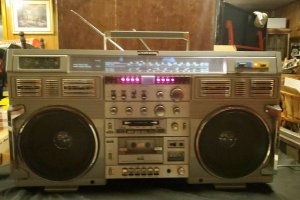
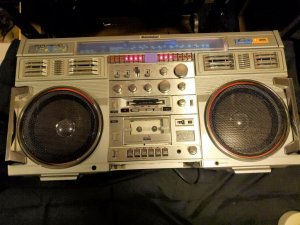
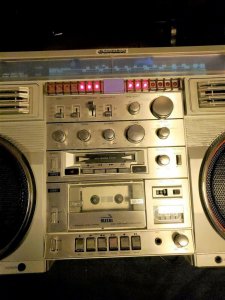
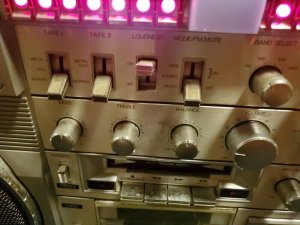
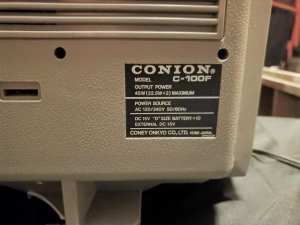
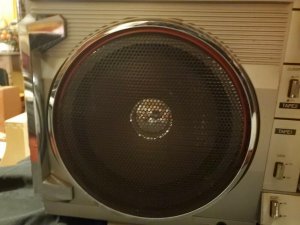
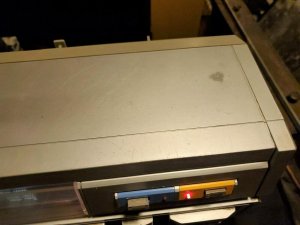
"Desperate Dad's" Conion C-100F Restoration

Status
Not open for further replies.

Bloodhound

Member (SA)
Well, I feel a bit out of my element among you all because I am.. I'll start with my story and give you all an idea of where I'm coming from. My young teenage son has asked me for a vintage boombox. He is a well behaved teen who is always there to help his dad and has never once complained about chores, given me any lip or not done what I've asked. He rarely asks for anything and when he showed me pictures of the one he wants (The Conion C-100F) I decided to make his dream come true for Christmas! (Or attempt to anyway!) I waited a few weeks to see if it was just a passing fancy and it's wasn't. He's hooked so that brings us to the here and now!

I've spent the last few days reading the forum here, trolling ebay and giving myself a crash course thanks to the many years of experience and posts here. A $1500-$5000 dollar box "ready to go" is out of the question so we have to make due with a unit in need of some TLC. Long story short I pulled the trigger on one today. The spare tape holder drawer appears to be missing and she's in need of a set of antenna's. I'm told there may be issues with the tape door so a replacement may be needed as well.

I have been building and restoring a very rare and infamous "movie car" from 1983 so I am no stranger to cosmetic and mechanical restoration work. No background in electronics however is where our biggest challenge lies. Anything cosmetic I can do.. replacing caps, troubleshooting electrical problems and doing LED mod's is where we're gonna need some help.

I'd like to make this box appear as complete and solid as I can for unveiling on Christmas. From there I'd like to make the box a father son project we can work on together with your help.

What's funny is that I grew up in the 80's and was a break dancer in 1985. Weird how the memories came flooding back! LOL.. Once I figure out how to post pics I'll show you what we're starting with. Keeping fingers crossed we can put her back together with help from some members here. If so it'll be the greatest thing since TKO battled Electro Rock!

Thanks and God Bless
 

docs

Member (SA)
Great that you are doing this, it sounds like the elements which need looking at are not too much of a problem.
Get it in your hands and do your assessment from there. If you need a spare tape drawer, you can get replacements of these along with the front silver bezel that goes on the front from member caution http://boomboxery.com/forum/index.php/topic/29406-new-c100-f-tray-trims-available/

The rest I would hold off on assuming until you can assess it for yourself. Often all you need is a keen eye, ability to repair cosmetics and as long as there are no serious electronic issues, you'll have a working boombox.
 

T-STER

Member (SA)
What a great story, i love the sound of this, i hope it arrives and is better than expected!
 

Bloodhound

Member (SA)
Thanks for all the positive comments and suggestions. The journey has just begun and I must say I am thoroughly enjoying it. My son and I watched an ebay auction on a C100FF tonight. We watched it jump from $280 to over $500 in the last minute or so. Best part was watching his reaction when he saw the price. He said "I'll never get one Dad. They are so much money!" He went on to say that he wants to try some garage sales etc. I was bursting at the seams but didn't crack! LOL. He's gonna lose his mind on 12/25! :-D

This seems like a fantastic hobby! Unlike cars it's cheaper for sure and something we can do indoors when it's cold outside! Here in Buffalo it's like the Arctic already so this should be fun!

Thanks to some of your posts I've learned quite a bit already. You all helped me make the decision to focus on a C100F made in Japan for starters.

Your all very lucky to have such wonderful members. Caution's resto thread is mind boggling. My head hurt after I read through it! LOL.. When my son showed me some restoration videos on youtube I was impressed... till I saw his thread that is. :)

I'm going to follow Docs advise from above and do my assessment when it gets here. Is it a good idea to even bother testing the tape players? Seems like all these boxes need new belts at a minimum. Would I be doing more harm than good by trying them? Is there anything I should be looking or listening for when testing it? I'll be sure and share my findings and add pics. Fingers crossed I can get her whole again in appearance by Christmas. Still, I won't even clean it so my son feels compelled to jump right in. If I can get a pic of his reaction it'll be one for the record books I'm sure.

Thanks again everyone for your well wishes and help!
 

docs

Member (SA)
Ofcourse try everything out, you need to know what is wrong so you can begin and prioritise. Sometimes decks need a bit more work after replacing belts, especially moving parts clogged up with old grease.
Looking forward to seeing how you progress.
 

Hajidub

Member (SA)
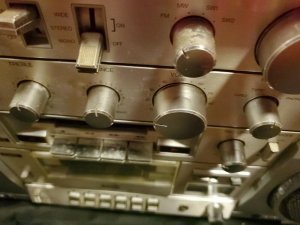
Belts first, take the knobs off and soak them in warm water w/dawn, clean the tape paths (while you're in there) with q-tip and alcohol (including rollers). Maybe a member can supply the antennae and advice beyond mine. Good luck, you're a great DAD!
 

floyd

Boomus Fidelis
If you take it apart label the plugs because it will be hard to put back together if you don't.
These have an impressive amp section for a one piece box.
The hardest part of the reassembly is lining up the inner frame with the front case so that the cassette door opens smoothly. Rock on man that is one Lucky guy , I was dumbstruck the first time I saw this box.
 

Bloodhound

Member (SA)
docs said:
Ofcourse try everything out, you need to know what is wrong so you can begin and prioritise. Sometimes decks need a bit more work after replacing belts, especially moving parts clogged up with old grease.
Looking forward to seeing how you progress.
Thanks for the recommendation! I'm looking forward to testing it.

Hajidub said:
Belts first, take the knobs off and soak them in warm water w/dawn, clean the tape paths (while you're in there) with q-tip and alcohol (including rollers). Maybe a member can supply the antennae and advice beyond mine. Good luck, you're a great DAD!
Thanks Hajidub! Will do.. I'm looking at some antenna's on ebay now... https://www.ebay.com/itm/ANT-17-Antenna-L-255mm-6mm-Lmax-880mm/392470293816?hash=item5b610d6d38:g:px4AAOSwg8hdnI3Y


JVC Floyd said:
If you take it apart label the plugs because it will be hard to put back together if you don't.
These have an impressive amp section for a one piece box.
The hardest part of the reassembly is lining up the inner frame with the front case so that the cassette door opens smoothly. Rock on man that is one Lucky guy , I was dumbstruck the first time I saw this box.
Thanks JVC Floyd. I'll be sure and take pictures as well. I'm no stranger to that having restored a classic car.

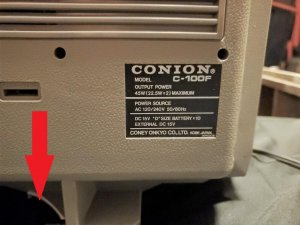
One thing I failed to notice prior to buying the box is a broken foot. :bang: Not sure how to address it. Makes me nervous there may be more damage the seller failed to mention. I guess I'll find out next Tuesday when it arrives.
6.jpg
 

floyd

Boomus Fidelis
Broken feet are common on these, I've seen people graft a piece of plastic and sand it smooth then touch up around the feet only so that you dont have to paint the back case.

These feet can snap off from normal use if the box is sat down on a hard uneven surface.
 

docs

Member (SA)
Yeh I did notice it but thought same as Floyd says, people have repaired them successfully but I'm no plastic moulding genius like some others on here so not sure their methods.
 

floyd

Boomus Fidelis
You almost need to use the plastic weld then bondo over the joint , then sand and paint.
 

Bloodhound

Member (SA)
I've done some plastic welding before so that will likely be the approach I take. I have a chart that advises as which rod to use depending on the type of plastic it's molded from. If there's a stamp somewhere that id's the type I should be good assuming I can find a donor piece of the same material to shape and attach.

I also noticed the white spots on the tuning lens. I'm going to assume someone used glass cleaner or some other chemical that caused it. Hopefully I can sand and buff it out.

I'm tempted to approach this resto like I did my classic car. I'm not afraid of taking lots of pics and labeling the connections etc in the course of disassembly. What concerns me is making a rookie mistake from which there's no return. I have no experience in electronics so I'm at a crossroads as to how ambitious we should be. Squirting some deoxit in each switch and working them is one thing. Removing and disassembing for a thorough cleaning is another. I'm already considering a repaint. Should have no problem color matching it using a friends spectrophotometer. So much to do and so little time! LOL.... I do have a few more questions though...

What do you recommend using to blacken the speakers? A sharpie? Some black printer ink perhaps or is there a tried and tested method?

I have watched Teddy Hashee's youtube vids and one thing has me perplexed. He appears to use his cell phone to adjust the tape deck motor speed. Anyone know of an app that does this? Is it done by frequency or sound? Totally green on that one. LOL

lastly, can anyone recommend a grease or oil for the tape deck gear shafts? I haven't the slightest idea where to get new belts either. I'm not afraid to spend the extra $$ to get high quality replacements.

Thanks for all your help and direction guys. It's most appreciated. :)

Oh.. one more thing. Is Conion pronounced like Con and onion or Con and "ion"... Yeah.. I'm that new at this. :)
 

caution

Member (SA)
Synthetic grease is popular, if you can find SuperLube at the store that's a good one. Sharpies are fine, looks very dark, doesn't add any weight to the cone and dries fast. Light strokes will help reduce pulling up fibers from areas still drying.

Here's where I got my belts:
SBS8.9 for the lower deck's counter belt
SBS8.9 for the lower deck's secondary belt
FBM9.6 for the lower deck's flywheel belt
SBS10.0 for the upper deck's belt

The full name is Coney Onkyo, but combined the Japanese say koh-nee-yohn, so saying "canyon" with a short o is close enough :-D
The word onkyo (音響) means "acoustic"
 

Superduper

Moderator
Staff member
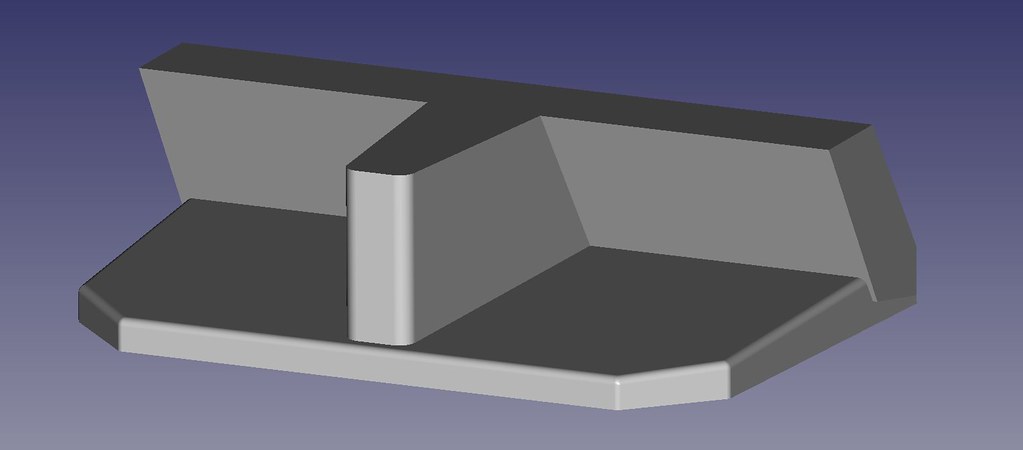
Hey Eric, can you draw up new feet that can be affixed with screws in after the old broken ones are completely cut/ground off?
 

caution

Member (SA)
That would be tough, they're sort of merged into the chassis. I could print that missing chunk...

49047133853_aeb0aa1a00_b.jpg
 

docs

Member (SA)
Might be most useful to take from one of your printed pieces to cut and mold into whatever is on the box. Nice one.
 
Status
Not open for further replies.