This was originally posted by member Prime over at S2G on September 28, 2008. Since a lot of great, older posts seem to disappear over there, I thought I would post it here too.
--------------------------------------------------
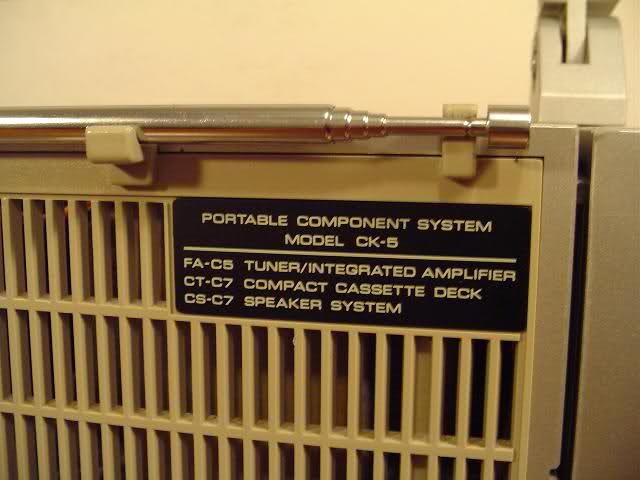
A year or two ago I was searching Ebay for boomboxes and came across a box that caught my eye. It was another component box that had large bass vents on the back of the speakers. The speakers themselves were a little unusual because they were flat and square. It was the Pioneer CK-5. I ended up winning it for a song. It was a nice warm day when it arrived so I unpacked it and carried it to the picnic table in the backyard. I ran a cord over, plugged it in and tuned to some hip hop station. I cranked it up a bit and was stunned by the bass output! It was literally vibrating the whole picnic table. This box was delivering bass on a Telefunken Studio 1 level yet it was just half the size of a JVC PC55.


After about one minute of loud volume the bass was lost and the speakers began rattling violently! The surrounds had failed. The surrounds were initially intact but after my short but loud test drive they crumbled and that was the end... for now. Getting replacement surrounds for these speakers is not possible. So after a lot of thought and some trials and errors, I made my own square surrounds. The process is quite time consuming and tedious but the end result is well worth it. Here's a brief step by step illustration of the refoam process.

Notice the rotted surround around the white rectangular diaphragm.

More cracks can be seen from the backside.

Here's another shot.

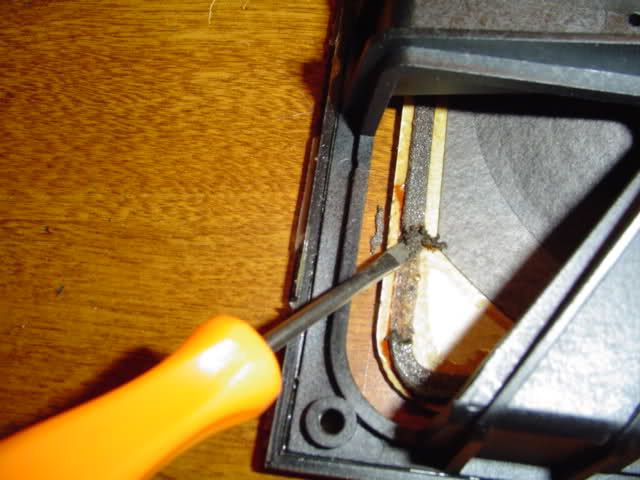
The foam turns into some sticky gunk that sticks to everything. It all has to be scraped off.
Once the outer edge is clean the inner edge is next.

After scraping all the residue off, it looks like this.

Pieces of the old decayed surround.
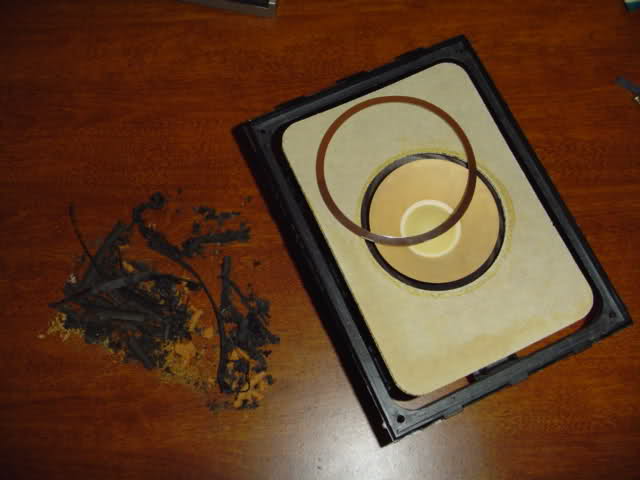
The cone tweeter surround is also removed but the chrome ring is saved.
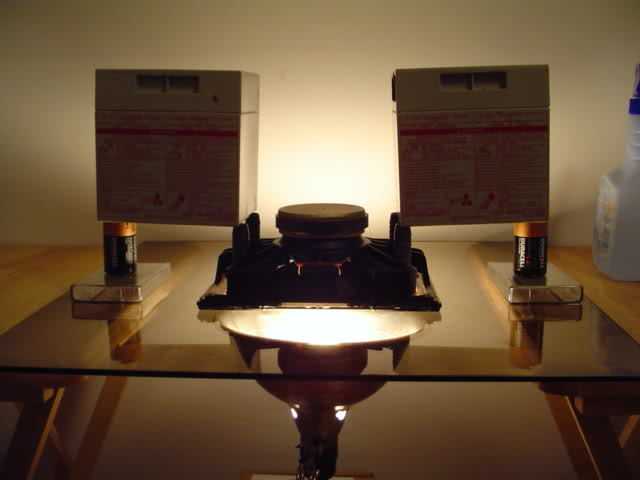
The diaphragm often becomes convex (curved inward) after the surrounds break down. This has to be fixed since it needs to be flat when we align the voicecoil. I used to get the thing damp, then press it as shown and waitfor it to dry. The lamp speeds the process. I don't do it this way anymore because it sucks. The picture below shows the latest way with carbon fiber strips.

The carbon fiber strips are placed like a floor joist to prevent the diaphragm from curling. They work great!

The outer perimeter of the diaphragm is so long that EACH speaker takes TWO surrounds normally meant for a 6.5 inch speaker. These surrounds also work for the Panasonic RX-C100 which was what I initially bought them for.

You have to do some trimming here and there.

Then make a clean cut here. Do this to 4 surrounds for a pair of these speakers.

The outer edge of the surround is glued first at one centimeter intervals. You have to use gel superglue. You must tug and pull as necessary to get itto lay right. This is a very difficult thing to do without ripping the surround.

Here the outer edge is almost complete.

The diaphragm is flat on the table while the inner surround edge is glued (Elmer's glue). This step is critical so that the voice coil is aligned correctly.

Here's one with the outer surround completed.
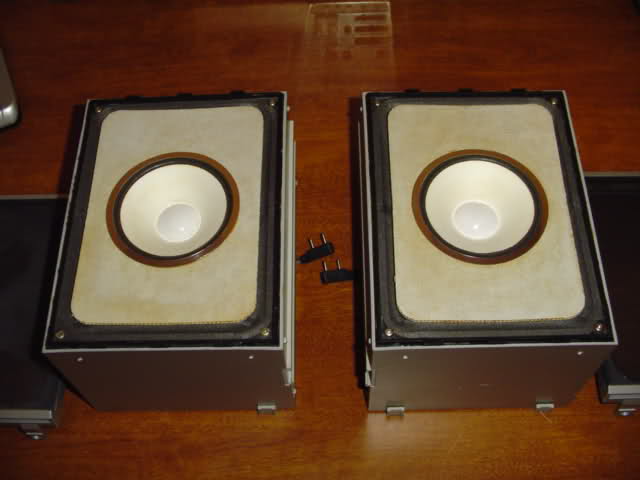
Here's a completed set with new tweeter surrounds and chrome rings back in place.
Regarding the Tweeter
It is a whizzer tweeter driven by the woofer voice coil.
The outer edge of the tweeter is isolated from the main backplane via a 4 inch (10 cm) surround. The tweeter moves in cadence with the main diaphragm for low frequencies.
At the other end of the spectrum, the tweeter projects the highs directly from the woofer voice coil without getting dampened by the mass of the main diaphragm.

The whizzer tweeter uses a 4 inch (10 cm) surround.

The chrome ring is glued on top of the new surround just as it was originally.
Brett
--------------------------------------------------
A year or two ago I was searching Ebay for boomboxes and came across a box that caught my eye. It was another component box that had large bass vents on the back of the speakers. The speakers themselves were a little unusual because they were flat and square. It was the Pioneer CK-5. I ended up winning it for a song. It was a nice warm day when it arrived so I unpacked it and carried it to the picnic table in the backyard. I ran a cord over, plugged it in and tuned to some hip hop station. I cranked it up a bit and was stunned by the bass output! It was literally vibrating the whole picnic table. This box was delivering bass on a Telefunken Studio 1 level yet it was just half the size of a JVC PC55.
After about one minute of loud volume the bass was lost and the speakers began rattling violently! The surrounds had failed. The surrounds were initially intact but after my short but loud test drive they crumbled and that was the end... for now. Getting replacement surrounds for these speakers is not possible. So after a lot of thought and some trials and errors, I made my own square surrounds. The process is quite time consuming and tedious but the end result is well worth it. Here's a brief step by step illustration of the refoam process.
Notice the rotted surround around the white rectangular diaphragm.
More cracks can be seen from the backside.
Here's another shot.
The foam turns into some sticky gunk that sticks to everything. It all has to be scraped off.
Once the outer edge is clean the inner edge is next.
After scraping all the residue off, it looks like this.
Pieces of the old decayed surround.
The cone tweeter surround is also removed but the chrome ring is saved.
The diaphragm often becomes convex (curved inward) after the surrounds break down. This has to be fixed since it needs to be flat when we align the voicecoil. I used to get the thing damp, then press it as shown and waitfor it to dry. The lamp speeds the process. I don't do it this way anymore because it sucks. The picture below shows the latest way with carbon fiber strips.
The carbon fiber strips are placed like a floor joist to prevent the diaphragm from curling. They work great!
The outer perimeter of the diaphragm is so long that EACH speaker takes TWO surrounds normally meant for a 6.5 inch speaker. These surrounds also work for the Panasonic RX-C100 which was what I initially bought them for.
You have to do some trimming here and there.
Then make a clean cut here. Do this to 4 surrounds for a pair of these speakers.
The outer edge of the surround is glued first at one centimeter intervals. You have to use gel superglue. You must tug and pull as necessary to get itto lay right. This is a very difficult thing to do without ripping the surround.
Here the outer edge is almost complete.
The diaphragm is flat on the table while the inner surround edge is glued (Elmer's glue). This step is critical so that the voice coil is aligned correctly.
Here's one with the outer surround completed.
Here's a completed set with new tweeter surrounds and chrome rings back in place.
Regarding the Tweeter
It is a whizzer tweeter driven by the woofer voice coil.
The outer edge of the tweeter is isolated from the main backplane via a 4 inch (10 cm) surround. The tweeter moves in cadence with the main diaphragm for low frequencies.
At the other end of the spectrum, the tweeter projects the highs directly from the woofer voice coil without getting dampened by the mass of the main diaphragm.
The whizzer tweeter uses a 4 inch (10 cm) surround.
The chrome ring is glued on top of the new surround just as it was originally.
Brett

 Prime did a fantastic job of repairing these for me. Mine were the first he did the carbon fiber strips on because the corners had started to curl and he wanted them to remain straight. I cannot thank Brett enough.


")