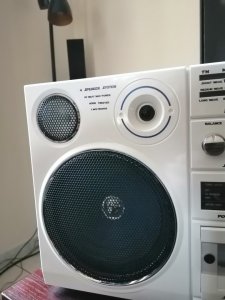
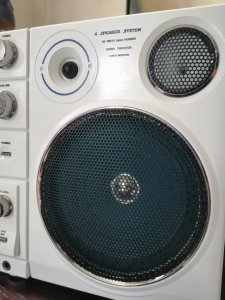
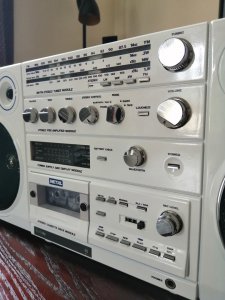
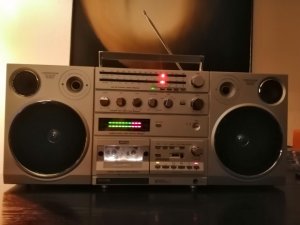
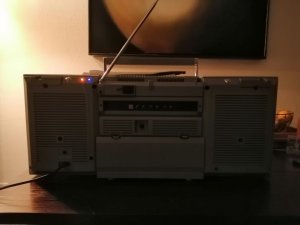
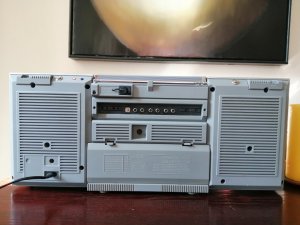
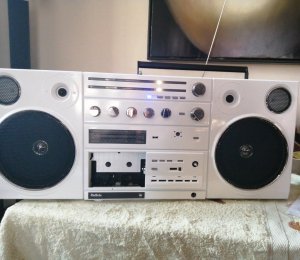
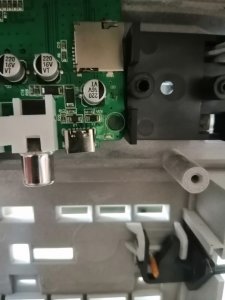
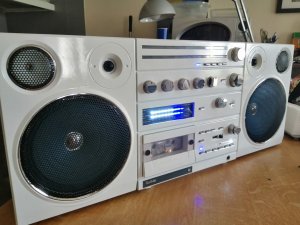
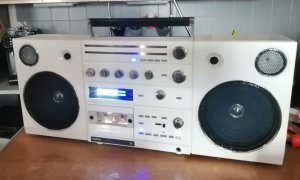
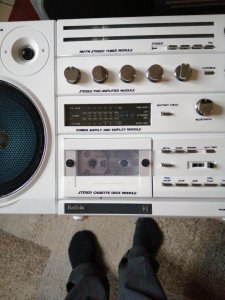
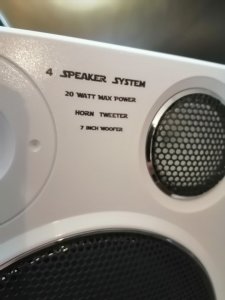
Philips D8614 - bluetoothed (internal)

Status
Not open for further replies.

H3NK3L

Member (SA)
Good work. Look very cool... Waiting for next steps in this upgrade.:yes:

Thank you very much. Leaving it at this for these 2 though. Found a way to light up the tape deck, but have to take almost everything out to get to it, so I 'll rather try that on the next one, when I have to take everything out anyway. They have some real fragile wiring and soldering at some points and I have no idea what the heck those engineers who created these were smoking (but I want the same thing !)

IMG_20230202_104358.jpgIMG-20230127-WA0022.jpeg
 

H3NK3L

Member (SA)
Good work. Look very cool... Waiting for next steps in this upgrade.:yes:
Next one (I have a few more of these) will get tape deck lit ! (found a way to do it, but have to take everything out for ease of access, so I ll do it when they ll be "empty" - most things are soldered and not easely detachable - I thnik I ll concider these finished)
 

H3NK3L

Member (SA)
Onto Philips d8614 upgraded... V3...

Time has come to crack the tough nut... To illuminate the tapedeck or not... Well..

After some mind-blowing experiences (for lack of saying... Extremely annoying an nerve rexking experiments...

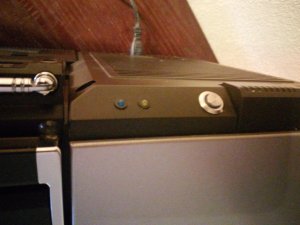
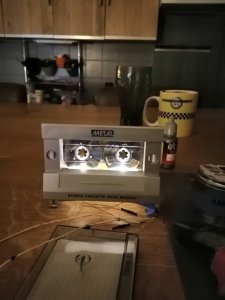
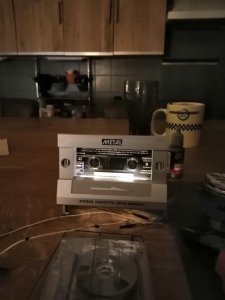
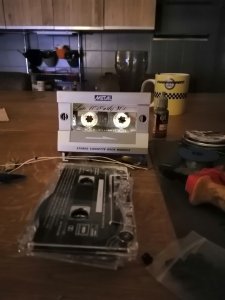
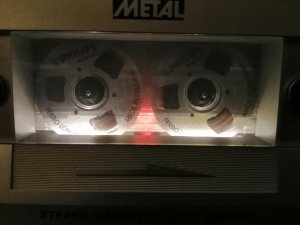
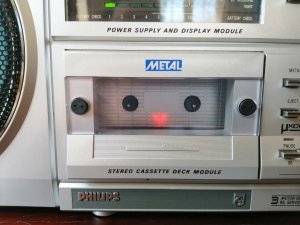
We have light!

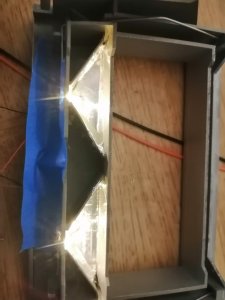
In order to get indirect light, I put self-adhesive aluminium in the triangle shaped thingies so they work as a kifhtbox, 12 v mixroleds (warm white), drilled a 1.5 mm hole tu pull them into the triangle shaped "boxes".

Next step.. Use the middle knotch on the bottom of the tape door to put in the status led for Bluetooth (à big red one that ll flash when. Bluetooth is on and either in pairing mode or not connected)
 

Attachments

  • IMG_20230206_190652.jpg
    IMG_20230206_190652.jpg
    83 KB · Views: 15
  • IMG_20230206_190624.jpg
    IMG_20230206_190624.jpg
    76.5 KB · Views: 15
  • IMG_20230206_190602.jpg
    IMG_20230206_190602.jpg
    85.8 KB · Views: 13
  • IMG_20230206_152733.jpg
    IMG_20230206_152733.jpg
    79.1 KB · Views: 16

H3NK3L

Member (SA)
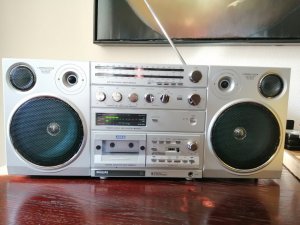
V3, the finished "oeuvre" ....

IMG_20230209_182933_edit_640724838169419.jpg

IMG_20230209_183013_edit_640767588323059.jpg

IMG_20230209_183228_edit_640872191045438.jpg

V3 has

- tape light on/off button
- multifonction bluetooth button
- one blue bluetooth status indicator led on the back + one red one for no connection/pairing mode (and only those) IN the tapedeck
- one bluetooth battery-charging indicator on the back
(bluetooth integrated)
- 2 microleds in the tuner (turn on when in tuner mode)
- fully working tape-deck

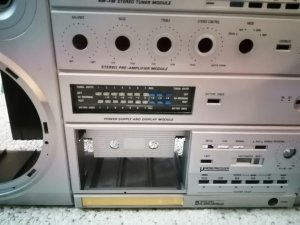
As for the milky window issue....i took out the hazed and uggly original , contaminated window and replaced it with a piece I cut out from a "celebrations" box (transparent perfectly clear acrylique), fixed it with doublesided silicon tape on the inside, sealed it with plastic putty (for modelling) and voila : a brand new and very clear window :)


at this rate...V4 will most likely have a coffeemaker :)

If anyone has any ideas as to how to further upgrade this species..... (I have a few more of these laying around)

PS : I tied cheating on the record bar pins to make the VU-meters permanent on the push of a button....but....it cant be cheated it goes into rec mode and makes all kind of weird noises on the tape deck (which is fysically not in the correct position and tries to correct that) :(
 
Last edited:

H3NK3L

Member (SA)
V4... Work in progres...
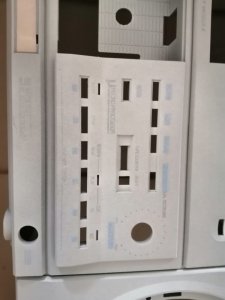
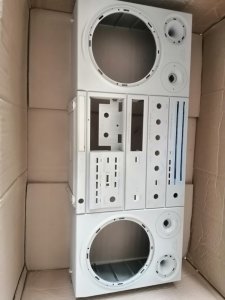
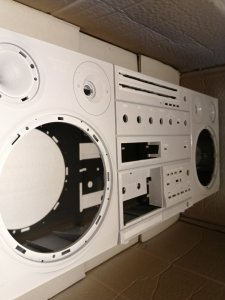
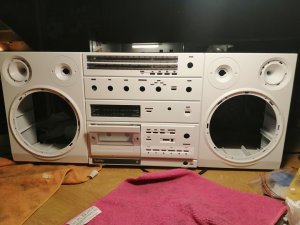
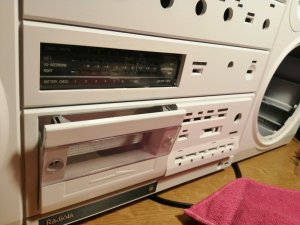
This is one that has its paint all stained and prints ruined... Therefore.... For V4 : an all white one, with only white and blue leds (will of course have the V3 Bluetooth, the V3 decklights etcetera)

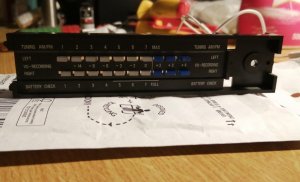
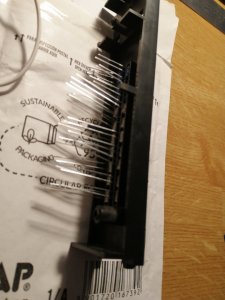
Step 1 : let's see if 5 by 2 mm leds (the only ones I could get my hand on) fit on the vu meter... And look and behold, they do...

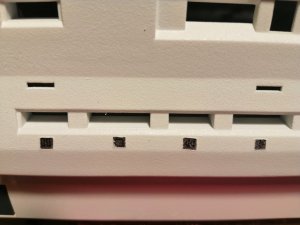
Step 2 : masking tape on all indications / prints we want to keep (we don't really need them all but we do need to know which button does what and we need the indications on the tuner)

Step 3 : paint job...... White gloss

Next steps : new Bluetooth idea (a multifunction treble/bass knob on the front panel (with the Bluetooth module that just fits in), white leds on the tuner needle, replace green FM stereo with a blue one, replace pauze, play and rec leds with white white and blue. One I used once on an ICS.
And of course get the 3 classical broken tapedeck wheels replaced with new ones, belt job and get the tapedeck back alive.

I used some Jenolite directoplast paint.. Not very fond of it to. Be honest if anyone has a good paint with good experience available in Europe, france... Please let me know! I sandpapered and used primer but this paint is like spraying milk (and not even the full fat!) on it.
 

Attachments

  • IMG_20230222_165237_edit_932586436319155.jpg
    IMG_20230222_165237_edit_932586436319155.jpg
    105.9 KB · Views: 9
  • IMG_20230222_133741.jpg
    IMG_20230222_133741.jpg
    73.2 KB · Views: 10
  • IMG_20230222_133732.jpg
    IMG_20230222_133732.jpg
    88.4 KB · Views: 10
  • IMG-20230222-WA0035.jpeg
    IMG-20230222-WA0035.jpeg
    94.2 KB · Views: 12
  • IMG-20230222-WA0032_edit_932990891060760.jpg
    IMG-20230222-WA0032_edit_932990891060760.jpg
    88.6 KB · Views: 10
  • IMG-20230222-WA0028.jpeg
    IMG-20230222-WA0028.jpeg
    111.5 KB · Views: 14

H3NK3L

Member (SA)
paintjob nealy finished...
IMG_20230225_192650_edit_75884546913940.jpg
IMG_20230225_192655_edit_75896342166543.jpg
IMG_20230225_192709_edit_75912458326436.jpg
IMG-20230225-WA0042.jpeg

(might do the same thing by masking fewer markings...depending on how I manage to clean the (maskes for painting) ones I left...

next :
1. cleaning up the markings I left
2. put white microleds on the tuner "needle"
3. insert the bluetooth module (wil operate with a halo like light behind/under a balance-buttons (that can be pushed and turned left/right)
4. put in some microleds to light the tapedeck
reassemble the whole thing...cross fingers...
 
Last edited:

H3NK3L

Member (SA)
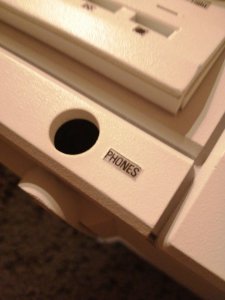
After careful consideration...and an attempt to clean the markings....decided not to keep any markings (previous one was just a test-object) - its easier to add markings then to clean them...

Phase 2 :
- paintjob finished (white gloss , antidust)
- speakers/ microphones back in place
- amplifier back in place
- new perspex window for the vu meters
- holes drilled for the bluetooth module (Which will get a button like the balance/treble/.. button )
- bluetooth module is a real tight fit (just fits, about 1mm playroom on one side only)
- tuner got (white) leds, and the green stereo led got replaced by a blue one (grinded to fit)

(and while waiting for paint to dry the tape deck got its new wheels and belts)


IMG-20230301-WA0016_edit_187519542013052.jpg
IMG_20230301_125426.jpg
 

H3NK3L

Member (SA)
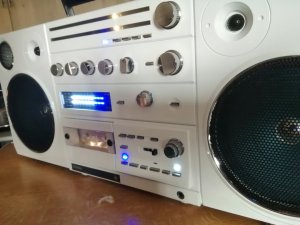
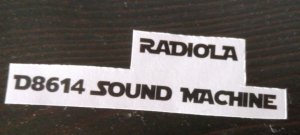
The finished oeuvre.... well, nearly finished...waiting for printable transparent vinyle stickers to put on the markings (in jedi/starwars font cause the black and white make it a bit stormtrooperish looking and an 80s font kindof matches...) - as per usual, in real life leds are way less violent

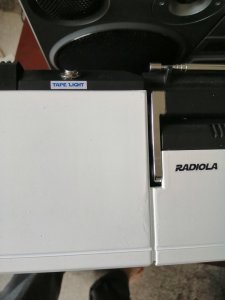
Tape light has an on/off button on the upper back of the left speaker
tuner lighs switch on when on tuner
stereo light is now blue
play/pauze are blue - rec is white

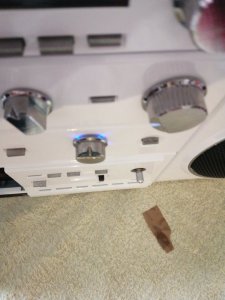
Bluetooth button has light behind it , the idea was to have it reflect , halo like....managed to get the 4 little holes spot on in front of the 4 microleds on the bluetooth module, but the effect isnt quite as hoped for, with a 3mm distance to the front cabinet, the frontcabinet + 2mm to the button the bluetooth microleds are a bit too wide , and weak :(


IMG_20230303_122619_edit_274451862829995.jpg

IMG_20230303_165040_edit_274511173820090.jpg

IMG_20230303_165116_edit_274526726362796.jpg

IMG_20230303_122716_edit_274472661434159.jpg

Bluetooth button (press = pair - short turn right/left : next/previoux - hold left/right " bluetooth volume up/down) - used an orrignal (but shortened) "balance - treble - stereo " button for more coherence
IMG-20230302-WA0002.jpeg

7d5d259b3c35f82fc4507b8f725685aa43a1f2d6.jpg
 

H3NK3L

Member (SA)
After hesitation and testing of stickers... And decals... Finally went for printable decals... Slowly but steadily putting on the basic markings... Color is dark dark blue (doesn't show in pictures), imitating the blue hue of the speakers.

The tuner markings are turning out to be a real b@tch... Took the calibration of another d8614... Turns out there are different tuners in same models... Got out 2 other 8614s...and found 3 different calibrations... Going from a 17cm sway of the needle to 19cm and 15.8cm... From 87.5 to 108 FM... Apparently not all tuners, though they look the same, are the same, so the markings are going to have to done one by one...
 

Attachments

  • IMG-20230311-WA0011_edit_459508949812695.jpg
    IMG-20230311-WA0011_edit_459508949812695.jpg
    78.8 KB · Views: 5
  • IMG-20230311-WA0007.jpeg
    IMG-20230311-WA0007.jpeg
    145.3 KB · Views: 5
  • IMG_20230311_114640.jpg
    IMG_20230311_114640.jpg
    71 KB · Views: 5
  • IMG_20230311_114533.jpg
    IMG_20230311_114533.jpg
    60.8 KB · Views: 4

H3NK3L

Member (SA)
The finished "oeuvre"
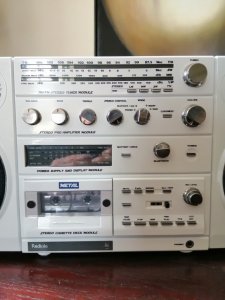
- added bluetooth button (turn left/right for next/previous - hold left/right for bluetooth volume / press for play/pauze - hold for on/off)
- found printable waterslide decal paper (laserprinter) to redo all markings (left out the "min max left right etc, as that made it too busy )
- redone the markings 80s style font - doesnt show on pictures but its actually dark dark blue (imitating the speakers)
- added tape light (and a sticker to indicate it lol)
- serviced tape deck, new belts, replaced the dead brittle little wheels
- replaced a few capacitators (Dried out)
- grinded and fit new leds for REC,PLAY,PAUZE and STEREO indicator
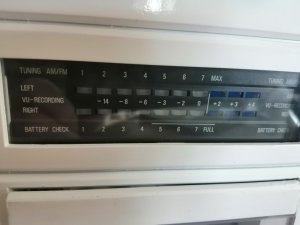
- replaced the vu meter leds with white and blue as well , and bridged a lot of the circuitery...that had come loose)
- cut a new window for the vu-meters out of perspex (the originals had the white milky lines in them, becoming very annoying and visible with the white leds)

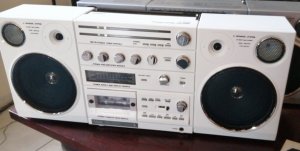
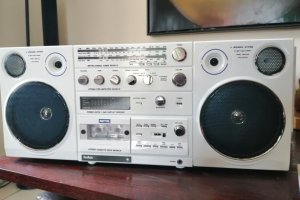
Project made out of 2 unusable in very bad shape radiolas (aka philips) that would have gotten thrown out, but together made for a functionning one by mixing their working componants

Resulting in a glossy WHITE (cause i had white paint laying around) D8614 fully working, 100 pct fonctionnal bluetoothed - with imperfections
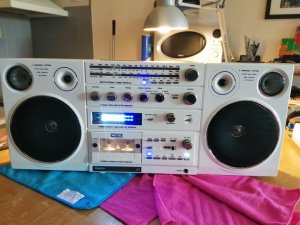
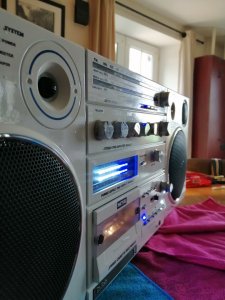
IMG_20230312_141357.jpg
IMG_20230312_141410.jpgIMG_20230312_145343_edit_484576369384391.jpgIMG_20230312_145611.jpgIMG_20230312_145637.jpgIMG_20230312_145652.jpgIMG_20230312_145716.jpgIMG_20230312_145724.jpg
 
Status
Not open for further replies.