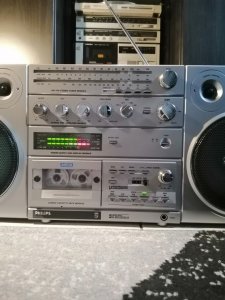
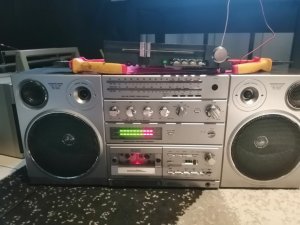
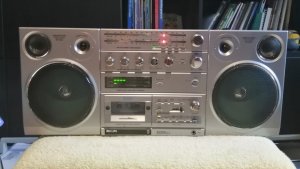
Philips D8614 - bluetoothed (internal)

Status
Not open for further replies.

H3NK3L

Member (SA)
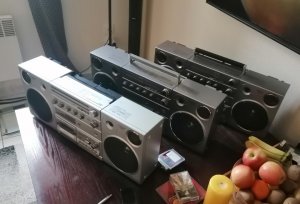
Bit of a love-hate relationship with these boomboxes to be honnest (and oft it seems like its mutual lol).
Had a few of these and its a bit of a hit or miss, great sound but hell those engineers made some odd decisions...

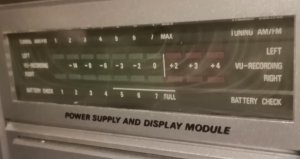
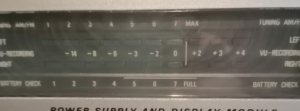
Anyways after changing vu meters, bluetoothing, lighting a jumbo..had some butons and leds and bluetooths modules laying around so I thought I d use them on this Philips...

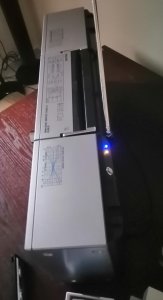
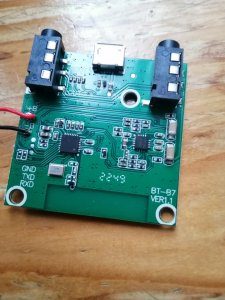
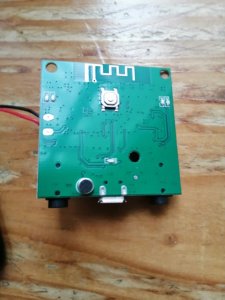
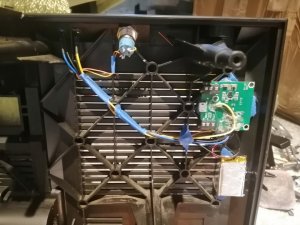
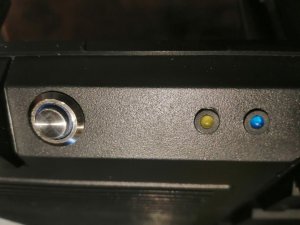
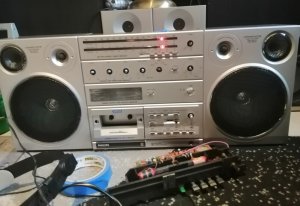
Found a place to put a basic 10 euro bluetooth (5.0 and quite decent, thank you Bezos) pcb, soldered some 3mm leds and wires instead of the integrated micro-leds on the circuit board, and found some room on the backplate of the philips to put a control button, the bluetooth status led and the bluetooth battery "charging) led, hardwired a basic pcb from a usb charger to the 220 inlet (fire hazard but did it cleanly), soldered an rca cable to the pcb of the boombox (aux), allowing both rca and usb to be unplugged to remove the cover - or if the case should have it...replace the bluetooth module. Backplace not being flat and having to put some insulation between battery and backplace I decided to use insulation to have a flat surface to put the module... and voila....integrated bluetooth
 

Attachments

  • IMG_20230128_152516.jpg
    IMG_20230128_152516.jpg
    147.3 KB · Views: 22
  • IMG_20230127_140013.jpg
    IMG_20230127_140013.jpg
    56.9 KB · Views: 20
  • IMG_20230125_113511.jpg
    IMG_20230125_113511.jpg
    144.9 KB · Views: 20
  • IMG_20230125_113519.jpg
    IMG_20230125_113519.jpg
    98.8 KB · Views: 22
  • IMG_20230127_121725.jpg
    IMG_20230127_121725.jpg
    135.9 KB · Views: 22
  • IMG_20230127_121751.jpg
    IMG_20230127_121751.jpg
    128.7 KB · Views: 20
  • Like
Reactions: Brutus442

H3NK3L

Member (SA)
This is my "trial and error" philips boombox (when I got it it was a real mess... half the tape deck parts missing (tape head, almost no wiring,, frame missing,..) .
I use it to try things on before doing those things to one in good condition.

First bluetooth attempt on this one:
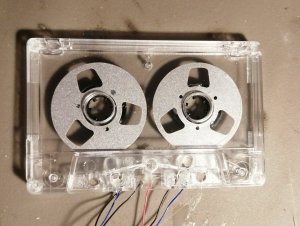
- make a fake tape (transparent tape casing, 2 fake reels)
- put the indicator led for bluetooth in that tape
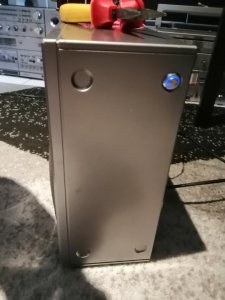
- as I figured out the buttons I had were exactly the size of the round "indents" on the side i put the button in it
- used the pins on the button to backlit it
Result :
- the tape was flashing red and blue when in pairing mode
- and blinking blue when paired, but that was kindof odd to see so I removed the blue, now it only blinks when in pairing mode
- button is permanently lit

IMG_20230130_095005.jpgIMG_20230123_120125.jpgIMG_20230123_120445_edit_253762277113361.jpgIMG_20230130_094934_edit_424963462489842.jpg
 
Last edited:
  • Like
Reactions: Brutus442

H3NK3L

Member (SA)
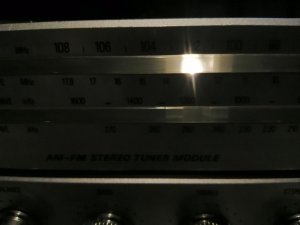
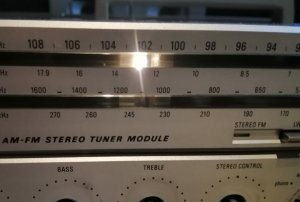
Has anyone succeded or knows howto remove the perspex windown (tuner and vu-meters) on these ?

They have a tendancy to become milky and stripy (inside, it s not on the outside/surface, it s really INSIDE them.

I have a few of them, with their windows in different states of milkyness, but between the lot of them I d like to at least have 3 with clear windows.
Didnt realise they came in different shades of grey : from an antracite dark grey to a more met
real clear light grey metal (very close to JVC / SILVER)

Next project : attempting to put 2 (micro smd) leds on the tuner-"needle". And getting the tape deck lit.

IMG_20230128_115302_edit_383500377093564.jpgalish grey to a
 

Brutus442

Member (SA)
Great mod!. I love the fact that the button and LED's are concealed in a manner that doesn't disrupt the original design. Nicely done
 

BoomboxLover48

Boomus Fidelis
Has anyone succeded or knows howto remove the perspex windown (tuner and vu-meters) on these ?

They have a tendancy to become milky and stripy (inside, it s not on the outside/surface, it s really INSIDE them.

I have a few of them, with their windows in different states of milkyness, but between the lot of them I d like to at least have 3 with clear windows.
Didnt realise they came in different shades of grey : from an antracite dark grey to a more met
real clear light grey metal (very close to JVC / SILVER)

Next project : attempting to put 2 (micro smd) leds on the tuner-"needle". And getting the tape deck lit.

View attachment 56461alish grey to a


Has anyone succeded or knows howto remove the perspex windown (tuner and vu-meters) on these ? Please explain clearly what do you want to do here?
Is it the clear plastic haziness, clarity, or opacity that was caused over time that you want to remove?
 

H3NK3L

Member (SA)
Sorry if I didnt explain well .
- It s the clear plastic (window like things through which you can see the tuner needle and VU-leds). Acrylic I think, surface cleans real well with semichrone and novus 3 2 and 1
- they are glued in place and quite fragile
- The problem is underneath the surface, it is within these "windows", there are these lines (a bit like oil would make lines when spilled on water) that are whitish (milklike).

So its not a surface or varnish or coating problem.
I tried the usual on the surface (from pledge to varnish and basic cleaning (novus and others that always did the trick) Surface is almost like a mirror on both sides lol
It s really INSIDE and its almost impossible to catch on photo, it s very angle-dependant and on photos its almost invisible. It looks like you can see how the acrylic got pressed into its mold, concentric lines.
Basically I tried a heatgun, letting it soak, tried alcohol underneath them,...but nothing worked to get them out to replace them with fairly decent ones (i have several 8614s who have those windows in different stages of decay, so the idea was to switch them out)

So I actually had 2 questions :
1. any tricks on how to remove these glued acrylic windows ?
2. any tricks on how to get them CLEAR and fully transparant again ?


(I ll see if I can get a hold on a decent device that takes decent photos)
 

H3NK3L

Member (SA)
Great mod!. I love the fact that the button and LED's are concealed in a manner that doesn't disrupt the original design. Nicely done
Thank you :) Was what I was aiming for, keeping it simple and respecting the original design (as much as possible). I m playing around with mini-smd leds to try and put them on the tuner-dial (Which is basically a huge square silver colored thing, but is very hazy with the milky "window" in front. trying to put one on each line of the tuner dial so have a more clearly visible idea of the location of the needle.
IMG_20230130_173115_edit_438192282036261.jpg

The picture shows a white one (havent gotten any reds laying around), its less violent in reality than my (not so decent) phone camera seems to think it is.

Also gives an idea of the "milky window" issue (frist picture) vs another one I have with a almost perfectly clear window - 0.3mm smd led

IMG_20230130_172717_edit_438265858171145.jpg
 
  • Like
Reactions: Brutus442

H3NK3L

Member (SA)
Has anyone succeded or knows howto remove the perspex windown (tuner and vu-meters) on these ? Please explain clearly what do you want to do here?
Is it the clear plastic haziness, clarity, or opacity that was caused over time that you want to remove?

Here are 2 pictures of 2 different ones ...its the best I can do (camera doesnt really seem to know what to focus on), hope this explains things better than my words.

IMG_20230131_094104_edit_439583022960528.jpg


IMG_20230131_093740_edit_439464420246483.jpg


Any tips or tricks to remove these milky, hazy things more then welcome ! (PS : surface is clean and shiny on both sides, there is no varnish or coating on them)
 

BoomboxLover48

Boomus Fidelis
The lettering is printed at the back right? Were you able to feel the letters when you run the finger over it? have you tried to gently clean the back side over the letters with a micro fiber cloth and soap water? Is it some sort of film stuck to it with lettering on them?
 

H3NK3L

Member (SA)
The lettering is printed at the back right? Were you able to feel the letters when you run the finger over it? have you tried to gently clean the back side over the letters with a micro fiber cloth and soap water? Is it some sort of film stuck to it with lettering on them?

Just to make sure we re talking about the same things :

The black lettering is printed (to the touch one can feel it)

The white lettering (vu - meter things), is about 7mm BEHIND the window.(it's a black rough surfaced plastic with the letters on them, when taken out it's black black no degradation, and the white letters are immacukously white. I think some sort of decal (the kind that would come off with alcohol)

I have no problems with the lettering, but with the acrylic (I think) windows that have a haze and milky lines IN them. There is no problem whatsoever with the surface of those windows , nither on the outside nor the inside (I polished and cleaned both sides, they shine like a mirror).

My issue, and it appears to be a common one on this particular boombox is the aging of the transparent tuner and vu meter window. They become milky and have these kind of lines in them (the big flat "u" shaped stripes on the photos of the vu-meter, they ré horizontal on the tuner tuner-window).

It's almost impossible to take them out.. They crack and break (almost like they melted them on).

Is there any trick or something one can soak them in to get them clear and transparent again?
 

BoomboxLover48

Boomus Fidelis
Molded plastic parts cause haziness it seems somehow might got contaminated during the process. This is true when going from polypropylene or polyethylene to a polystyrene, polycarbonate or other translucent or transparent type resins. The residue left behind will almost always appear as milky streaks but can also show up as cloudiness or haze.

This haziness is not caused by surface oxidation but contaminants in the resin type.
I will not soak it an any type of solvent and would leave it alone. This might have to to do with the type of plastic that was used at that time.
 
Last edited:

H3NK3L

Member (SA)
Thanks for the clarification !
Nothing to do but to leave it alone then (and keep the surfices nice and shiny).

Additional information : from the 9 I ve had in my hands so far, ALL had this issue , in a lesses or heavier form. I checked the timestamps (they put them on the plastic molding, the clock-like things) and they all had different dates, and the issue occurs on the "made in Austria" as well as the "Made in West Germany" ones. So chances are these windows were all molded in the same place with the same contamination :(

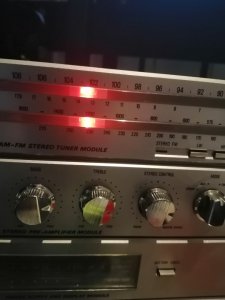
On the bright side (and bright is the right word) : I now have RED smd leds (0,3mm) for modellisme purposes, nice very small, not too bright, 5 to 12V DC for the tuner dial. Way less bright then the white ones (so I ll save on resistors lol), just trying to figure out a way to fix them. Tried to put them in a tube (the plastic stras-stick-thingy from an earwax-remover with 2 cotons on the side. Exactly the right width to fit into the gap the "needle" has... so is doesnt make it any "thicker" , but not a good idea, it makes for an "80s type square led" look, but it spreads the light allover the place making it look like a Knights Industries Two Thousand thing without the Larson -scanner effect unless one turns that tuner dial back and forth real fast
(yeah you gotta be "old" to get that one I guess, or be a real 80s freak, or be one of those "lets google that" types ;))

I think I ll use the "warm white" ones to bring some light to the tape deck - put in a button on the right speaker back topside (like for the bluetooth button) to allow to toggle tape deck lighting on/off. And after that call it a day, sit back, test it all out, get tired of it, move on to a next project and let it catch dust till i rediscover it and put it up sale or something lol.
 

H3NK3L

Member (SA)
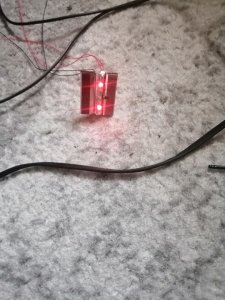
The red tape-led is a blinking one (in a fake tape), indicating bluetooth is in pairing mode / not connected
as per usual, modern leds (NOT the VU-meter) are way less harsh in real life than a camera shows.
Red leds do "bleed" ...due to the hazed and milky tuner-dial-window
I ll probably put in a heavier resistor to dim them some more (there in series not parallel for that reason already)
The (tiny) leds are now on the "rim" of the "needle", which basically seen from above looks a W (the rim being the middle of the 3 upper lines of the W - so next time I ll try putting it IN the W (on one side, on the bottom of the "W") so it looks less "large).
(this is still on the philips I use to experiment on :)

IMG_20230201_100035_edit_474782516908282.jpg

IMG_20230201_100104.jpg
IMG_20230201_100420.jpg

Next step : bringing light to the tape-deck (warm white) - with on/off button
 
  • Like
Reactions: Brutus442

H3NK3L

Member (SA)
As one learns from ones mistakes...IMG_20230201_134443.jpg
V2 of the led-lighting of the tuner

IMG_20230201_133817_edit_476711733878821.jpg

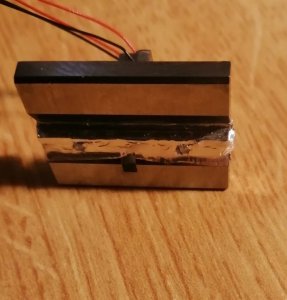
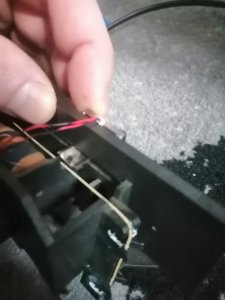
(neutral rubber adhesive to keep the microleds in place and fix the wires - followed by hot glue (very little margin in there) - made sure the leds slightly stick out. Covered by adhesive aluminum to hide any bleeding. Keeping the fake-brushed aluminum sides of the pointer clear

IMG_20230201_135627.jpg

The whole thing slides with ease - the only room to have these tiny winy cables pass is on the topside of the tuner...happy coincidence : it has a plastic ridge on front and behind the passage of the tuner-wire...which can conveniantly be covered so the new led-wire can slide over it without getting stuck or pulling somewhere. and it has about 3mm of room between the top of the tuner and the top cover to move around, bit of light greasing and should be good :)

IMG_20230201_153735_edit_478098385346838.jpg

Once it s all in place, boombox closed, tuner tuning, .... (in real life the red dots are smaller and of a pure red (80s led style)
 
Last edited:
  • Like
Reactions: Brutus442

H3NK3L

Member (SA)
Thank you :)

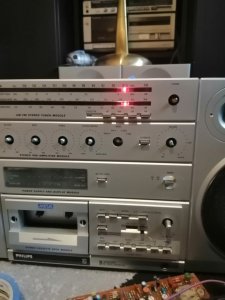
All done it gives 2 boomboxes (I m not gonne mess with them anymore)

The above one
1. Fully working boombox (radio/cassette/...) as intended by the original designers/engineers
2. Integrated bluetooth (with control button on the upper backside of the right speaker)
3. a bluetooth status led + bluetooth battery charging indicator next to the button (discrete)
4. 2 minileds as tuner-needle (they switch on when set to "RADIO" only)
= fully working + integrated bluetooth
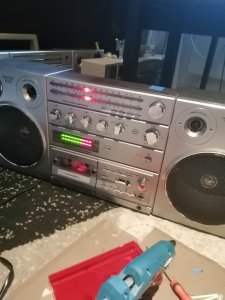
This one has a rechargeable battery for the bluetooth module, so it can be used as bluetooth speaker when battery powered. (the bluetooth LiON battery will probably outlive the batteries for the boombox when used on batteries)


And my test-object :
1. Only radio working
2. integrated bluetooth with backlit control button on the side of the boombox
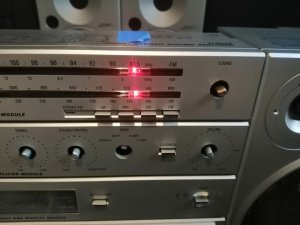
3. Fake tape in the tapedeck with a bluetooth status led in it
4. Radio with minileds as tuner needle (in radio mode)
5. blocked the thing in REC-mode so the VU-meters light up no matter what the audio source : bluetooth, radio, aux, phono,...
= one radio - bluetooth boombox with permanent vu-meters (and not just in REC or PLAY mode)

Both have a shady milky tunerwindow, hardly visibile tuner-dial behind in, at least now one sees where the needle is :)

Next up is a very light grey one I have ... thinking about giving it white tuner lights, changing the VU-meter leds to white/blue (or UV-blue), stereo led to blue, play/pauze led to white and rec led to blue , and givent the chance....getting tape deck to work again - and ofcourse bluetoothing it the same way but this time with a blue and a white indicator led on the back, and giving it (probably white) tape deck lighting. Or...do the same thing as with the above one : bring it back to live as is, respect the original design and put in discrete bluetooth button/leds.
 
  • Like
Reactions: Brutus442
Status
Not open for further replies.