Sharp GF-555 ON and OFF switch not working.

Status
Not open for further replies.
Hi
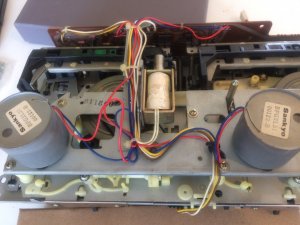
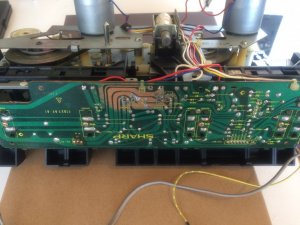
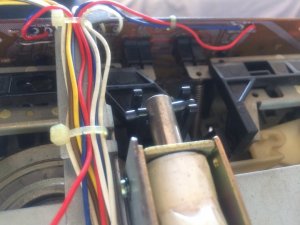
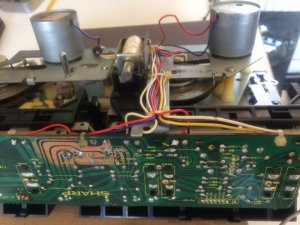
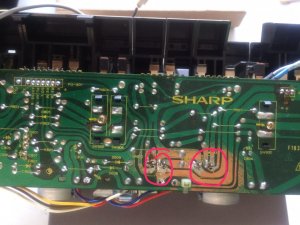
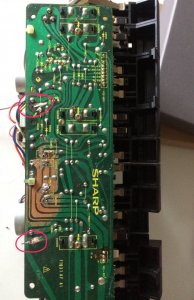
Please can you help me repair the ON and OFF switch for Sharp GF-555. It was working before I took the mechanism out to replace the parts on the flywheel. The red motor wires had come off which I solderd back next to the blue wire . I wonder if I have made a mistake in soldering . Please help thank you.
 

hopey

Member (SA)
Always good to take a photo before hand. If you can post a photo of what you have got someone can verify the pin-out
 
Hi :)

Thank you for your reply :) yes you are right I kept thinking I'll take a photo of how the red wires are attached but kept it too late. As far as I can remember they where attached on top of the circuit board rather than through the hole like I have. Please see attached images . The image where I have put a circle around I think the wires where soldered there.

When I turn the on button I can hear the power going through but the cassette player itself is not turning on.

Thank you
 

Attachments

  • IMG_8870.JPG
    IMG_8870.JPG
    135.2 KB · Views: 5
  • IMG_8872.JPG
    IMG_8872.JPG
    147.9 KB · Views: 6
  • IMG_8873.JPG
    IMG_8873.JPG
    116.1 KB · Views: 6
  • IMG_8874.JPG
    IMG_8874.JPG
    143 KB · Views: 5
  • IMG_8875.JPG
    IMG_8875.JPG
    155 KB · Views: 5

hopey

Member (SA)
I don't know if you have the connections correct however i don't think you have used enough heat to pool the lead solder correctly. Make sure you use lead solder with flux core and the lead should pool around the wire and also the copper track. I use a 30 watt iron so you don't have to hold the heat on for too long. The lead when hot should be very shiny.
 
Hi :)

Thank you for your reply :)

Please see attached image this is the solder I am using and flux . Is this okay. also I have unsoldered the red wires please can you mark an alternative place where these wires can be soldered. The original spot has no copper surface .

Before I discounted the mechanism the wires where solderd in a different spot .

Thank you
 

Attachments

  • IMG_8879.JPG
    IMG_8879.JPG
    128.6 KB · Views: 5
  • IMG_8883.JPG
    IMG_8883.JPG
    176.8 KB · Views: 6

hopey

Member (SA)
You have bare copper tracks looks like the lacquer has been sanded off? Just trace the copper track to the next solder point and sweat it on there. Your iron is a little too hot just touch on for short bursts.
 
Hi Good Morning :)

Thank you for your help :) to get to copper on the same track I have gently scraped little bit of the green mask close to where the original soldering point was. Please see attached . I will solder here hope that works.

Also I have figured out I think the fuse has blown that's why the cassette player isn't turning on.

Thank you
 

Attachments

  • IMG_8884.JPG
    IMG_8884.JPG
    149.3 KB · Views: 4
  • IMG_8885.JPG
    IMG_8885.JPG
    50.7 KB · Views: 4
Hi :)

I've managed to power up the cassette player. I've also located one soldering point. The audio cassette is still not spinning though it spills out the tape. I'll replace the belts as I have already replaced the pulley. Maybe I've positioned that incorrectly.

Thank you
 
Status
Not open for further replies.