Sharp GF-212

Status
Not open for further replies.

Andrewnow

Member (SA)
Here's the little fella I'll be working on, my first project, a Sharp GF-212.

-Radio works
-Sound through left speaker only
-Tape doesn't work but I can hear a whirring sound
-nothing missing or broken (nothing I can see so far, anyway)
-some cosmetic issues - minor rust and corrosion spots

I'm not sure how high I can realistically aim.

Plan A: get everything working.

Plan B: if I can't fix the tape, remove the mechanism to reduce weight, pimp it out with LEDs and just use the radio.

Cosmetically, I'd like to get it looking really nice. I would even go as far as repainting, adding crazy LEDs etc., although spray painting will be tricky because I live in a flat.

Any and all advice welcomed.
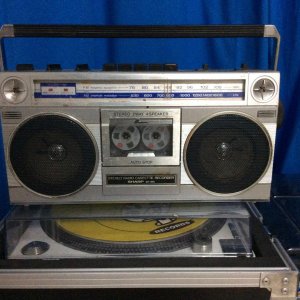
image.jpg
 

MyOhMy

Member (SA)
Nice and cute but needing a good was behind the ears. :yes:

I'd do as much as I could possibly do and, even if you can't get the deck working, leave it fitted. I've learned that as skill, confidence and competence improve you may wish you'd left the deck inside for a future project. And, of course, once the deck is gone, the deck is gone.
 

Andrewnow

Member (SA)
MyOhMy said:
Nice and cute but needing a good was behind the ears. :yes:

I'd do as much as I could possibly do and, even if you can't get the deck working, leave it fitted. I've learned that as skill, confidence and competence improve you may wish you'd left the deck inside for a future project. And, of course, once the deck is gone, the deck is gone.
Thanks for that. Ok, I'll take your advice.
 

Andrewnow

Member (SA)
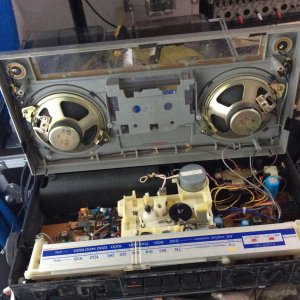
Today is bath day for the casing, and my first look-see at the insides.


I'm really new at this, not much idea what I'm doing....
 

Andrewnow

Member (SA)
It's open.

There will be no "taking the case off" because everything is attached.

This is where my lack of electronics know-how is starting to show.

Just a couple of quick questions:

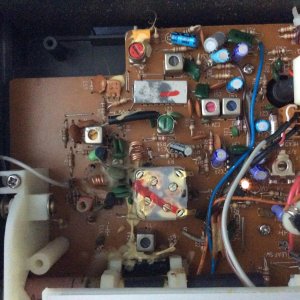
1) what are all these wires, and

2) what is all the other stuff?
 

Attachments

  • image.jpg
    image.jpg
    130.9 KB · Views: 7

Andrewnow

Member (SA)
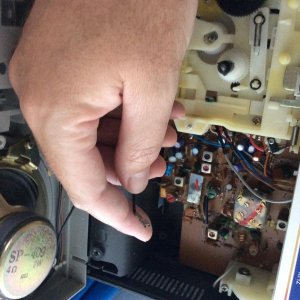
As I was attempting to hold it open and take a photo (as advised), I accidentally pulled this cable out. Any idea where it belongs? It came out before I could take the photo!

The other end is attached to the outside of the speaker cone. It's most likely some kind of grounding wire, methinks. There is no similar / corresponding wire on the other side. If only I could've seen where it was attached!
 

Attachments

  • image.jpg
    image.jpg
    101.1 KB · Views: 9
  • image.jpg
    image.jpg
    122.2 KB · Views: 8

Andrewnow

Member (SA)
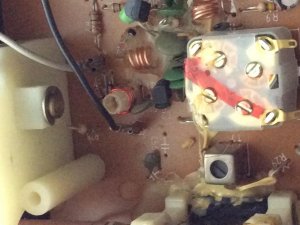
Hmm, I think I got it. There's a little piece sticking out which the black wire fits on perfectly. It's the only place that makes sense.

I am happy to say I'm back at square one!

There are no easily-spotted problems like broken parts or disconnected wires...I guess all I can do for now is vacuum the dust out, close it up, and wipe the outside.
 

Attachments

  • image.jpg
    image.jpg
    70 KB · Views: 3

MyOhMy

Member (SA)
A tip or two for you that have been of great help to me:

I not only take an 'overall' photo but more photos from different directions and angles.

Before I go any further I then take a photo of every connection including things like the speaker connections.

I look at the interior to understand which component/element does what and visually follow connecting wires to their destination.

Before unplugging any type of block connector I use a red/black/green indelible marker to place small dots/dashes/lines on the connector and at the connection point. Make sure the marks are adjacent and pair off in type/style.

Before you remove any component, carefully examine how it is secured, whether or not it connects or otherwise interacts with other components.

Some internal fixing screws that secure a particular component may differ in size or spec so................draw an outline of the component onto stiff paper/cardboard and write the component name on the paper/card then mark the screw locations. As each screw is removed from the component, screw it into the corresponding position into the paper/card.

I hope this helps. I'm a beginner like yourself and find little things like I've mentioned help considerably and, of course, once you've reassembled the box you'll not be left gawping at a lonely screw left on your worktop! :blush: :lol:
 
Status
Not open for further replies.