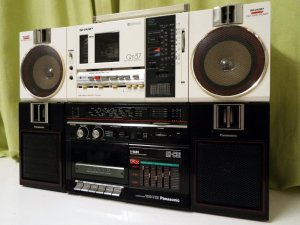
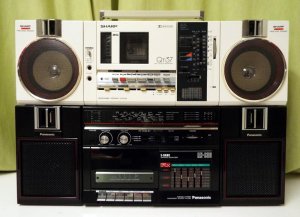
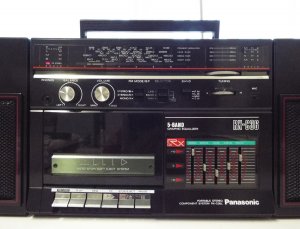
Sourced on eBay UK, this tidy little BB cost me the grand total of £0.99p plus £5.60 P+P so I couldn't give it a miss even though the description was a little short on words: "......The radio works and the tape will rewind and fastforward but struggles to play"..... was just about all I had to go on!
The BB as was listed:
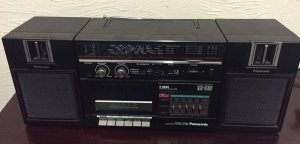
Not the most shiny of presentations but, at £0.99p, I didn't care. Once it arrived I discovered why it wasn't shining all spic & span: It was covered in a layer of grease or fat so it'd obviously spent quite some time on Kitchen Detail. Appearance showed fading to some of the lettering but the rest appeared nice and tidy, intact and complete apart from a wandering RCA Line In 'fitting'. Good enough so far.
"Open Sesame!"
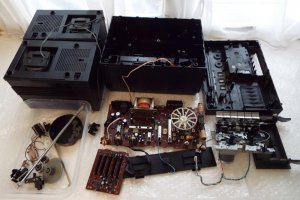
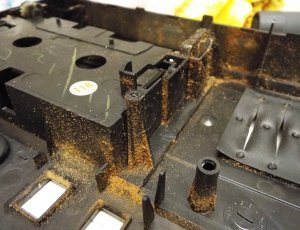
'Kitchen Detail' was obviously been Curry Powder Fight Kitchen Detail!!! Yuk!
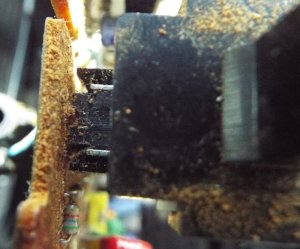
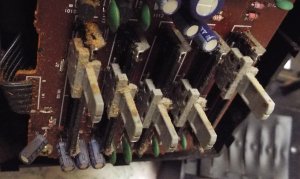
Enough pics of that little lot. The powder hadn't penetrated too far but had stuck to the grease/fat somewhat and gotten into the slider pots. Luckily, the grease/fat was only light inside and limited to just inside the casing and speakers so the clean-up wasn't a big job, just a little tacky and not taking too long.
After cleaning off the grease and curry powder the next task was the sliders. I couldn't apply lube directly to the pots without it forming into a curry paste so this was unavoidable. With great care I removed all five equaliser sliders without a hitch as I knew (from this forum) that these are very delicate & fragile. Into a small tray they went - just as my cat leapt onto the table landing with one heavy paw in the tray - YIKES!
So, this was the result and now a bigger, more intricate job than first expected:
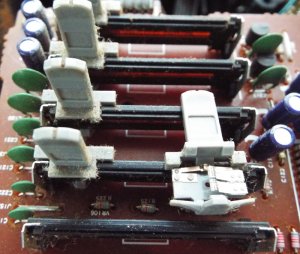
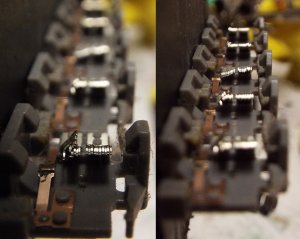
I started with the least damaged, to hone my skills, using wooden toothpicks (no slip), pins, needles and a magnifier. Dear me, there's some patience need with this job! It took me several hours over a couple of days to get the best results.
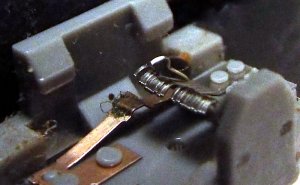
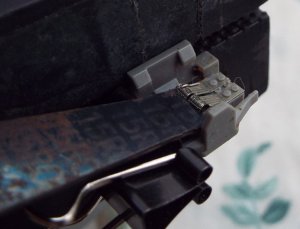
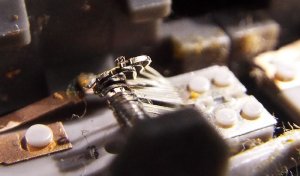
The worst ones needed a little imagination to provide a decent amount of additional support as the pins were quite damaged. I did the best job I could manage and feel confident the result was around.......98% successful and once they were done I needed a rest, that was one heck of a fiddly job I have no wish to repeat!
Next job: A broken leaf switch on the cassette deck. I didn't even know it was called a leaf switch never mind how to fix it so I started a topic:
Broken Leaf Switch On Panasonic - Doner Part From Sharp?
as I needed some expert advice from forum members - which was given without hesitation so BIG thanks to jimmyjimmy19702010 & baddboybill for their help with this.
The problem:
A plastic clip had broken off the fixing clip.
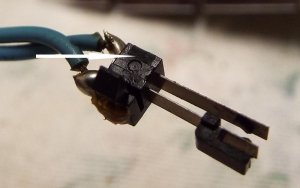
View attachment 23399
I had an identical spare in good condition from a Sharp QT250 doner box. Side by side, doner part on left:
View attachment 23398
This also turned into a fiddly little job, having to remove the damaged part then re-solder the doner part in its place. A pain in the neck but I got there after a while and, although I'll win no awards for soldering skills, I think the result was satisfactory at the very least:
View attachment 23400
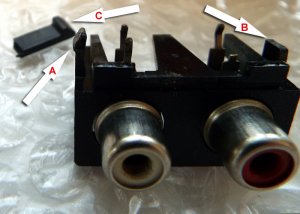
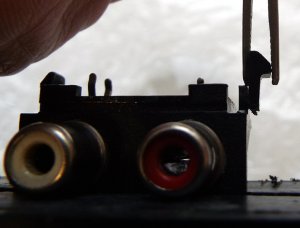
RCA Line In port was loose so this was another new job for me to tackle, there was a broken clip and the soldered joints had failed. Again, fiddly so I'll let the picture do most of the talking - 'cos I like lots of pics!:
View attachment 23401
Salvage a hook from a doner box and cut/shape/file to fit. A: good clip, B: broken clip, C: doner part:
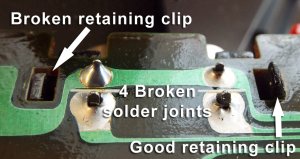
I've now learned just how difficult it is to make sure all soldered joints are kept apart, they're really close together with little room for error.
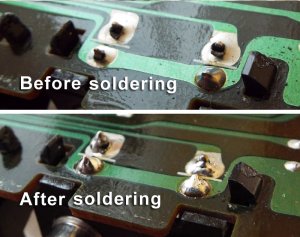
Job done:
View attachment 23406
Now for the final task: noisy/clattery cassette deck when in 'Play' mode, noise free on 'FF' & 'Cue' mode. I replaced the belts and cleaned/lubed as much as I could access and found the noise to be much reduce but I can still hear the noise above playback. I spent quite a while try to isolate the problem from within all the moving parts and a worn cog is the result of my findings:
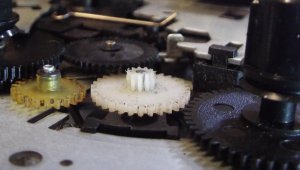
The very small amount of lateral movement has resulted in uneven wear on the white cog, this is slipping and causing the noise.
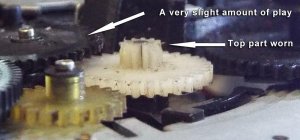
I have no spare for this as yet so I'll be leaving this final job until I acquire a spare. I've removed the refitted the counterpart from the Sharp doner box which is the same size but lacks the cog detail on the narrow part of the cog wheel. Not a difficult job at all so all in good time. Now the box is re-assembled I've found the centre equaliser pot is a tiny -tiny - bit less responsive in the output range on the left channel but very difficult to detect unless you look for it. Nonetheless, it's there.
So then, How was it for me? Not bad at all! I learned more about BB's, practiced & improved my skills - and learned a hard lesson in patience! Visually, the wear on the lettering is a bit of a let down but doesn't appear as bad in reality as it does in the images. I like this box. I's compact, tidy, well laid out and sounds good for a small box. Best of all: at £0.99p I can't fault the price! I'll be keeping my eye out for more models in this range - at least I'll be OK for spares at the very least!
Ooops - almost forgot:
View attachment 23411
View attachment 23414
View attachment 23413
The BB as was listed:

Not the most shiny of presentations but, at £0.99p, I didn't care. Once it arrived I discovered why it wasn't shining all spic & span: It was covered in a layer of grease or fat so it'd obviously spent quite some time on Kitchen Detail. Appearance showed fading to some of the lettering but the rest appeared nice and tidy, intact and complete apart from a wandering RCA Line In 'fitting'. Good enough so far.
"Open Sesame!"


'Kitchen Detail' was obviously been Curry Powder Fight Kitchen Detail!!! Yuk!


Enough pics of that little lot. The powder hadn't penetrated too far but had stuck to the grease/fat somewhat and gotten into the slider pots. Luckily, the grease/fat was only light inside and limited to just inside the casing and speakers so the clean-up wasn't a big job, just a little tacky and not taking too long.
After cleaning off the grease and curry powder the next task was the sliders. I couldn't apply lube directly to the pots without it forming into a curry paste so this was unavoidable. With great care I removed all five equaliser sliders without a hitch as I knew (from this forum) that these are very delicate & fragile. Into a small tray they went - just as my cat leapt onto the table landing with one heavy paw in the tray - YIKES!
So, this was the result and now a bigger, more intricate job than first expected:


I started with the least damaged, to hone my skills, using wooden toothpicks (no slip), pins, needles and a magnifier. Dear me, there's some patience need with this job! It took me several hours over a couple of days to get the best results.


The worst ones needed a little imagination to provide a decent amount of additional support as the pins were quite damaged. I did the best job I could manage and feel confident the result was around.......98% successful and once they were done I needed a rest, that was one heck of a fiddly job I have no wish to repeat!
Next job: A broken leaf switch on the cassette deck. I didn't even know it was called a leaf switch never mind how to fix it so I started a topic:
Broken Leaf Switch On Panasonic - Doner Part From Sharp?
as I needed some expert advice from forum members - which was given without hesitation so BIG thanks to jimmyjimmy19702010 & baddboybill for their help with this.
The problem:
A plastic clip had broken off the fixing clip.

View attachment 23399
I had an identical spare in good condition from a Sharp QT250 doner box. Side by side, doner part on left:
View attachment 23398
This also turned into a fiddly little job, having to remove the damaged part then re-solder the doner part in its place. A pain in the neck but I got there after a while and, although I'll win no awards for soldering skills, I think the result was satisfactory at the very least:
View attachment 23400
RCA Line In port was loose so this was another new job for me to tackle, there was a broken clip and the soldered joints had failed. Again, fiddly so I'll let the picture do most of the talking - 'cos I like lots of pics!:
View attachment 23401
Salvage a hook from a doner box and cut/shape/file to fit. A: good clip, B: broken clip, C: doner part:


I've now learned just how difficult it is to make sure all soldered joints are kept apart, they're really close together with little room for error.

Job done:
View attachment 23406
Now for the final task: noisy/clattery cassette deck when in 'Play' mode, noise free on 'FF' & 'Cue' mode. I replaced the belts and cleaned/lubed as much as I could access and found the noise to be much reduce but I can still hear the noise above playback. I spent quite a while try to isolate the problem from within all the moving parts and a worn cog is the result of my findings:

The very small amount of lateral movement has resulted in uneven wear on the white cog, this is slipping and causing the noise.

I have no spare for this as yet so I'll be leaving this final job until I acquire a spare. I've removed the refitted the counterpart from the Sharp doner box which is the same size but lacks the cog detail on the narrow part of the cog wheel. Not a difficult job at all so all in good time. Now the box is re-assembled I've found the centre equaliser pot is a tiny -tiny - bit less responsive in the output range on the left channel but very difficult to detect unless you look for it. Nonetheless, it's there.
So then, How was it for me? Not bad at all! I learned more about BB's, practiced & improved my skills - and learned a hard lesson in patience! Visually, the wear on the lettering is a bit of a let down but doesn't appear as bad in reality as it does in the images. I like this box. I's compact, tidy, well laid out and sounds good for a small box. Best of all: at £0.99p I can't fault the price! I'll be keeping my eye out for more models in this range - at least I'll be OK for spares at the very least!
Ooops - almost forgot:
View attachment 23411

View attachment 23414
View attachment 23413


