Panasonic RX-5010 tape deck heads not moving

Status
Not open for further replies.

hale2adam

New Member
Hello all. I just found this website and recently found a Panasonic RX-5010 boombox in great condition. The seller shipped to me and the tape deck worked at that point, after shipment It no longer works and i am trying to diagnose the problem and fix from the expertise I find here. When the play button is pressed you can hear the motor turning but the belt isn't moving. I can see a thin belt through the front, and with a little turn of the head the belt turns then stops. I haven't opened the unit yet and any guidance would be greatly appreciated.
Cheers!
 

hale2adam

New Member
Great! Thanks for the info. I'm going to open it up and see. If there is any advice on doing that please let me know.
 

floyd

Boomus Fidelis
On these Panasonics once you remove the screws from the back of the boombox and open the cassette door the front case panel comes off usually there's just a pair of wires with a plug that go to the speakers then you can see the cassette deck right in front of you.
There should be four screws around the perimeter of the cassette deck to remove the tape mech.
 
  • Like
Reactions: hale2adam

caution

Member (SA)
This is from the RX-5012 manual but disassembly should be the same as the 5010.
Figure 4 shows case screws and figure 5 shows tape deck screws

53181624198_cb5d7ddb10_o.jpg
 
  • Like
Reactions: hale2adam

hale2adam

New Member
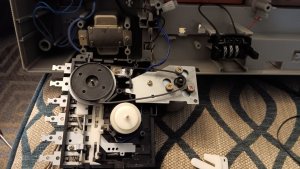
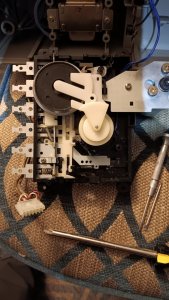
I have opened it up and indeed it was the belts. I'm hoping someone can help me figure out the main belt path? There was no reference as it was melted, and I can't figure out exactly how it winds itself through the wheels. I only see two wheels but i assume it gets routed elsewhere for more tension. I see how the counter belt goes back on, as that one was still attached. I appreciate any help.

belt1.jpgbelt.jpg
 

Attachments

  • pi.zip
    4 MB · Views: 6

caution

Member (SA)
Yes, it goes around all three pulleys. The manual (link) shows the belt path:
Matching up the letters, it looks like you should be able to route it properly.

53199458769_656724439f_o.jpg
 

hale2adam

New Member
Awesome! Lastly are there any tips on putting the front back on after installation? I didn't get the clicks that it is in place correctly and i am having trouble lining it up smoothly. What side or edge to put on first, and should it be tilted? Do I keep the tape deck closed or open?
This part is taking me longer that the rest combined! Thanks again.
 

hale2adam

New Member
I finally got it to snap into place, but unfortunately the two new belts didn't fix my problem. The wheel doesn't turn at all and has quite a bit of tension. Any other ideas would be appreciated. Other than the old belt being melted maybe that gunked up something. i cleaned and removed as much as i can. Thanks again
 

hale2adam

New Member
Yes, it goes around all three pulleys. The manual (link) shows the belt path:
Matching up the letters, it looks like you should be able to route it properly.

53199458769_656724439f_o.jpg
I figured out the problem. Pictured, i must have accidently broke it when putting back together. Is this fixable? Thanks

20230920_145518[1].jpg20230920_152643[1].jpg20230920_152712[1].jpg
 

caution

Member (SA)
The only chance you have at fixing that motor is to undo the crimps holding the backplate on, so you can access the inside to solder the wires back onto what remains of the contacts. I don't think that would be easy to do, so a new motor may be the best option.
 
  • Like
Reactions: hale2adam

hale2adam

New Member
The only chance you have at fixing that motor is to undo the crimps holding the backplate on, so you can access the inside to solder the wires back onto what remains of the contacts. I don't think that would be easy to do, so a new motor may be the best option.
Thanks again. Other than getting a parts radio, are there any sites that sell the motors? I'm going to try to fix it as well. Thanks
 
Status
Not open for further replies.