All Black 20/20 (need a little help)

Status
Not open for further replies.

static2000g

Member (SA)
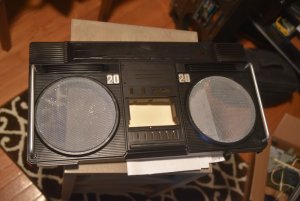
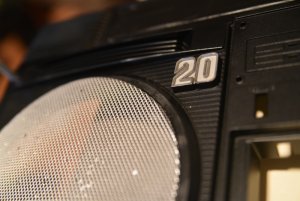
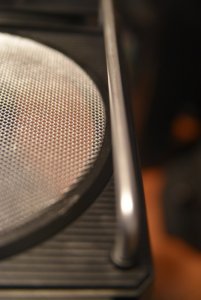
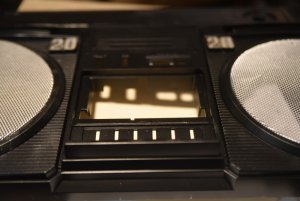
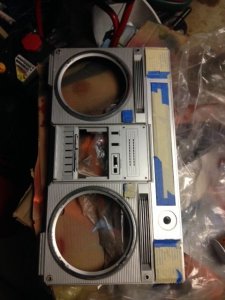
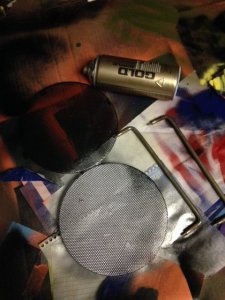
I figured since I was adding some Lasonic speakers; I would change up the entire look. So far so good. Using Montana Spay paints for the job along with the Montana touch-up markers for any bumps and bruises I do while puting this back together (I'm a little clumsly-lol).

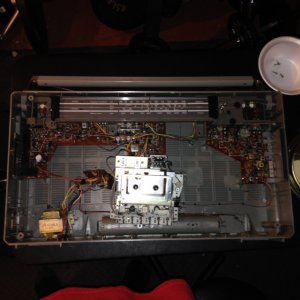
However, I'm a little stuck. I can't finish getting the guts out, I see a little screw near the top that can't reach, not sure if this is the issues but it proably has something to do with it. Has anyone brokedowna 20/20? If so I need advice?

Lastly, what do you guys think of the black and chrome look? My only other alternative is painting random graffiti all over it? or shoud I just stick with the black and chrome look? But more importantly, I gotta get the guts out of this thing.
 

Attachments

  • DSC_1305.JPG
    DSC_1305.JPG
    492.3 KB · Views: 10
  • DSC_1306.JPG
    DSC_1306.JPG
    458.5 KB · Views: 31
  • DSC_1307.JPG
    DSC_1307.JPG
    409.3 KB · Views: 7
  • DSC_1308.JPG
    DSC_1308.JPG
    398.3 KB · Views: 7
  • IMG_3231.JPG
    IMG_3231.JPG
    54.3 KB · Views: 10
  • IMG_3232.JPG
    IMG_3232.JPG
    67.2 KB · Views: 5
  • IMG_3234.JPG
    IMG_3234.JPG
    124.5 KB · Views: 8
  • IMG_3221 (1).JPG
    IMG_3221 (1).JPG
    123.8 KB · Views: 7

Reli

Boomus Fidelis
You taped off the tweeter and mic grills and are going to leave them chrome, right? If so, then it's going to look sweet - better than original.
 

howie1976

Member (SA)
I just totally gutted my first Rising 20/20 last week. I'm not sure if I can explain how to do it but I'll try.

1st remove the tape deck by removing the 3 screws facing you. There is one on the bottom right, bottom left and on the top left. Don't confuse the top left one with the other top left screw on the very top. Leave that one alone with the one across from it on the right intact. You do not have to remove those. Then unplug the four cables going to the circuit board and remove the deck.

2nd remove the screws from the main circuit board. These screws are all facing you. There is one on the left, one in the center, one behind the cassette deck you just removed and four on the left side of the panel.

3rd remove the two screws in the space above the tuner dial and between the top metal plate. These screws are facing you. There should be a screw directly below the "bass" knob and below the "volume" knob.

4th remove the two screws on either side of the power supply. Then remove the cable going to the circuit board.

5th you are going to need to remove the red and blue power wires going to the battery compartment. You can remove the red one along with the small metal plate it's attached to by wiggling it and pulling. But the blue wire needs to be soldered off. I guess you can cut this one but I soldered it off.

Once you have done this, all parts including the entire circuit board should come right out.

Btw, black looks cool. I'm doing something similar to mine but I went with another color. But I'll post that at a later date. Stay tuned...

Hope this helps. Good luck!!
 

Beosystem10

Member (SA)
Yes, this:
Reli said:
You taped off the tweeter and mic grills and are going to leave them chrome, right? If so, then it's going to look sweet - better than original.
is on the money, IMHO. :thumbsup: :thumbsup: :thumbsup:
Good luck with this project. Howie's suggested way sounds really straightforward and there doesn't seem to be that much inside there so with a bit more careful work, this is going to be that chrome & black stunner I already have in my imagination when looking at the box. :-)
 

static2000g

Member (SA)
Reli said:
You taped off the tweeter and mic grills and are going to leave them chrome, right? If so, then it's going to look sweet - better than original.
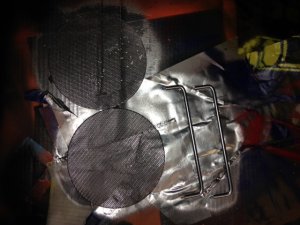
that was the idea at first but honestly, I didn't like it. I went ahead and painted the mic grill black.
 

static2000g

Member (SA)
howie1976 said:
I just totally gutted my first Rising 20/20 last week. I'm not sure if I can explain how to do it but I'll try.

1st remove the tape deck by removing the 3 screws facing you. There is one on the bottom right, bottom left and on the top left. Don't confuse the top left one with the other top left screw on the very top. Leave that one alone with the one across from it on the right intact. You do not have to remove those. Then unplug the four cables going to the circuit board and remove the deck.

2nd remove the screws from the main circuit board. These screws are all facing you. There is one on the left, one in the center, one behind the cassette deck you just removed and four on the left side of the panel.

3rd remove the two screws in the space above the tuner dial and between the top metal plate. These screws are facing you. There should be a screw directly below the "bass" knob and below the "volume" knob.

4th remove the two screws on either side of the power supply. Then remove the cable going to the circuit board.

5th you are going to need to remove the red and blue power wires going to the battery compartment. You can remove the red one along with the small metal plate it's attached to by wiggling it and pulling. But the blue wire needs to be soldered off. I guess you can cut this one but I soldered it off.

Once you have done this, all parts including the entire circuit board should come right out.

Btw, black looks cool. I'm doing something similar to mine but I went with another color. But I'll post that at a later date. Stay tuned...

Hope this helps. Good luck!!
Howie - you're a God send............!!!!!!!!!!!!!!!!!!!!!!!!!!!!!!!!!!!!!
 
Status
Not open for further replies.