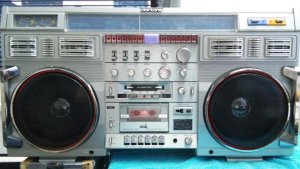
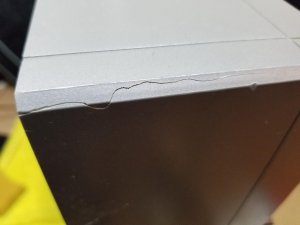
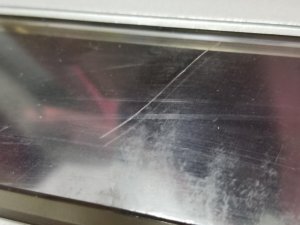
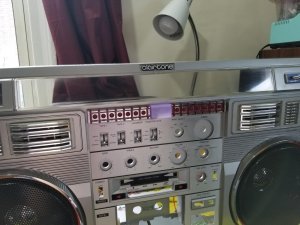
I haven't been touching boomboxes for a while, but recently I started working on one of my project boxes; a clairtone 7980 I bought 3 years ago. This box looks great, but it suffered some damage from poor packaging because one corner set against the side of the box despite my explicit request to pad all the corners  . A screw post is broken off, the tuner dial window is loose, and one corner has cracked. The radio didn't tune into FM stereo properly, and as always the decks need rebelting. It also had a scratch in the tuner dial window.
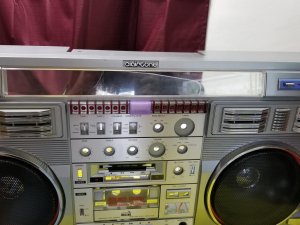
"You really need a better camera and better lighting" before pictures:

The work I've done so far:
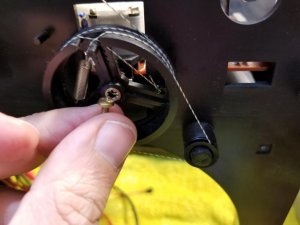
I replaced one antenna from a Helix I had (had to sell it, there's only so much room in an NYC apartment!). That was an easy start")
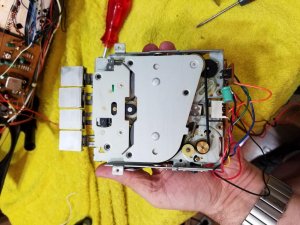
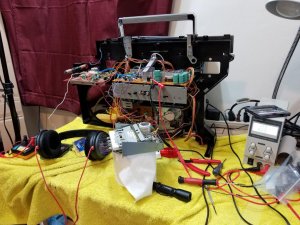
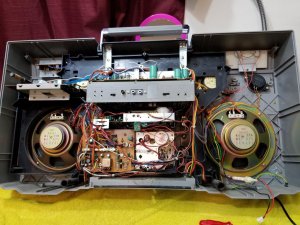
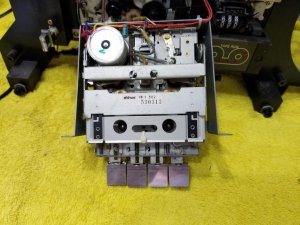
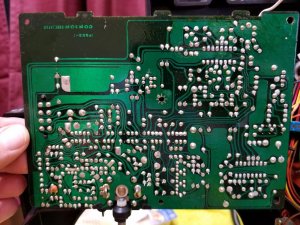
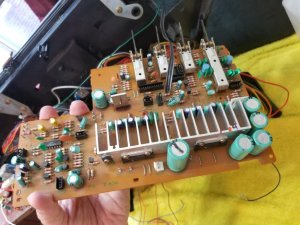
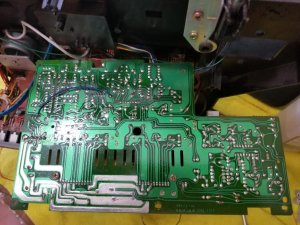
Next, the disassembly of the box to do the classic rebelting of the decks. I didn't even bother trying the tape decks as the belts are always gone anyways, and worst case it will spin gooey belt stuff all over the mechanics. For this, you have to take the chassis out. Since I've had experience working on the Helix, it was easy now. Just take loooots of pictures and mark the wires (I didn't, I just rely on the pictures, and use Caution's awesome diagram in case of doubt. Do what I say, don't do what I do!). I really don't like the engineers who built this box, with all the horrible color coding of the wires. For instance, the main voltage wires ared RED and BLACK for.... GROUND and PLUS. Yes, they are reversed. WHY!?!?! And then there's a whole bunch of identical connectors with identically colored wires, even plugged into the same board, as if they wanted you to screw up. And then there's the printed circuit board with a hole right through one of the traces, which they fixed with an extra wire, oh man... but I digress.
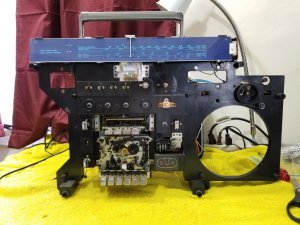
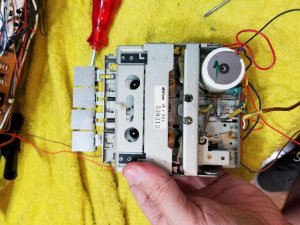
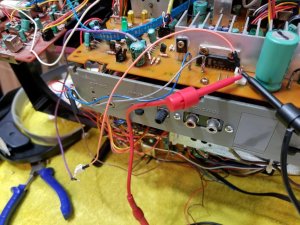
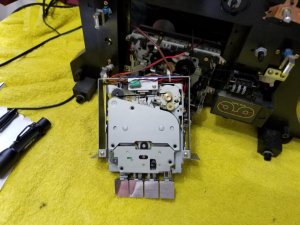
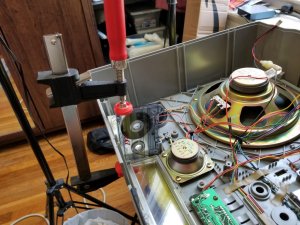
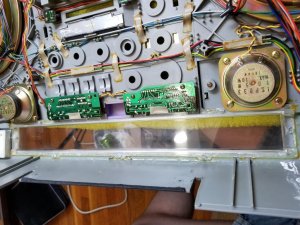
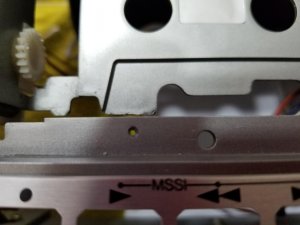
The chassis sure is very nice though! You can take it out and test most functions, though they didn't make it very easy to hook up a DC power source. Here's a few pictures of what to connect in case you do so. And my test lead's red is actually plus, just so you know. I use a variable power supply set at 15V, with current limiting (though you don't really need that).

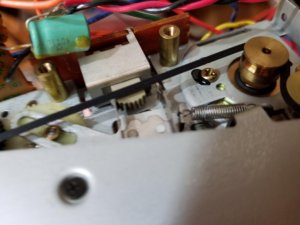
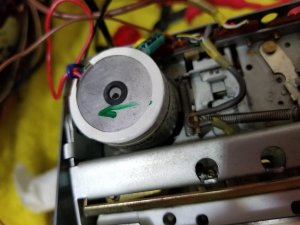
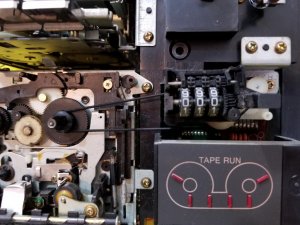
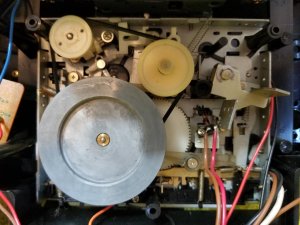
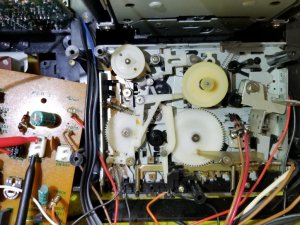
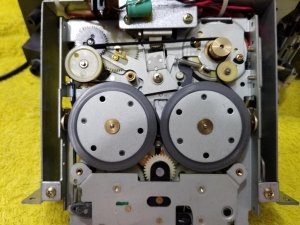
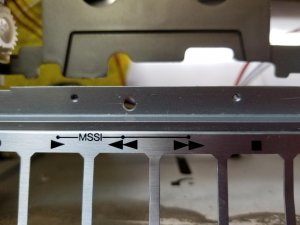
Ok, rebelting now is easy. Tape 1 I do in place by pushing the pcb next to it to the side, removing some tie-wraps so the wires are loose enough, maybe unscrew one of the buttons that is connected to a 3-wire flat cable that gets in the way. Now you can access the back of the deck, which you can remove with just three screws. Flip it open with the top down, and you can access all the gears/belts. Now before you put in new ones, make sure to clean all the gears really well. There's one gear (top left) that drives a worm wheel. That probably has dried up gunk which will impact your rewind performance. Remove it as well as you can and add some new grease. Now you can put in two belts. The recommended belt sizes (gleaned from here) are SBS8.9 (counter belt and secondary belt) and FBM9.6 (flat drive belt). However, I found that SBS8.9 is too tight and it too will affect rewind performance negatively by tugging too hard on one gear. I used a fresh SBS9.2 and switching between the two fixed rewind performance.
Tape 2 is easy with the chassis out. Just unscrew it from the front, pull it out, flip it over, remove the back, and switch the belts (again, clean!). I find that this deck is very simple and forgiving. This needs an SBM10.0 but I used an SBS10.0.
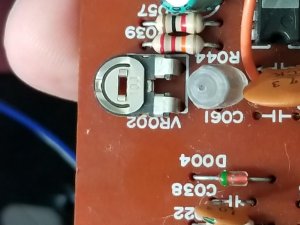
Next, the FM stereo issue. There's a good thread here that explains the likely culprit; a variable resistor that is open. I thought it didn't apply to my box, as I would get fm stereo but only whenever there was a hard passage such as a loud beat. Turns out, of course, that it was actually the variable resistor, which I did check first thing just to be sure. It's VR002 on the tuner board. I found a replacement VR of exactly the same dimensions on an old tape deck's pcb, but it was a 10k one, where this is a 5k one. No problem, wiring a 10k resistor in parallel to it will kind-of-fix-it. It's not an exact replacement as now the resistance does not linearly go up anymore, but for this application it's not so important. So, with that replaced, it tunes into FM stereo perfectly, woohoo!

Next thing I did was de-oxiting all the switches, internal and external. I removed the top board with the amps on it to get easy accesss to all the pots and switches on the IO/Preamp board. Don't forget the internal ones, like the record bar near tape 1 (the thing that is attached to the deck with a spring), radio band selector (connected with the plastic blue strip), mixer pot, ...
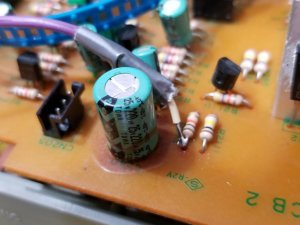
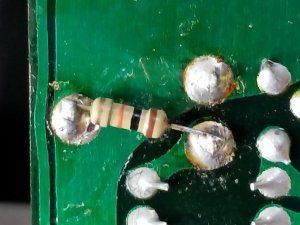
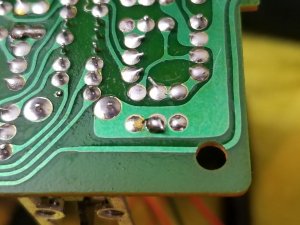
Oh lookie here at the funny blue wire..?
D'oh!
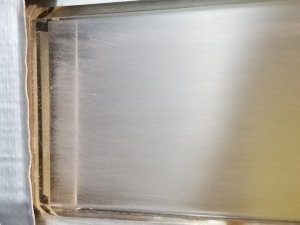
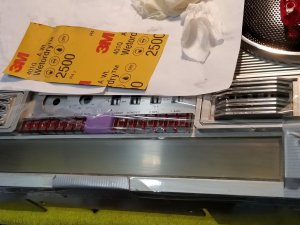
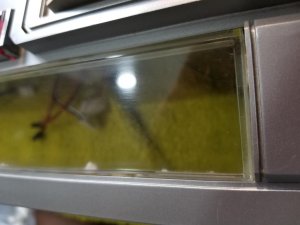
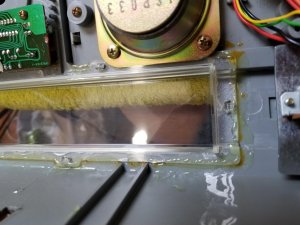
Time for some cosmetic justice; the scratch in the tuner window. I've never attempted removing scratches on anything serious, only once on a cheap box a few years ago to get the hang of it. From that, I learned to clean up very well in between different grits of sand paper, and to meticulously hunt for any scratches before moving to the next one. I did practice first on a small Sanyo since it had been a while, and that went well. So I taped off the surrounding area and went to town. I hoped the scratch wasn't too deep, and attempted to get rid of it with 1000 grit. Nope. I had to go down all the way to 100 actually, but that got it out for sure. Now, I went up to 400, 600, 800, 1000, 1500, 2000 all the way up to 2500 using the wet sandpaper technique. I bought a 3M kit with multiple grits, and I think I bought the 2500 separately. In hindsight I'd also use 3500 for the final sanding round. But, this worked and the scratch is gone! I wouldn't say it's perfect as I can see some new horizontal scratches that only revealed themselves around grit 800-ish, but you have to hunt for those with a flashlight. I finished it off with novus 3, 2, and 1. Looks much better!
Oh god oh god oh god
Frosty..
Shiny!
Phew!
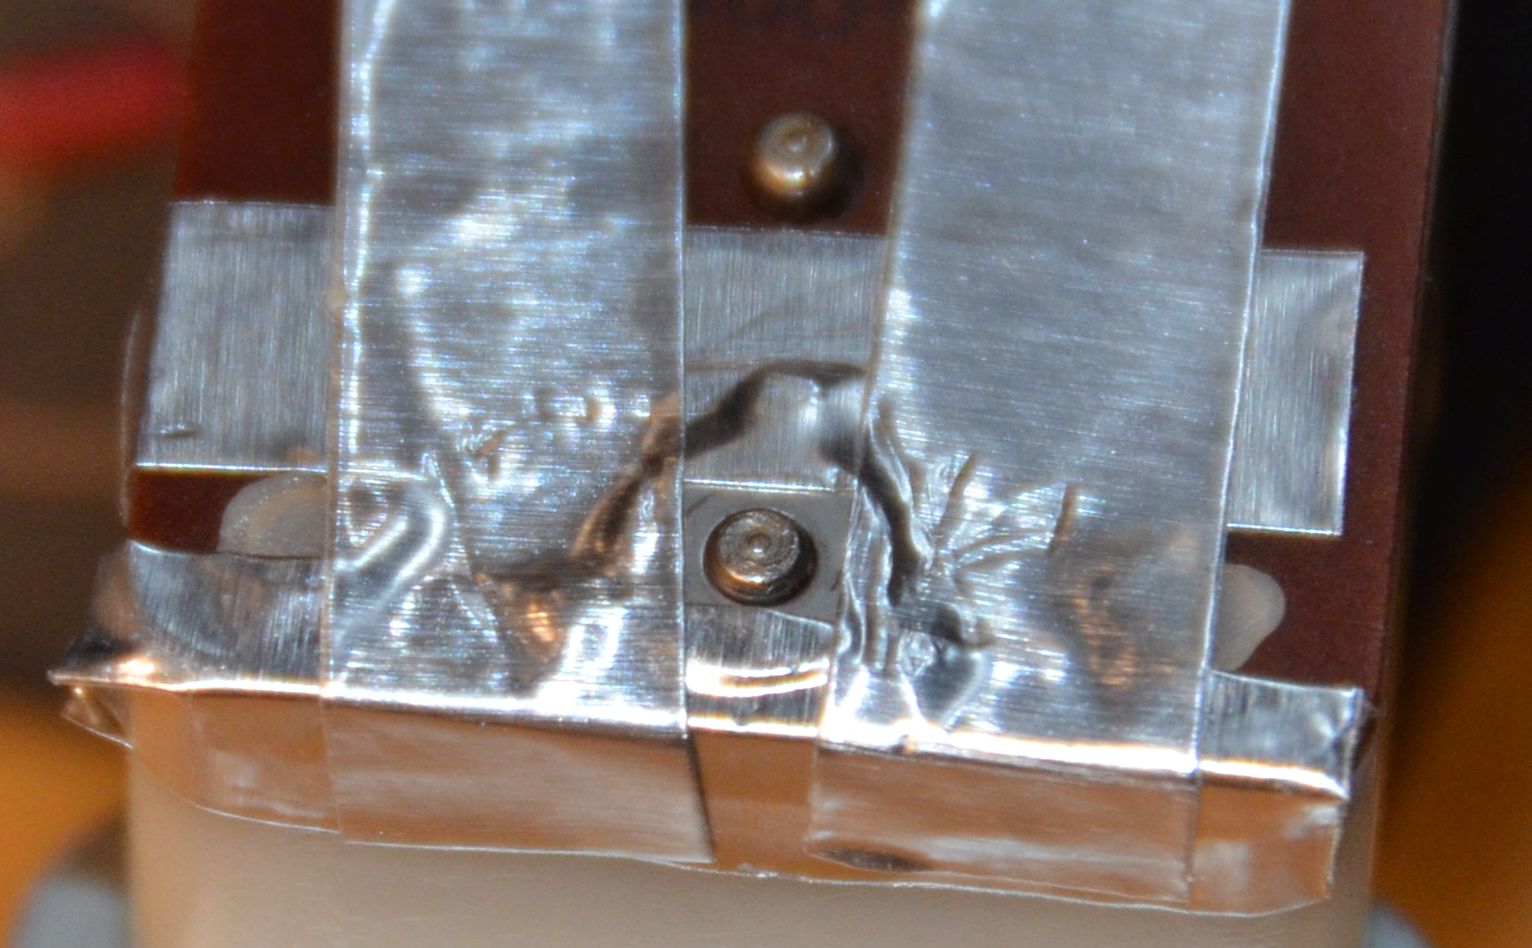
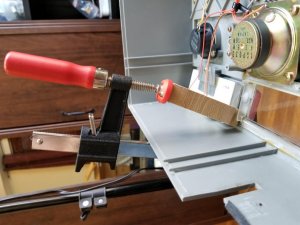
Another thing I only now noticed is that the tuner dial window was not secured to the case properly, and there was tension on it pushing it inwards from the top. This must have been transportation damage, as the supports that it is glued to had snapped off. So I had to clamp it somehow to the case and want McGuyver on a piece of wood to make it fit there so I could clamp it from the outside. Great success! I used two-epoxy plastic weld and brushed them onto the sides of the window and let it drie. Worked great! I hope it will stay fit but this should bond well enough. I also went ahead and re-attached a broken off screw terminal in one of the corners.
It seemed appropriate
..but this worked a little better
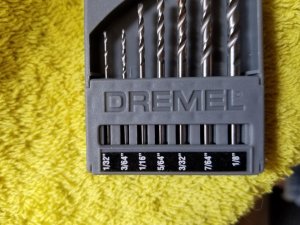
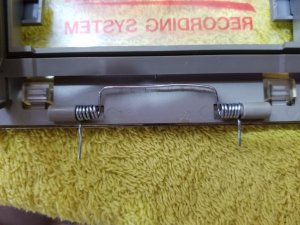
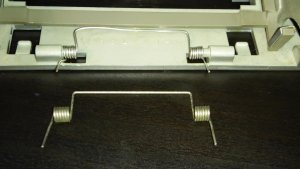
Next, tape 1's door was missing the spring to do the soft-eject. Luckily I had some good pictures from the Helix and I was able to create one from some steel wire I found at the hardware store. Only problem is that for some reason, the Clairtone only has a single hole to fit the spring into, while the Helix had two. So I took a tiny dremel drill bit (3/64") and drilled the second hole. The hole was already in the plastic mold, it just was never drilled. With that done, the spring fits and I now have working soft-eject! The tension isn't as great as the original, so it's now a very slow soft eject (cue elevator music). It is however miles better than the door just sitting there doing nothing when you press the button. Might come back to this in the future (tips welcome!)
Next on the list will be troubleshooting tape deck 2, which sounds very muffled and noisy. I'm not sure what I want/need/can do to that busted corner. I've never done any painting whatsoever in my life other than throwing it at walls, so I'm not sure I want to touch that. Though at least in this case (hurrr) it looks like you could get away with spraying just the sides, not the rest. Opinions?!
. A screw post is broken off, the tuner dial window is loose, and one corner has cracked. The radio didn't tune into FM stereo properly, and as always the decks need rebelting. It also had a scratch in the tuner dial window."You really need a better camera and better lighting" before pictures:
The work I've done so far:
I replaced one antenna from a Helix I had (had to sell it, there's only so much room in an NYC apartment!). That was an easy start
Next, the disassembly of the box to do the classic rebelting of the decks. I didn't even bother trying the tape decks as the belts are always gone anyways, and worst case it will spin gooey belt stuff all over the mechanics. For this, you have to take the chassis out. Since I've had experience working on the Helix, it was easy now. Just take loooots of pictures and mark the wires (I didn't, I just rely on the pictures, and use Caution's awesome diagram in case of doubt. Do what I say, don't do what I do!). I really don't like the engineers who built this box, with all the horrible color coding of the wires. For instance, the main voltage wires ared RED and BLACK for.... GROUND and PLUS. Yes, they are reversed. WHY!?!?! And then there's a whole bunch of identical connectors with identically colored wires, even plugged into the same board, as if they wanted you to screw up. And then there's the printed circuit board with a hole right through one of the traces, which they fixed with an extra wire, oh man... but I digress.
The chassis sure is very nice though! You can take it out and test most functions, though they didn't make it very easy to hook up a DC power source. Here's a few pictures of what to connect in case you do so. And my test lead's red is actually plus, just so you know. I use a variable power supply set at 15V, with current limiting (though you don't really need that).
Ok, rebelting now is easy. Tape 1 I do in place by pushing the pcb next to it to the side, removing some tie-wraps so the wires are loose enough, maybe unscrew one of the buttons that is connected to a 3-wire flat cable that gets in the way. Now you can access the back of the deck, which you can remove with just three screws. Flip it open with the top down, and you can access all the gears/belts. Now before you put in new ones, make sure to clean all the gears really well. There's one gear (top left) that drives a worm wheel. That probably has dried up gunk which will impact your rewind performance. Remove it as well as you can and add some new grease. Now you can put in two belts. The recommended belt sizes (gleaned from here) are SBS8.9 (counter belt and secondary belt) and FBM9.6 (flat drive belt). However, I found that SBS8.9 is too tight and it too will affect rewind performance negatively by tugging too hard on one gear. I used a fresh SBS9.2 and switching between the two fixed rewind performance.
Tape 2 is easy with the chassis out. Just unscrew it from the front, pull it out, flip it over, remove the back, and switch the belts (again, clean!). I find that this deck is very simple and forgiving. This needs an SBM10.0 but I used an SBS10.0.
Next, the FM stereo issue. There's a good thread here that explains the likely culprit; a variable resistor that is open. I thought it didn't apply to my box, as I would get fm stereo but only whenever there was a hard passage such as a loud beat. Turns out, of course, that it was actually the variable resistor, which I did check first thing just to be sure. It's VR002 on the tuner board. I found a replacement VR of exactly the same dimensions on an old tape deck's pcb, but it was a 10k one, where this is a 5k one. No problem, wiring a 10k resistor in parallel to it will kind-of-fix-it. It's not an exact replacement as now the resistance does not linearly go up anymore, but for this application it's not so important. So, with that replaced, it tunes into FM stereo perfectly, woohoo!
Next thing I did was de-oxiting all the switches, internal and external. I removed the top board with the amps on it to get easy accesss to all the pots and switches on the IO/Preamp board. Don't forget the internal ones, like the record bar near tape 1 (the thing that is attached to the deck with a spring), radio band selector (connected with the plastic blue strip), mixer pot, ...
Oh lookie here at the funny blue wire..?
D'oh!
Time for some cosmetic justice; the scratch in the tuner window. I've never attempted removing scratches on anything serious, only once on a cheap box a few years ago to get the hang of it. From that, I learned to clean up very well in between different grits of sand paper, and to meticulously hunt for any scratches before moving to the next one. I did practice first on a small Sanyo since it had been a while, and that went well. So I taped off the surrounding area and went to town. I hoped the scratch wasn't too deep, and attempted to get rid of it with 1000 grit. Nope. I had to go down all the way to 100 actually, but that got it out for sure. Now, I went up to 400, 600, 800, 1000, 1500, 2000 all the way up to 2500 using the wet sandpaper technique. I bought a 3M kit with multiple grits, and I think I bought the 2500 separately. In hindsight I'd also use 3500 for the final sanding round. But, this worked and the scratch is gone! I wouldn't say it's perfect as I can see some new horizontal scratches that only revealed themselves around grit 800-ish, but you have to hunt for those with a flashlight. I finished it off with novus 3, 2, and 1. Looks much better!
Oh god oh god oh god
Frosty..
Shiny!
Phew!
Another thing I only now noticed is that the tuner dial window was not secured to the case properly, and there was tension on it pushing it inwards from the top. This must have been transportation damage, as the supports that it is glued to had snapped off. So I had to clamp it somehow to the case and want McGuyver on a piece of wood to make it fit there so I could clamp it from the outside. Great success! I used two-epoxy plastic weld and brushed them onto the sides of the window and let it drie. Worked great! I hope it will stay fit but this should bond well enough. I also went ahead and re-attached a broken off screw terminal in one of the corners.
It seemed appropriate
..but this worked a little better
Next, tape 1's door was missing the spring to do the soft-eject. Luckily I had some good pictures from the Helix and I was able to create one from some steel wire I found at the hardware store. Only problem is that for some reason, the Clairtone only has a single hole to fit the spring into, while the Helix had two. So I took a tiny dremel drill bit (3/64") and drilled the second hole. The hole was already in the plastic mold, it just was never drilled. With that done, the spring fits and I now have working soft-eject! The tension isn't as great as the original, so it's now a very slow soft eject (cue elevator music). It is however miles better than the door just sitting there doing nothing when you press the button. Might come back to this in the future (tips welcome!)
Next on the list will be troubleshooting tape deck 2, which sounds very muffled and noisy. I'm not sure what I want/need/can do to that busted corner. I've never done any painting whatsoever in my life other than throwing it at walls, so I'm not sure I want to touch that. Though at least in this case (hurrr) it looks like you could get away with spraying just the sides, not the rest. Opinions?!
")