Static noise on tape play, bad caps?

Status
Not open for further replies.

Proutpouel

Member (SA)
Apr 27, 2016
19
0
0
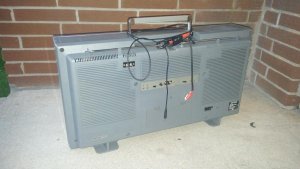
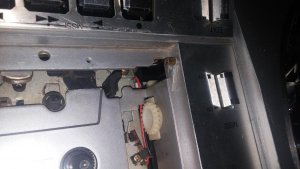
Hello all! This is my first post and i am very happy to see so much people dedicated to boombox repairs :D Here is my issue : I bought my clairtone 7980 for 300$, got to fix the belts problem with the unit, other problems will need to be checked out too but not right now. Tape deck 1 outputs lots of static noise on the right channel, i doubt it could be a switch problem, i cleaned them though. Someone sent me both the wiring diagram and the schematic in high resolution so i can at least trace the signal from head to speaker. But before i launch myself into all this massive diagnostic, has anyone ever had that kind of issue? Also, both decks motor's make buzzing sound (from speakers) when in power, and that can be reproduced on other modes (tape 1/2, radio, line in) i guess bad caps that are leaky are causing this.. In any case i could try to replace motors if all fails. Thank you everyone :)
 

Proutpouel

Member (SA)
Apr 27, 2016
19
0
0
Wow! Thank you all for your great advices :) unfortunately in electronic class, we didn't get the tape deck course as it is obselete technology but i go ahead and get all the experience i can. I will let you know how things are going, today is paint day for the clairtone bad boy :)
 

Proutpouel

Member (SA)
Apr 27, 2016
19
0
0
I have finished painting the cover, here is what's happenning now with the radio itself. On every mode except radio (and even there it does it a bit) the right channel VU meter vibrates around level 0 and there is practicly no audible sound. If you crank the rafio past 11 you'll hear thumping like an helicopter sound. I am currently in the bus going to get both deoxit and MG contact cleaner. Also will grab bags of caps to recap the unit. The thumping noise however can be stopped by pressing the Edit button, but that will disable my VU meter.. Boy, what a machine..
 

Proutpouel

Member (SA)
Apr 27, 2016
19
0
0
Well contact cleaner fixed every thing :) i wish to thank all of you who helped this post! I will continue repairs on cleaning / adjusting the tape heads, fix my broken door and install LEDs.
 

caution

Member (SA)
Mar 25, 2014
2,515
346
83
Boomboxery
Proutpouel said:
Well contact cleaner fixed every thing :) i wish to thank all of you who helped this post! I will continue repairs on cleaning / adjusting the tape heads, fix my broken door and install LEDs.
Please post pictures of your project, we all want to see what you're doing!
 

Proutpouel

Member (SA)
Apr 27, 2016
19
0
0
This is how she looks for now. I chose a dark gray color to do the back panel, with scotch tape over the labels to protect them At this very minute i'm writing this, I have repaired the Tape Run carbon traces PCB!! :D with a bottle of nickel conductive paste (it was the only product available at the store for the moment) I am so damn PROUD of how the restoration of this box is going :) Next steps will be to fix the spare tape tray plastic finger, install the LEDs for the dial, and fix the tape door hinge. In the future i might plan to replace the woofers with clear cone ones to add LEDs lightong behind them (after watching some Conion C 100 mods on youtube)
 

Attachments

Proutpouel

Member (SA)
Apr 27, 2016
19
0
0
never mind... the tape run pcb has failed, i will either retry with the stupid pain in the ass paste or dremel from a virgin copper pcb board. What are your best solution to DIY "from the garage" a PCB??
 

caution

Member (SA)
Mar 25, 2014
2,515
346
83
Boomboxery
Someone here might have an original, that part doesn't usually go bad.
You might want to ask about it in the wanted section
 

Proutpouel

Member (SA)
Apr 27, 2016
19
0
0
I cannot really afford a part like that. Unless its cheap like 20$ or under i'll have to find another way.. But i will post to check. Thank you mister caution!!
 

Proutpouel

Member (SA)
Apr 27, 2016
19
0
0
Ohhhh this is just fantastic! The original plastic hinge finger was broken, i managed to machine a new metal part that looks like it, not only the door fits perfectly, but in a wild shot it also sits confortably on the brake wheel! It is centered vertically, and gives free space horizontally of few milimeters, WOW, i am amazed... Thats a good way to start the day!
 

Attachments

caution

Member (SA)
Mar 25, 2014
2,515
346
83
Boomboxery
Nice work! This is a tricky pin to get right since it's mostly round, but the top and bottom have flattened surfaces to allow the tape door hinge to slide onto the pin before it can turn freely. I had to replace one also, I crafted a new one out of plastic in the same shape, and welded it on with solvent, but yours looks even more durable than that.
 

MyOhMy

Member (SA)
Jul 26, 2015
2,509
7
0
71
Sleaford, Lincolnshire, UK.
Proutpouel said:
Ohhhh this is just fantastic! The original plastic hinge finger was broken, i managed to machine a new metal part that looks like it, not only the door fits perfectly, but in a wild shot it also sits confortably on the brake wheel! It is centered vertically, and gives free space horizontally of few milimeters, WOW, i am amazed... Thats a good way to start the day!
Well done indeed! :thumbsup: :rock:
 

Proutpouel

Member (SA)
Apr 27, 2016
19
0
0
Caution, its an old trick of mine, metal part, soldering gun, platic,... ;) place the piece where you want, heat it, you'll see plastic melting, be quick though, or, you'll end up misaligned. I am few mm misaligned and the door is few mm out in depth but it is well not enough to affect the tape. And finish the part with krazy glue after heating it ;) you're done!
 

BoomboxLover48

Member (SA)
Dec 3, 2010
5,763
275
83
Chicago, IL
Proutpouel said:
Caution, its an old trick of mine, metal part, soldering gun, platic,... ;) place the piece where you want, heat it, you'll see plastic melting, be quick though, or, you'll end up misaligned. I am few mm misaligned and the door is few mm out in depth but it is well not enough to affect the tape. And finish the part with krazy glue after heating it ;) you're done!
It works, but it is better to make a hole with a drill bit and then glue it together.
 

caution

Member (SA)
Mar 25, 2014
2,515
346
83
Boomboxery
Looks pretty good! Just some advice though... if you get into fixing more things - Krazy Glue will break down and crumble apart after a few years, it's not good for permanence. I wouldn't recommend using glues or epoxies to repair plastic. You were right to melt the plastic, but if possible, use a bonding solvent. It doesn't use heat, and is much less invasive to the original surfaces. It's great for fixing cracks and replacing fallen-off pieces. One tiny drop can be all it takes, it evaporates very quickly and makes a bond stronger than any glue can. Here's an example product, although there are many of them.
 

Proutpouel

Member (SA)
Apr 27, 2016
19
0
0
Really?! I sure will keep an eye for that :) i just came back from the electronic store, bought a virgin copper board to remake a new PCB and use copper plates instead of carbon traces to light up the Tape Run LEDs
 
Status
Not open for further replies.