Can anyone confirm what the torsion spring spec for Tape-1 door insert

Noshoeman

New Member
Nov 10, 2020
4
0
1
Markham
Hi Everyone,
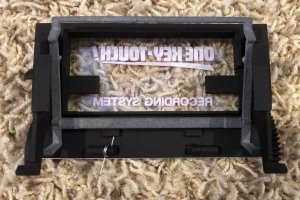
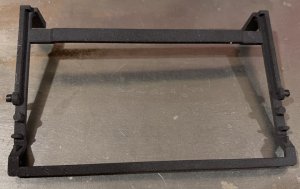
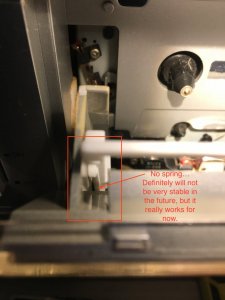
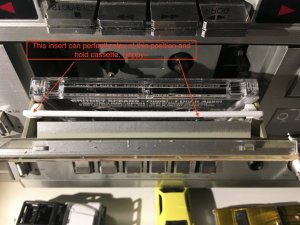
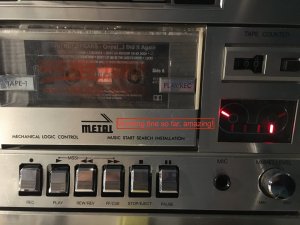
I recently got a Clairtone 7980 and found the Tape-1 not loading cassette correctly. Then I did some researches and found that a door insert is missing. I ordered a 3D printing replacement prod from https://www.shapeways.com/product/A...r-insert?key=71ad94ead90e0d5e90f1ccc445f6ba66
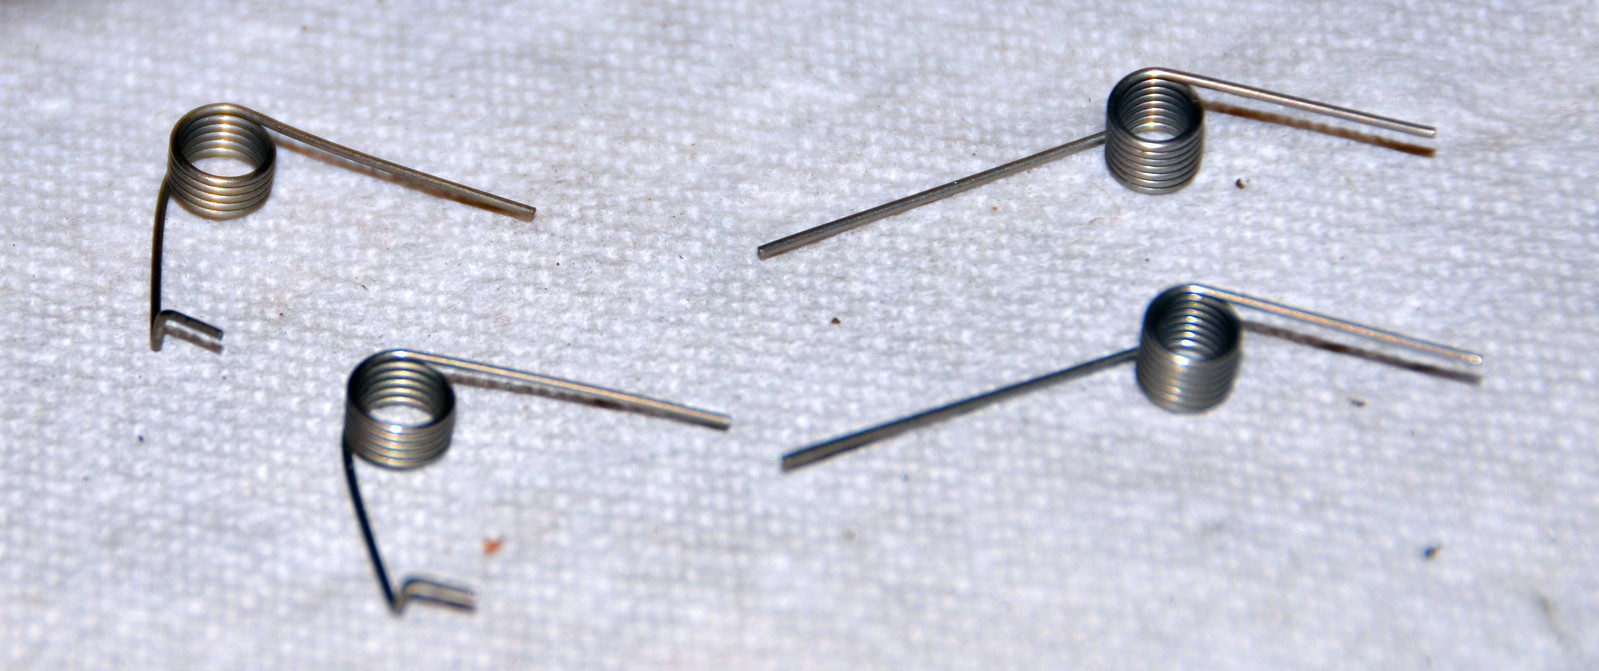
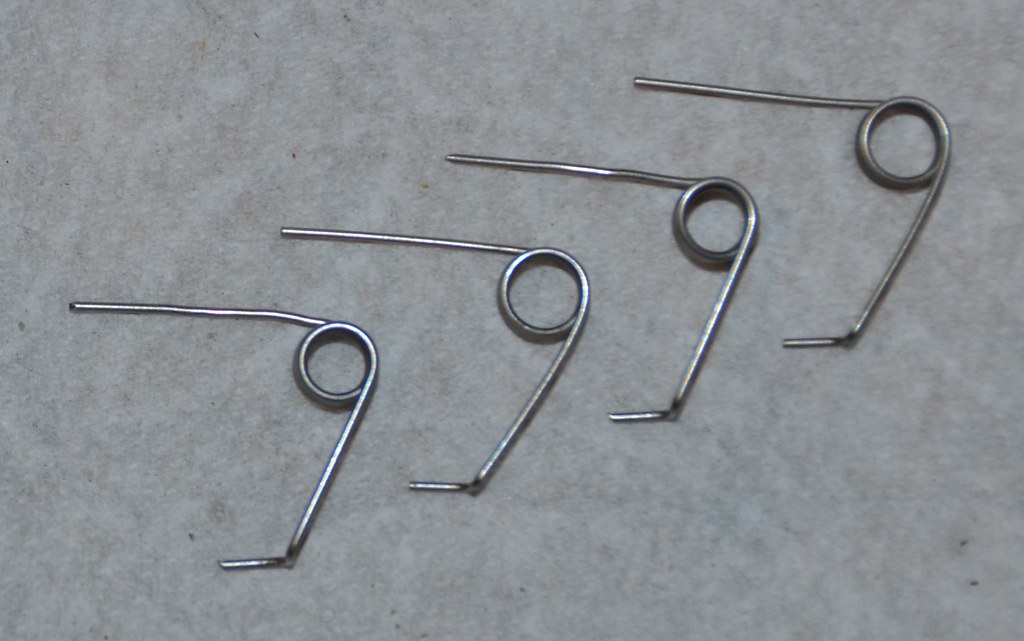
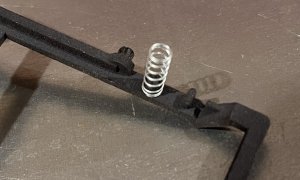
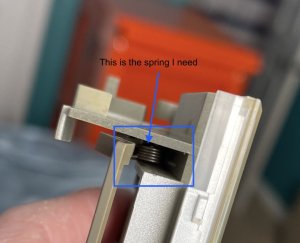
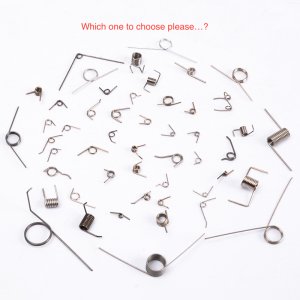
However, the 3D prod manufacturer told me I need 2 small torsion springs on each side of the bracket in order to work properly. From online store, I can see many kinds of mini torsion springs, but don't know which one to choose.

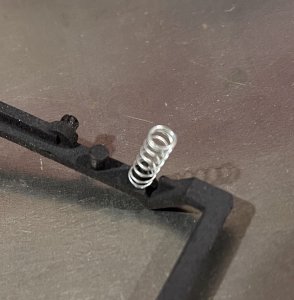
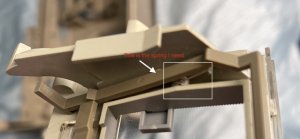
I attached the tape-1 door of mine as well as the pictures from network. Can anyone please advise the size/spec for these two springs?

Thanks and Happy holiday
 

Attachments

caution

Member (SA)
Mar 25, 2014
2,515
346
83
Boomboxery
You won't find them, they are a special shape.
I made a couple for my box from spare springs I found, here is some pics and the specs. Good luck!


  • Love
Reactions: Noshoeman

caution

Member (SA)
Mar 25, 2014
2,515
346
83
Boomboxery
By the way, if making springs doesn't work out, there's another option. You might've missed it, but the info on that page says "We also have a modified frame for use with compression springs in case the original ones are missing." I drew a second version (here) that has small posts on each side, which are meant to line up with posts on the custom printed door, in the full door kit, which uses trimmed-down pen springs.

You'll have to add posts to your door, that line up with posts on your insert. Not sure if there's enough depth on the door, but a small screw would probably work on the insert.
 
  • Like
Reactions: Noshoeman

Noshoeman

New Member
Nov 10, 2020
4
0
1
Markham
Thank you soooo much for the very useful and detail information!
I'll try to find some similar springs and DIY as per your spec. I guess it won't be easy for me, lol.

will update here when I have it done :D

You won't find them, they are a special shape.
I made a couple for my box from spare springs I found, here is some pics and the specs. Good luck!


Noshoeman

New Member
Nov 10, 2020
4
0
1
Markham
Yes, actually the 3D prod designer contact me later, saying that I should try the version you mentioned. And they also have all-in-one solution including replacement glass, replacement laser inscribed aluminum trim and all hardware necessary. That's definitely the ultimate solution to solve my problem, the only drawback is... a bit pricy :D

"Part of this system includes a custom bracket that has 2 compression spring pegs. In an attached image, you will see how the springs are mounted if you look closely. You won't be able to do this with the bracket you purchased since you purchased an OEM style bracket which does not have those pegs. However, the rectangular pegs which are located further up might be usable for this same purpose. Just showing you how we did it and providing you some ideas in case you can't find the original style torsion springs." ---- shapeways, 3d print designer


custom_door_bracket.jpg
(picture credit to shapeways, 3d print designer - meetgodzilla)

By the way, if making springs doesn't work out, there's another option. You might've missed it, but the info on that page says "We also have a modified frame for use with compression springs in case the original ones are missing." I drew a second version (here) that has small posts on each side, which are meant to line up with posts on the custom printed door, in the full door kit, which uses trimmed-down pen springs.

You'll have to add posts to your door, that line up with posts on your insert. Not sure if there's enough depth on the door, but a small screw would probably work on the insert.
 

Superduper

Member (SA)
Hey noshoeman:
I am the store vendor, and Caution who you are quoting is the one who created the 3D drawing so he is intimately familiar with the C100 door system, and the items being sold. Putting springs on the rectangular pegs is not an ideal solution because your door doesn't have the matching pegs on the door side, but might still work in a pinch. Unless the spring is the perfect length, the opposite end might squirm around a bit and if too long, might even curl up under. Just things to keep in mind. Caution posted the spring sizes you will need. It's gonna take some work (pliers and wire cutters) and possibly trial and error but you should consider making up a couple of those torsion springs first. At worse, you'll lose some time and a few bucks if it's not successful but you might possibly get a bit of fun out of the endeavor.

Attached are several images of the bracket. The one shown is the "modified" version with the extra coil spring pegs (round pegs). All of the brackets have the rectangular peg. On one image, you can see the spring on the round peg/perch. But you can see that the spring can also fit on the rectangular peg as well, though not as secure as the round one.

bracket_back.jpg

coil_spring1.jpg

coil_spring2.jpg
 
Last edited:
  • Like
Reactions: Noshoeman

Noshoeman

New Member
Nov 10, 2020
4
0
1
Markham
Wow, I don't know you are also here :D Thank you and @caution for providing those information to me.

Here as promised, I'm updating my current status that ----- IT WORKS GREATE WITHOUT ANY SPRING! AMAZING!

:D I got that 3D printed insert a few days back, today I got a chance to try it on my boombox to see exactly how the springs can fit in to support it. Guess what, this white 3D insert can just perfectly hold the cassette at a right position! Immediately, problem fixed! Not sure why, maybe because it is slightly tight that I squeezed it in with a bit force so it stays at the top position without support from spring. It might get loosing in the future, so very appreciate your posts for future reference and help. And, this is a really very good 3D printing product arrived in very well packaged bag.

Again, thanks everyone for your kind inputs .

IMG_5052.JPG

IMG_5051.JPG

IMG_5054.JPG


Hey noshoeman:
I am the store vendor, and Caution who you are quoting is the one who created the 3D drawing so he is intimately familiar with the C100 door system, and the items being sold. Putting springs on the rectangular pegs is not an ideal solution because your door doesn't have the matching pegs on the door side, but might still work in a pinch. Unless the spring is the perfect length, the opposite end might squirm around a bit and if too long, might even curl up under. Just things to keep in mind. Caution posted the spring sizes you will need. It's gonna take some work (pliers and wire cutters) and possibly trial and error but you should consider making up a couple of those torsion springs first. At worse, you'll lose some time and a few bucks if it's not successful but you might possibly get a bit of fun out of the endeavor.

Attached are several images of the bracket. The one shown is the "modified" version with the extra coil spring pegs (round pegs). All of the brackets have the rectangular peg. On one image, you can see the spring on the round peg/perch. But you can see that the spring can also fit on the rectangular peg as well, though not as secure as the round one.

View attachment 50939

View attachment 50940

View attachment 50941