Hi Guys,
Well I've been on a boombox maintenance/restoration blitz lately and my latest patient is my Hitachi TRK-9150W. This unit was purchased from Brian (Terry) months ago in a partly operational condition. The unit was pretty dirty, had a dead deck but a good tuner and the amp sounded strong.")
Upon inspection, I realised the deck was partly frozen with a jammed Pause key and Timer Edit key. I also couldn't operate the FFWD/RWD buttons when the unit was in play mode. The tape heads were completely rusted also so those would have to be replaced. The LCD clock was dead too so there was some work to do.
I quickly got the LCD display working OK but if you've ever had one of these tank Hitachis' apart, you would know how much of a pain the decks are to work on. So there I was months ago with a nice sounding radio with an excellent Line In but the deck remained non-operational (my pet hate).
Fast forward a few months and a half dozen completed restorations, I was now prepared to tackle the TRK-9150W!
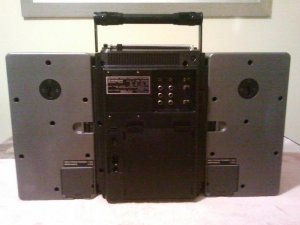
View attachment 3116
View attachment 3117
Speakers detached:
View attachment 3118
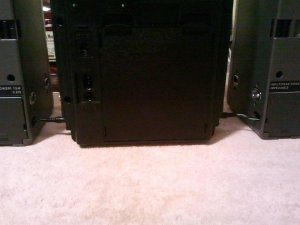
The back removed after disconnecting around 12 wires.
View attachment 3119
View attachment 3120
Five more screws removed, control knobs removed and the top panel removed. Time to pull the chassis:
View attachment 3121
At this stage, I got to work disconnecting the tape heads and tape counter which had lost its' numbers.
Then I de-soldered the deck motor power wires and the earth wire. After removing the 4 deck screws, the deck can now be moved about 5 cms - just enough room to get a small screwdriver in to remove the micro switch behind the deck. Then the deck can be flipped over just enough to get access to the 2 white wires that need to be be unscrewed from the deck motor. OK, now finally the deck could be lifted free!!
Now it was time to fit the replacement tape heads from my parts box. After flipping the deck over, I got to work freeing up the frozen pivot point in the Pause mechanism - that took over 20 minutes just to isolate the offending part.
View attachment 3122
Deck as removed - one intact but loose tape counter belt, the rest were a sticky mess plus jammed/seized mechanisms. This deck has obviously been non-operational for many years+! Look at the size of this Hitachi deck - it's huge!
View attachment 3123
After lubricating and rebelting the deck, I realised one of the idler wheels was sticky as it wasn't spinning freely when turning the flywheel. My parts box came to the rescue again with a free spinning part that fixed the problem. Unfortunately, after removing this part, I saw that the plastic post the part pivots on had broken free from its' base. Super glue and JB weld came to rescue again and it's now repaired!
After reassembly, I can say that this deck now sounds beautiful. No warble, correct speed (non adjustable motor by the way), clear bass, mids and highs and the auto stop works correctly!
I love the two flashing lights that tell the user the deck is in operation - very cool!
Quick video showing the unit first playing the radio, then recording the radio, then playing back the new recording:
http://youtu.be/-2yPDvXGpjQ
Thanks,
James...")
Well I've been on a boombox maintenance/restoration blitz lately and my latest patient is my Hitachi TRK-9150W. This unit was purchased from Brian (Terry) months ago in a partly operational condition. The unit was pretty dirty, had a dead deck but a good tuner and the amp sounded strong.
Upon inspection, I realised the deck was partly frozen with a jammed Pause key and Timer Edit key. I also couldn't operate the FFWD/RWD buttons when the unit was in play mode. The tape heads were completely rusted also so those would have to be replaced. The LCD clock was dead too so there was some work to do.
I quickly got the LCD display working OK but if you've ever had one of these tank Hitachis' apart, you would know how much of a pain the decks are to work on. So there I was months ago with a nice sounding radio with an excellent Line In but the deck remained non-operational (my pet hate).
Fast forward a few months and a half dozen completed restorations, I was now prepared to tackle the TRK-9150W!
View attachment 3116
View attachment 3117
Speakers detached:
View attachment 3118
The back removed after disconnecting around 12 wires.
View attachment 3119
View attachment 3120
Five more screws removed, control knobs removed and the top panel removed. Time to pull the chassis:
View attachment 3121
At this stage, I got to work disconnecting the tape heads and tape counter which had lost its' numbers.
Then I de-soldered the deck motor power wires and the earth wire. After removing the 4 deck screws, the deck can now be moved about 5 cms - just enough room to get a small screwdriver in to remove the micro switch behind the deck. Then the deck can be flipped over just enough to get access to the 2 white wires that need to be be unscrewed from the deck motor. OK, now finally the deck could be lifted free!!
Now it was time to fit the replacement tape heads from my parts box. After flipping the deck over, I got to work freeing up the frozen pivot point in the Pause mechanism - that took over 20 minutes just to isolate the offending part.
View attachment 3122
Deck as removed - one intact but loose tape counter belt, the rest were a sticky mess plus jammed/seized mechanisms. This deck has obviously been non-operational for many years+! Look at the size of this Hitachi deck - it's huge!
View attachment 3123
After lubricating and rebelting the deck, I realised one of the idler wheels was sticky as it wasn't spinning freely when turning the flywheel. My parts box came to the rescue again with a free spinning part that fixed the problem. Unfortunately, after removing this part, I saw that the plastic post the part pivots on had broken free from its' base.
Super glue and JB weld came to rescue again and it's now repaired!After reassembly, I can say that this deck now sounds beautiful. No warble, correct speed (non adjustable motor by the way), clear bass, mids and highs and the auto stop works correctly!
I love the two flashing lights that tell the user the deck is in operation - very cool!
Quick video showing the unit first playing the radio, then recording the radio, then playing back the new recording:
http://youtu.be/-2yPDvXGpjQ
Thanks,
James...


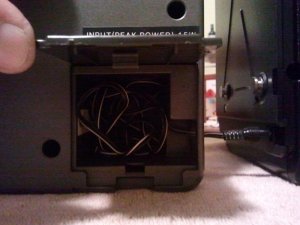


 . BTW, do you happen to know where this part belongs to ? I found it in battery compartment and assuming it's mechanical part of the deck.

