Aiwa 950 rebelt (*started*) very PIC heavy

docs

Member (SA)
Jun 26, 2010
2,558
381
83
52
United Kingdom
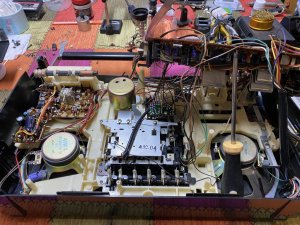
Thought as i go through this hideous rebelt I would document for others. I tend to work in sections and will post more as I progress and hopefully the photos will be useful to others in the future,

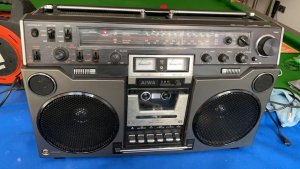
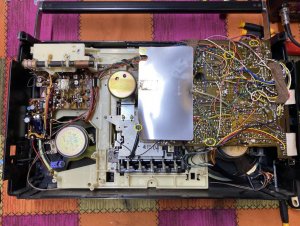
In all it's glory, it is a magnificent all rounder and this one was a bargain thankfully.
01.jpg

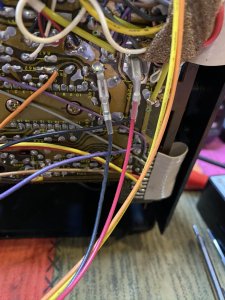
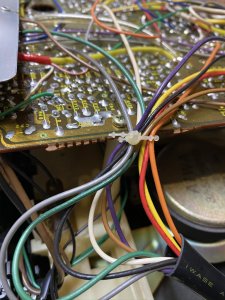
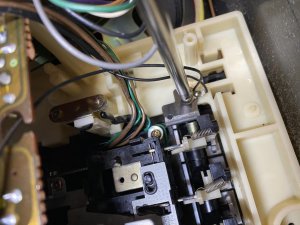
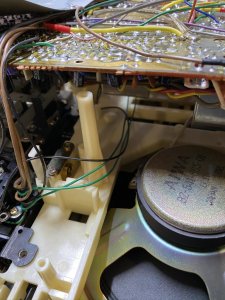
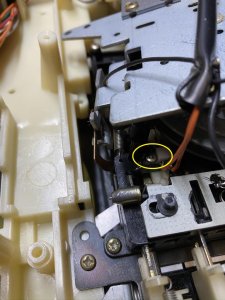
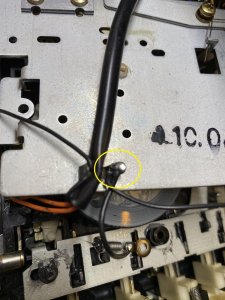
Upon opening look out for the antenna connectors in the top left section.
02.JPEG

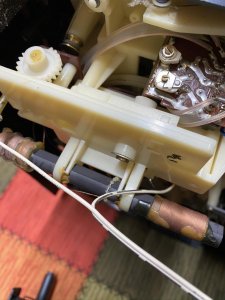
Antenna connector 1.
03.JPEG

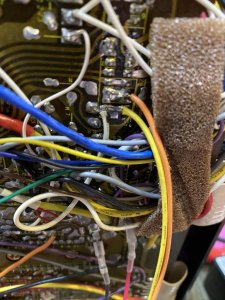
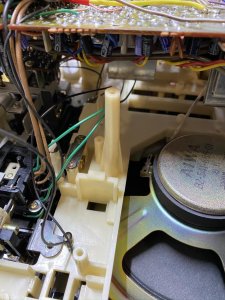
Antenna connector 2 with a black line on the white sheath to differentiate it from the other wire.
04.JPEG

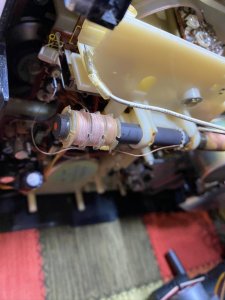
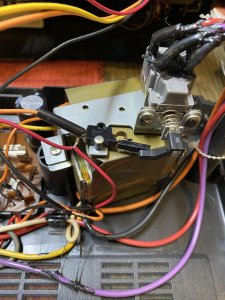
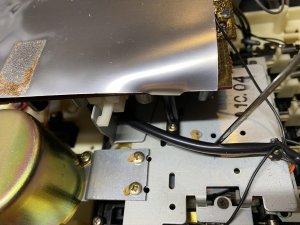
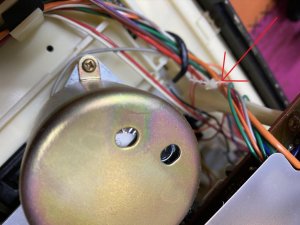
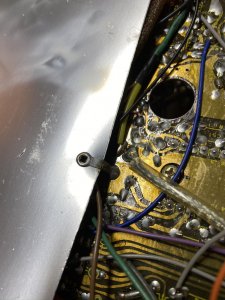
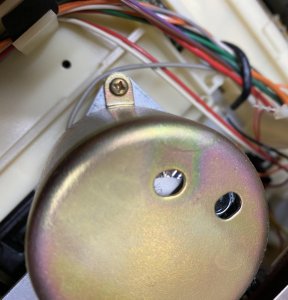
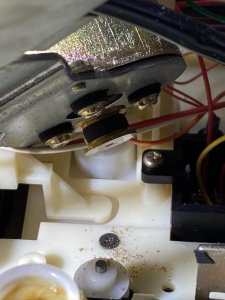
Amazingly, there are two connectors from the power transformer. I say this because it looks like most wired connections are soldered :(
05.JPEG

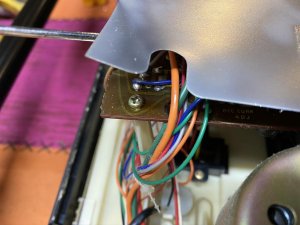
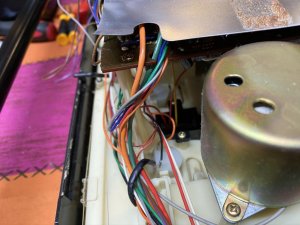
These two (Orange and Yellow) are connected to the power switch which is weirdly directly attached to the transformer.
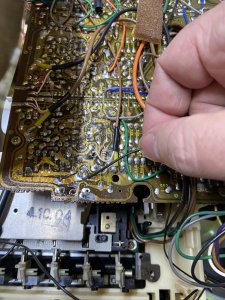
You should really desolder these two to make it easier when working on the main chassis.
06.JPEG

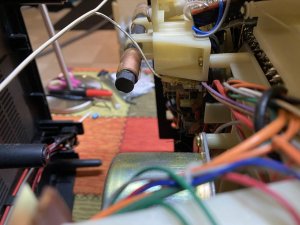
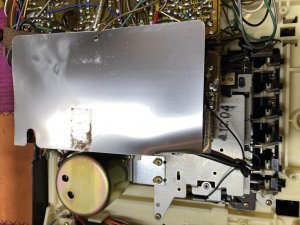
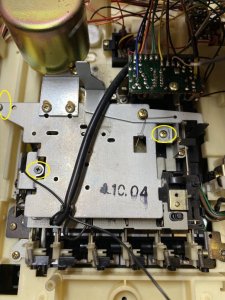
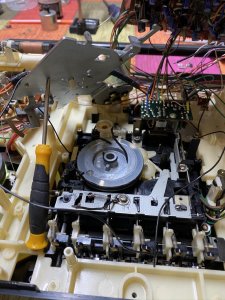
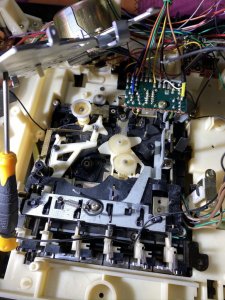
You can then remove the back case cover.

The rear case with the transformer and power switch...
07.JPEG
 

docs

Member (SA)
Jun 26, 2010
2,558
381
83
52
United Kingdom
Looking at the back of the unit, it doesn't appear to be straight forward to remove the PCB and access the deck...
08.JPEG

An Aiwa speciality, partially blocking access to the deck with the PCB and a mess of wires soldered all over the place.
These are lovely units and very well made, sadly internally designed and built by what I would call a moron...
09.JPEG

At first glimpse there looks to be at least 4 screws holding the PCB in place, not sure, but it doesn't look like it will be free enough to give enough space to work on the deck after these 4 screws are removed. More desoldering?
10.JPEG

11.JPEG

12.JPEG

13.JPEG
 

Grateful Dad

New Member
Feb 12, 2017
5
0
1
The service manual is free at HiFi Engine. There are 5 screws on the PC board to remove to allow access to undoing the back of the mech. to access the belts.
I just re-belted by 955.
Good luck.
 

Tinman

Member (SA)
Mar 4, 2019
514
258
63
USA
I rebelted a 950 earlier this year and these pics are bringing some bad memories back.
I kept thinking that it looked like they gave a soldering iron and a handful of wires to a 10 year old and turned them loose on it.
I ended up cutting several wires to gain access to different parts.
I soldered them back as I put it back together.
I believe I even lengthened some to make it easier on the next person.
It's funny how you forget how amazingly disorganized the inside is when you're done and hear how great the box sounds.
 

docs

Member (SA)
Jun 26, 2010
2,558
381
83
52
United Kingdom
Grateful Dad said:
The service manual is free at HiFi Engine. There are 5 screws on the PC board to remove to allow access to undoing the back of the mech. to access the belts.
I just re-belted by 955.
Good luck.
Perfect, I thought there might be another but I just had a quick look before actually trying it out, will update as I go.
I realise that many people may have already belted this or dare not to have a go but I thought a few pictures and descriptions would go a long way to hopefully leading others to having a go.
Like the 990, it'll be worth it in the end :yes:


Tinman said:
I rebelted a 950 earlier this year and these pics are bringing some bad memories back.
I kept thinking that it looked like they gave a soldering iron and a handful of wires to a 10 year old and turned them loose on it.
I ended up cutting several wires to gain access to different parts.
I soldered them back as I put it back together.
I believe I even lengthened some to make it easier on the next person.
It's funny how you forget how amazingly disorganized the inside is when you're done and hear how great the box sounds.
Agreed, just seems like the last finishing touches were somewhat rushed.
Not a bad idea extending some of the wires which need to be longer to be able to hold the PCB towards the top out of the way.
 

Radio raheem

Member (SA)
May 13, 2009
4,959
909
113
uk
These sound better than the 770 880, such a shame they are a pita to do, good luck with it Dave lad
 

Funkateer38

Member (SA)
Apr 24, 2017
142
13
18
Good idea to illustrate the steps to change the belts. For mine, I opened and in front of all its welded wires that block access to the cassette player, I closed
 

docs

Member (SA)
Jun 26, 2010
2,558
381
83
52
United Kingdom
Lifting the main PCB:

Remove the 5 screws holding the PCB seen here with little yellow circles which are a bit hard to see:

08.JPEG

Remove or open the following clips:

Remove this clip holding the wires to the post - red arrow:
01.JPEG

Open clip:
02.5.jpeg

Open further clip in top section above PCB:
02.JPEG

Open clip at lower right of deck:
03.JPEG

Remove screw with grounding cable in lower right of deck:
04.JPEG

Remove this clip for wires on lower side of PCB:
05.JPEG

Move these 3 wires to the other side of the post:
06.JPEG

07.JPEG

Desolder the main clip on the silver cardboard protector:
08.JPEG

Under the silver insulator, desolder the black wire here:
10.JPEG

Prop up the PCB to allow access, I used a screw driver into the lower screw hole:
11.JPEG

Remove the screws holding the back plate of the deck:
12.5.jpg

12.JPEG

Remove this screw to free the microswitch:
13.JPEG

14.JPEG

Desolder the small black wire from the retainer here:
15.JPEG

Lift the plate to discover the goo!
Use a screwdriver to hold the plate up to allow access:
16.JPEG

Remove the capstan wheel to clean and clean the other areas as needed:
17.JPEG

Don't forget to clean any goo off the motor:

18.JPEG

That's it! once you are to here you can try your belts and put everything back together in reverse order.
Tricky bits are putting the microswitch back in while not losing the belts on the motor and trying to fit a new counter belt.

Hope it proves useful for others.
 

BoomboxLover48

Member (SA)
Dec 3, 2010
5,752
273
83
Chicago, IL
I was about to buy one and gave up on it, seeing the trouble Dave has to go through! :yes:
Royal pain in the place where Sun never shines! :w00t: :lol:

This is a real nightmare! ;-) :blush:
 

Tinman

Member (SA)
Mar 4, 2019
514
258
63
USA
Believe it or not, you got lucky.
The belts on mine were like bits of tar strewn all around the box.
I had to take everything out to clean it properly.
Unless you've dealt with belts in that condition, it's hard to believe they can turn into something so filthy, gooey and hard to clean.
Congrats on being so patient to not only do the job but document it for others to follow.
 

tpd67

Member (SA)
Jan 18, 2020
1
0
0
Hello,

Can you tell me where you got the new belts from? Are you replacing the pinch roller as well?

Tim
 

T-STER

Member (SA)
Jul 14, 2014
2,246
73
48
UK
Epic work Dave and so good that you documented it for others, i did mine a long time ago and would of appreciated this guide so much.
 

Ghettoboom767

Member (SA)
May 6, 2009
4,307
56
48
USA
Wow,darn Aiwas a’s,all hard wired-no fun! Your really good and patient to do this,looks almost like a Sanyo 9998 nightmare!😮