Lettering and decals - solved

Huffers

Member (SA)
Apr 25, 2019
108
84
28
Billericay, Essex, UK
Hi all,
It’s been a few weeks since I posted anything. I have had some really helpful feedback on here so thought I would share what I have been up to.
I have been in search for a way to create my own decals for a boombox. This way you would be able to save even the roughest case and potentially bring it back to life by respraying and reapplying the original decal work. keeping true to the original spec. I did ask on here but I was surprised with the lack of comments, so get the impression not many people have taken on this challenge.
Not to be put off I continued my search. I mean these boomboxes were manufactured 40 years ago, surely I have the technology to recreate it. Well that’s what I thought anyway. So after a lot of searching I found what I think is a viable solution. When I say viable it doesn’t mean it’s easy and I nearly gave up several times. It was definitely a learning curve. But after several attempts and many expletives I think I have a method that I would certainly try again.

I can’t take the credit as I found the initial solution at https://pulsarprofx.com/
But this needed a bit of refinement.

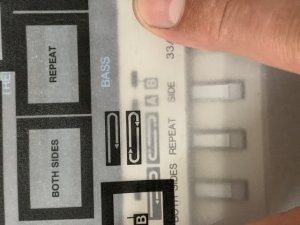
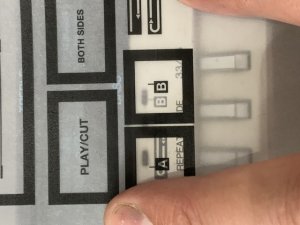
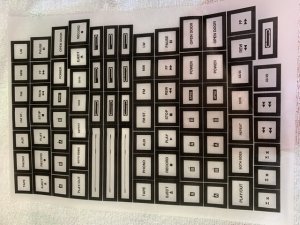
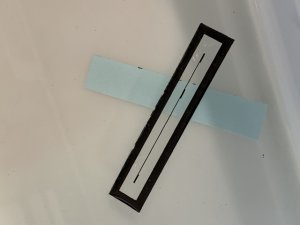
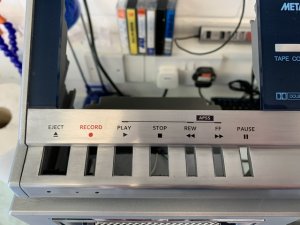
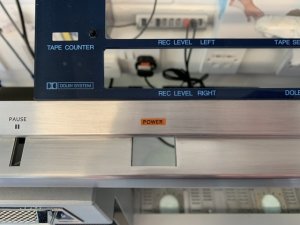
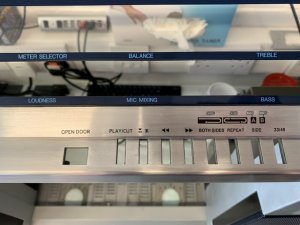
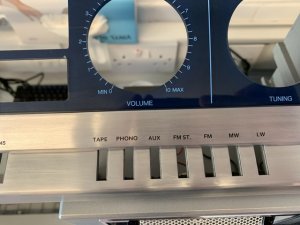
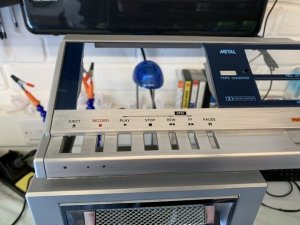
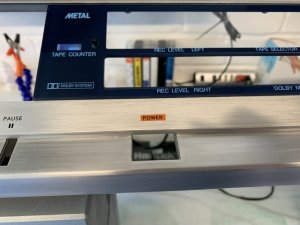
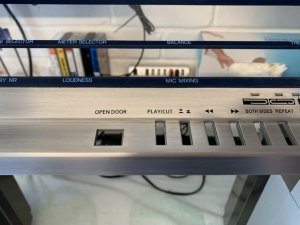
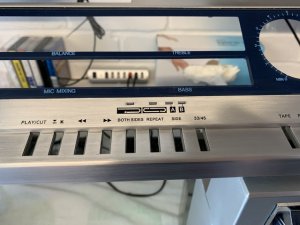
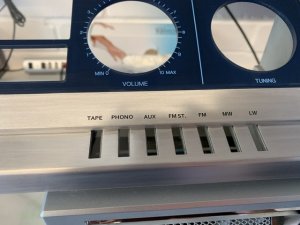
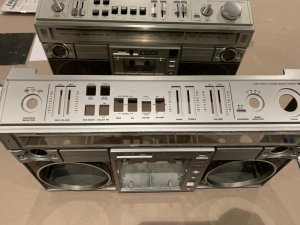
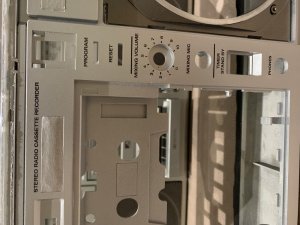
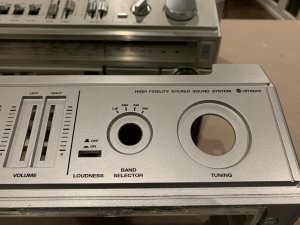
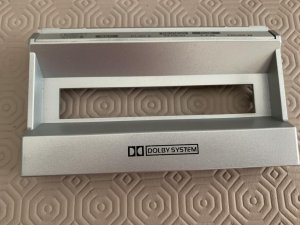
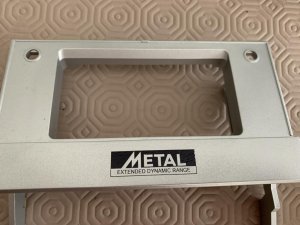
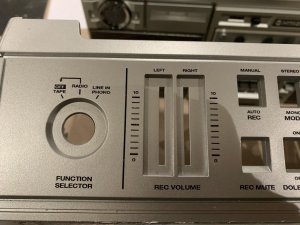
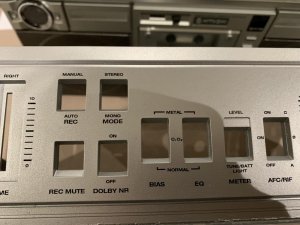
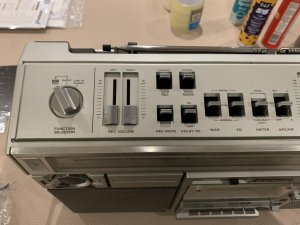
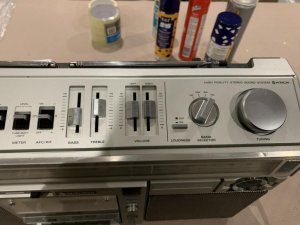
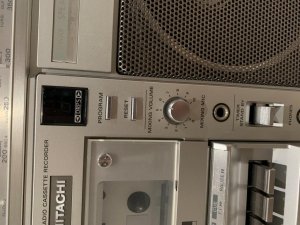
Anyway here are some pictures of a Hitachi TRK-8290 case that has been resprayed and new decals created and applied by myself. I have also included 3 pictures of an original TRK-8290 so you can compare the new decals with the old. Some are better than others, I was certainly getting better towards the end so practice definitely makes perfect.
Would really appreciate some feedback to see what you guys think. If it would be of interest to anyone happy to write up my experience and tips and share in here when I have some time.
 

Attachments

Fatdog

Well-Known Member
Staff member
May 3, 2009
10,900
127
63
Holy moly! Apart from the "Dolby" and "Metal" lettering, that looks really damn good! :thumbsup: :cool: :yes:

I used to build model planes when I was younger, and remember trying that decal kit. I don't know the cause, but I never had excellent luck with it. Something always seemed to go wrong at some point.
 

Dbzerk

Member (SA)
Oct 28, 2017
342
13
18
42
Melbourne Australia
Looks amazing!
Is it costly?
How do you create the art work?
What's involved in the application process?
Sorry about the Q's... I'm excited to hear
 

sernas88

Member (SA)
Sep 20, 2018
69
3
8
49
Ireland
I want to know as well :yes:


Dbzerk said:
Looks amazing!
Is it costly?
How do you create the art work?
What's involved in the application process?
Sorry about the Q's... I'm excited to hear
 

Huffers

Member (SA)
Apr 25, 2019
108
84
28
Billericay, Essex, UK
Hi all. Thanks for the replies. Yes a couple of the labels (Dolby and metal) are a little dodgy, these were my earlier attempts I was definitely getting better with practice.

I will do a full write up when I have some time. But will try to answer some of the initial questions.
I probably spent about £80 to get started. But now have The materials to do a few more before having to purchase anymore.
There are a few things you need before that:

A laser printer. Ink jet is no good must be laser. I actually found a cheap secondhand one on eBay which worked perfectly.
A laminator. The ones used to do the hot laminating pouches. I already had one of these which worked fine. There is some discussion about suitable models but I didn’t have any big issues with mine you can probably get one for about £30
Hot air gun. You can get these pretty cheap about £15. I actually used a hairdryer but mine was 1800w so pretty powerful. General view is that the hot air gun is best.

In terms of producing the graphics. I only used Microsoft Word, nothing more special than that. I found the best approach was to put the case on a scanner and scan a picture of the graphics I wanted. I would think you could also take a photo as long as you take the picture square on so not to distort the image.
I then put this picture into word, took a reference measurement between 2 points on the case so that I could scale the image in Word to actual size. From here I could then overlay my graphics on the original to get a very close match in terms of dimensions, letter size, spacing etc.
Once you have the graphic you can delete the picture.
I found a great free font based on serif that was an almost perfect match to the original text in the boombox so the writing was really easy to do. The rest of the graphics were pretty basic. Mainly straight lines so again not to difficult to recreate. I even created the Hitachi logo from scratch, looks complicated but broken down it was really only circles triangles and straight lines.

Once you have the graphic is when the fun begins. I will put a link to the initial guidance document that was my original basis I then tweaked. it will give you a good high level overview.

https://decalprofx.com/Vertical/3_LIBRARY/3f_Instructions/Instructions.pdf
Here is the instruction manual from the site.

High level process
1 create artwork
2 print onto special PCB paper using a laser printer
3 apply TRF to artwork using laminator. This is Toner reactive foil. Basically this foil sticks to the laser toner when heat and pressure is applied
4 you then have to apply a very thin Mylar carrier to the top of the image. Tricky part you use the laminator again but the only thing that holds it is static
5 put in water which will release the paper backing from the PCB paper. This should leave just the artwork on the clear Mylar carrier
6 spray very thin layer of adhesive to the artwork
7 position the artwork where you want to apply it and rub over the artwork
8 peel back the Mylar Carrier
9 spray a thin layer of clear lacquer over the finished item to seal and protect

This is a simplified view of the steps to give an idea of the process.
 

Brutus442

Member (SA)
Jan 7, 2012
1,286
415
83
Toronto, Canada
This is a game changer for the resto crowd for sure. Great work and amazing write up. I can see a new sub directory of this forum being created for box images and company logos :thumbsup:


Is the decal as durable or scratch resistant or at least as durable as the original? I'd fear an errant fingernail turning the volume up would damage the beautiful work.
 

Huffers

Member (SA)
Apr 25, 2019
108
84
28
Billericay, Essex, UK
So what I did was spray the case, then apply the decals then over spray with clear lacquer. I used car spray.
I wouldn’t trust the lettering on it own without lacquering over the top but should be hard wearing with the overcoat.

Over the next few days. I will do a fully detailed write up of the materials you need and the detailed steps including some tips that I have found during my experience. Will post it when I can.
Brutus442 I agree would be good to have a place where people can share their pictures and tips.
 

Brutus442

Member (SA)
Jan 7, 2012
1,286
415
83
Toronto, Canada
Thanks for the response. A clear lacquer would be a perfect cover and car products are very robust.

I'll be paying a lot of attention to this thread! Thanks!

:popcorn: :popcorn: :popcorn: :popcorn:
 

Huffers

Member (SA)
Apr 25, 2019
108
84
28
Billericay, Essex, UK
Hi Everyone. Just a quick update. I am currently working on a detailed breakdown of the full process, including all equipment and materials required, hints and tips. I will post this over the new few days. I will also create the guide as a PDF and try to upload that as well.
 

Huffers

Member (SA)
Apr 25, 2019
108
84
28
Billericay, Essex, UK
Hi All.
apologies I have not updated this thread for a while. Just wanted to add my latest decal work. On a current restoration of a Sharp VZ2000. The front case was in a really poor state with many cracks so decided to completely strip it down and respray.
I refinished the aluminium trim and re-applied all the decals. This has been a really useful learning experience and have managed to improve the process. So on the back of this I will be completing the detailed write up and hope to post here soon.
 

Attachments

  • Like
Reactions: DPaignall