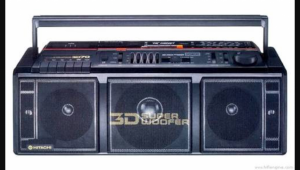
Hi Guys,
A while ago I posted a thread about a cheapie 3D7 I scored. Since the restoration, this box has seen some very heavy use as it's just such a great box. The only 'issue' I have with this particular model is the penny pinching fixed AC lead you have to contend with. Continually rolling it up and pulling it out after each outdoor use is a real pain so it was time to do an upgrade.
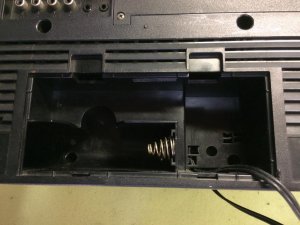
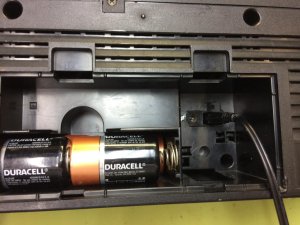
First thing to do was to find a suitable location for the new AC cable input. I didn't want to have a messed up rear panel so a connector that sat inside the battery compartment seemed like the way to go:
It does mean you have to remove the battery cover to plug and unplug the cable but that's much more convenient than rolling up that stupid fixed cable.")
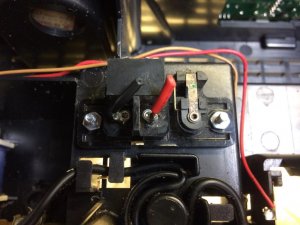
Ok, now what sort of input should we use? The answer was the input from a parts Sanyo M9998. I noticed the Hitachi TRK-9150 uses an identical AC input.
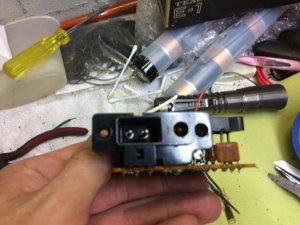
Next I had to desolder the connector from the circuit board it's attached to. As the Hitachi has a separate AC/DC switch, I won't need to use the battery defeat switch on the connector.
I also won't need to use the 12V input as the Hitachi already has one.
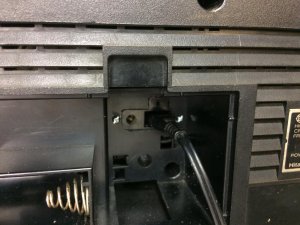
Now it was time to cut a hole for the connector to pass through.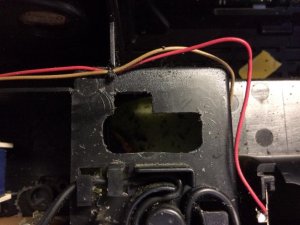
Just had to visit the hardware store for some fine thread nuts and bolts of the right size. I didn't want to risk using self tappers for this job.

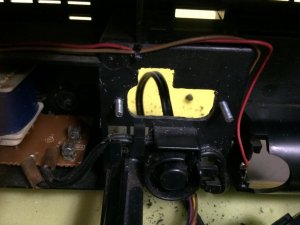
With the plastic cover fitted: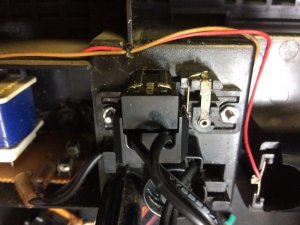
Next I had to thoroughly clean out all the plastic shavings that tend to get everywhere inside the box.
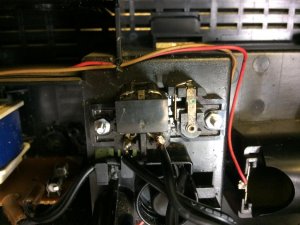
All finished and operational:
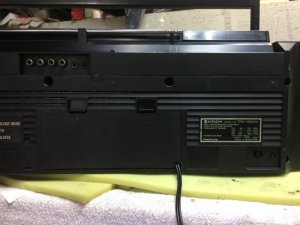
As the power cord still passes through the corner of the battery cover, from the outside, the Hitachi still looks factory.
I know it's not a big deal but if you've spent anytime cranking a 3D7, 3D8 etc, you'll understand why I bothered to do this hack.
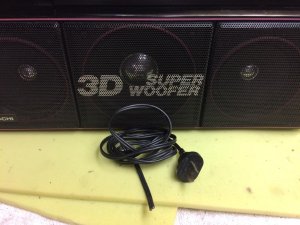
Old power cord be gone!!!
Thanks guys,
James....
A while ago I posted a thread about a cheapie 3D7 I scored. Since the restoration, this box has seen some very heavy use as it's just such a great box. The only 'issue' I have with this particular model is the penny pinching fixed AC lead you have to contend with. Continually rolling it up and pulling it out after each outdoor use is a real pain so it was time to do an upgrade.
First thing to do was to find a suitable location for the new AC cable input. I didn't want to have a messed up rear panel so a connector that sat inside the battery compartment seemed like the way to go:
It does mean you have to remove the battery cover to plug and unplug the cable but that's much more convenient than rolling up that stupid fixed cable.
Ok, now what sort of input should we use? The answer was the input from a parts Sanyo M9998. I noticed the Hitachi TRK-9150 uses an identical AC input.
Next I had to desolder the connector from the circuit board it's attached to. As the Hitachi has a separate AC/DC switch, I won't need to use the battery defeat switch on the connector.
I also won't need to use the 12V input as the Hitachi already has one.
Now it was time to cut a hole for the connector to pass through.
Just had to visit the hardware store for some fine thread nuts and bolts of the right size. I didn't want to risk using self tappers for this job.
With the plastic cover fitted:
Next I had to thoroughly clean out all the plastic shavings that tend to get everywhere inside the box.
All finished and operational:
As the power cord still passes through the corner of the battery cover, from the outside, the Hitachi still looks factory.
I know it's not a big deal but if you've spent anytime cranking a 3D7, 3D8 etc, you'll understand why I bothered to do this hack.
Old power cord be gone!!!
Thanks guys,
James....