First of all, my deeply felt thanks to those who started and contributed to the post "JVC / Victor RC 838: Channel Balance Issues", for inspiration as well as insights.
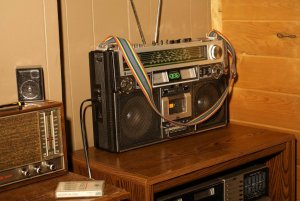
It is so well known among RC 838 owners that one of the channels may not work properly. On mine, R channel will be dead in "Stereo" mode. You may hear from it, to a point, in certain other Mode or Modes, just because the design allows some audio signal to come through from the other channel for certain sound effects, as far as I understand. Information so far points to the failed audio related sliders as culprit in most cases.
To work on mine, I carefully removed the chassis. With a scheme in hand, I quickly found I was still lucky because the Volume pot was working for both L and R channels.
However, all other 3 - Bass, Treble and Balance sliders did have problem! If you look carefully and check closely with a good flashlight, you may visually find out what went wrong with them even without removing them from PCB.
Important clues include fallen contact brushes and uneven wears. What you need to do next is to remove and rebuild the failed ones.
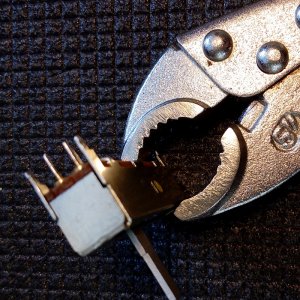
The photo below shows a fallen contact brush on the left:
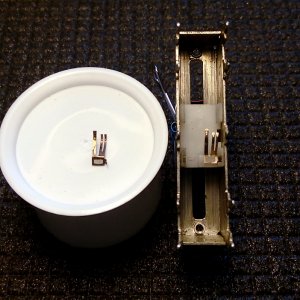
Here you can see the wears are uneven because 1 of the contact brushes became loose, or got off base entirely as in my case. Also worth noting is the pot for Balance (on the right in the photo, with "black & white stripes"), an M / N type pot that can be very hard to find on the market now:
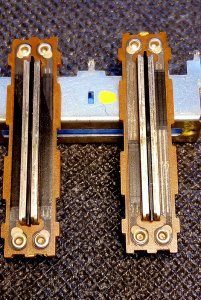
This is also time to check the glue markings on the ends of each stripe. Don't hesitate to touch up with some conductive glue if you see ANY opening, or just a hairline crack there:
It is so well known among RC 838 owners that one of the channels may not work properly. On mine, R channel will be dead in "Stereo" mode. You may hear from it, to a point, in certain other Mode or Modes, just because the design allows some audio signal to come through from the other channel for certain sound effects, as far as I understand. Information so far points to the failed audio related sliders as culprit in most cases.
To work on mine, I carefully removed the chassis. With a scheme in hand, I quickly found I was still lucky because the Volume pot was working for both L and R channels.
However, all other 3 - Bass, Treble and Balance sliders did have problem! If you look carefully and check closely with a good flashlight, you may visually find out what went wrong with them even without removing them from PCB.
Important clues include fallen contact brushes and uneven wears. What you need to do next is to remove and rebuild the failed ones.
The photo below shows a fallen contact brush on the left:
Here you can see the wears are uneven because 1 of the contact brushes became loose, or got off base entirely as in my case. Also worth noting is the pot for Balance (on the right in the photo, with "black & white stripes"), an M / N type pot that can be very hard to find on the market now:
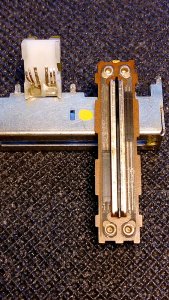
I glued it back using JB Weld, which was highly recommended by a senior member here for most plastics. I also took the opportunity to reinforce the brush that still held its position, with just a tiny drop of JB Weld. This is also time to check the glue markings on the ends of each stripe. Don't hesitate to touch up with some conductive glue if you see ANY opening, or just a hairline crack there:
\
To re-assemble, make sure to use the right tool to precisely control how far you can go and NEVER over-tighten:
My unit started to work again after the 3 pots were rebuilt and put back. As I could see no other issues to attend to, I replaced the the tuning light with an LED and added LED's to the 2 VU meters as well, just to make it look nicer:
 Those tiny brushes are super thin and love to go flying across the room with the slightest grasp. :annoyed:
 I had a similar, but worse, problem with slider brushes (
")