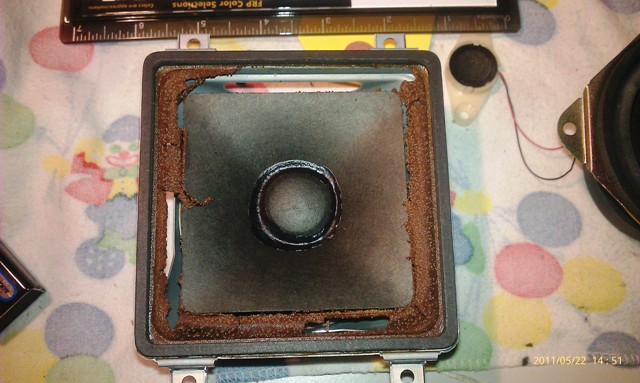
I have recently acquired a Pioneer that had...you guessed it...square woofers...with rotted foam. 
I already had a CK-5F with bad foams which Prime (Brett) handled beautifully for me as I didn't have time to diddle with it a couple of years ago. And though it is doing beautifully as of now, what happens if the foam should go bad again? I also have some Sony's with APM's. What about those? Given foams inherent issues when subject to humidity I decided to make what very few speakers have...fabric reinforced rubber surrounds.
These were done on 4" square cone woofers. The larger the woof, the easier it will be. The same principles apply no matter the shape of the speaker. I hope this will be a great asset for those who can't get specialty sizes anymore. Let's be honest, it's getting pretty damn hard to get speaker surrounds.
Now I know there is a Japanese thread on how to do this with chamois. Here's why I don't like it.
1. Not very suitable to small speakers.
2. Natural chamois can degrade faster than rubber impregnated cloth. Plus getting a chamois thin enough to shape for a very small speaker with enough flexibility is tough. The throw of the speaker is very important and the thickness of material is a very important factor.
3. I believe the combination of rubber and fabric is the best of both worlds. The rubber impregnation inhibits fabric breakdown and gives great moisture resistance while the fabric reinforces the rubber and aids in helping rubber withstand "drying' conditions which it may become brittle.
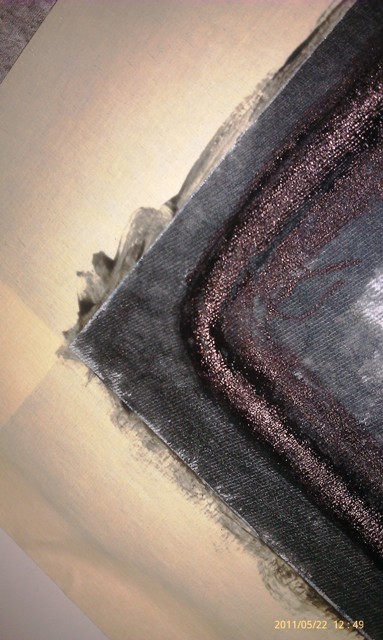
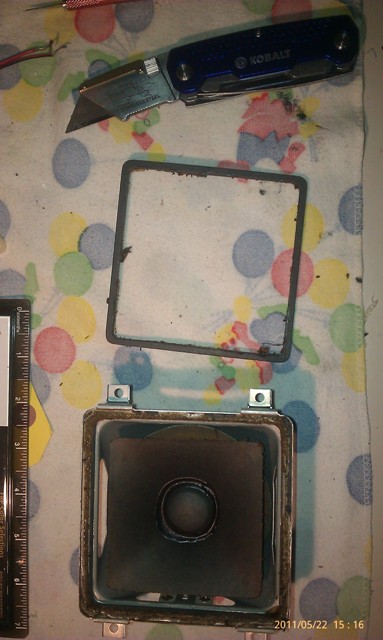
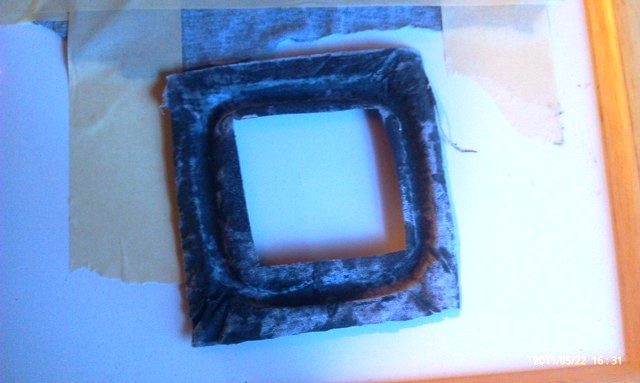
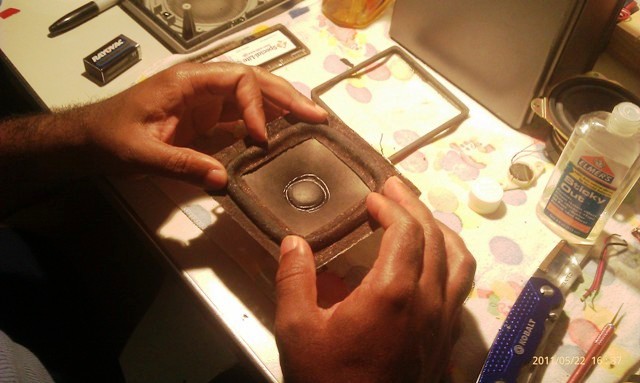
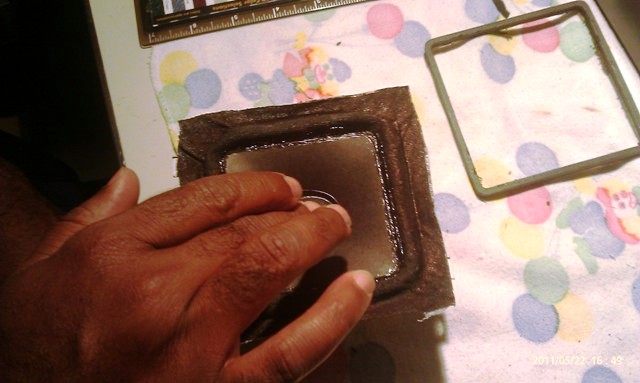
See a corner of the first one I did below...instructions follow.")
First a few things you will need to have on hand...
1. Old T shirt, preferrably gray so you can see it as it dries. You'll see why later.
2. Paint brushes. Plan on trashing these when done. Even with tolulene to thin the liquid rubber material it's a loss. They're cheap enough.
3. Scissors and box cutter, X-acto knife, old plastic card. (Spatula or putty blade will work also.)
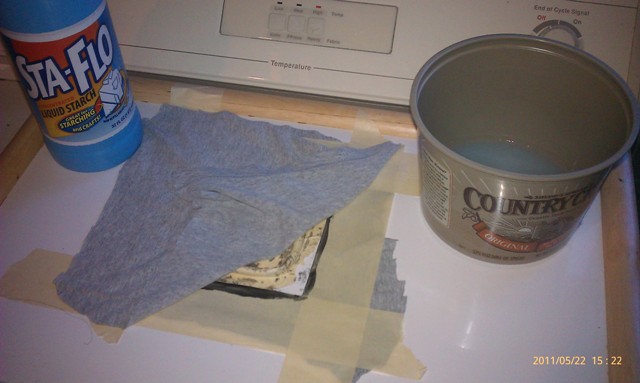
4. Sta-Flo liquid starch and bowl.
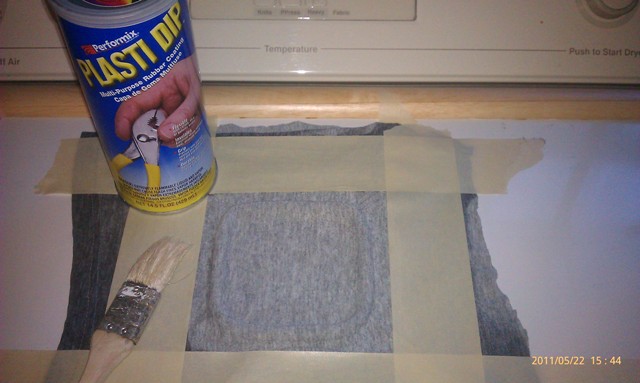
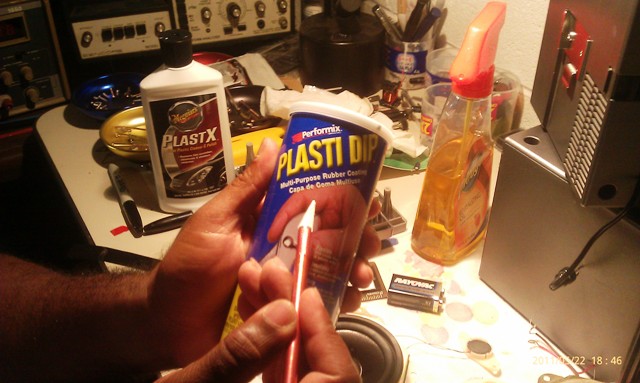
5. Plasti-Dip rubber coating. (DO NOT USE THE SPRAY...More on this later.)
6. Flat smooth surface obviously.
7. Masking tape. (DO NOT USE PAINTERS TAPE, IT WILL NOT HOLD PROPERLY. Adhesive isn't strong enough.)
8. Plastic tubing. Size depends on speaker.
9. Ruler (I used an Archietct & Engineering scale as well but not required.)
10. 9v Battery, electrical tape and scrap wire for leads.
11. Glue gun. Works great, holds like no ones business, and no long waits.
12. Sticky Out or Goo-Gone.
13. Old rags for the aforementioned.
14. Blow dryer or low power heat gun.
The first thing you will do is size the speaker statrting with the cone. In this case the size edge to edge is 2-15/16". Well address the frame later. This dimension is what you will use to determine the actual amount of tube needed. If you use the frame size, you risk misshaping the template you will be creating. Keep in mind, the rest edges for surrounds vary in size from frame to frame. So use the cone circumfurence, or if square, edge to edge.
While checking the cone edge, look at the gap between the cone and the frame. In my case, it's 1/4" and that's what size tubing I used.
Using a flat surface, in my case an old breakfast tray, I cut the tube to length and bent at the corners, making sure to maintain the 2-15/16th dimension for the inside edge of the surround. (I marked the tubing accordingly, you should do the same.) Upon completion, I set the tube on the tray and began taping it down. What resulted below is after I did the first one, but you get the idea...
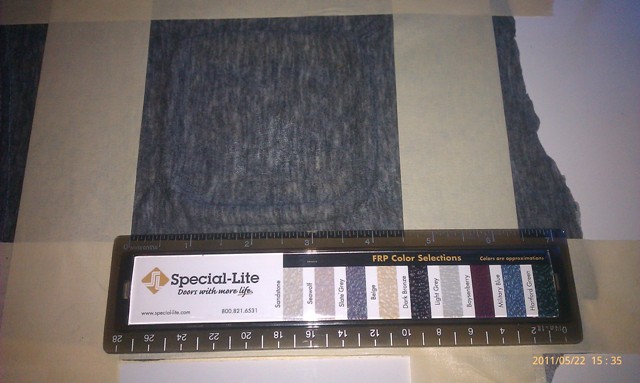
Make absolutely sure you check the dimensions after taping. Any shift will get you out of round, or in this case, out of square. Once you are comfortable, cut out a good chunk of the T shirt. Your mileage will vary depending on your situation. Prepare your starch mix using a 2/1 ratio of starch to water. Soak the cloth thouroghly, wring out firmly but not to the point it feels dry. Center the material across your template.
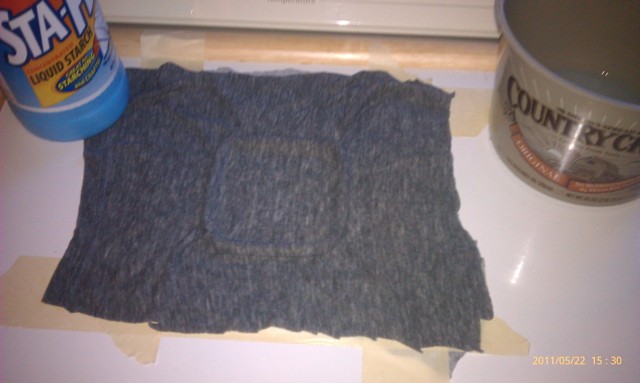
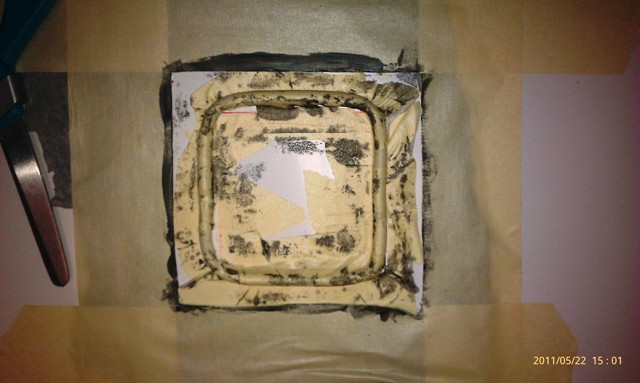
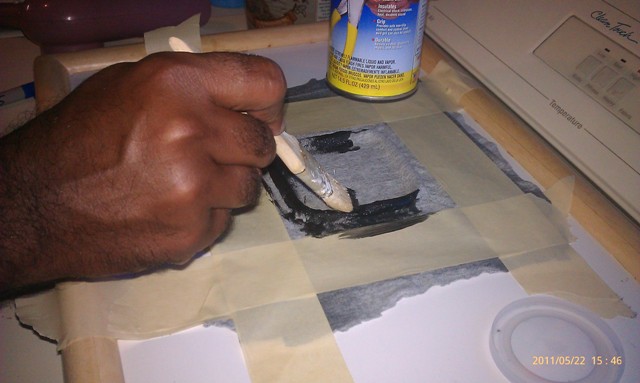
As you can see above, the material has been shaped. And that is exactly what you do after setting the cloth. Be sure to work with firm presses, using the card to crease against the form (tube) work the inside first then out, repeating until it's flat on the outside edge, slightly angled on the inside edge. Let it set for a few minutes. Next is a task you may do earlier, but really should save for now to keep you busy just long enough not to screw with the cloth, and not run off and do something else totally forgetting about it.
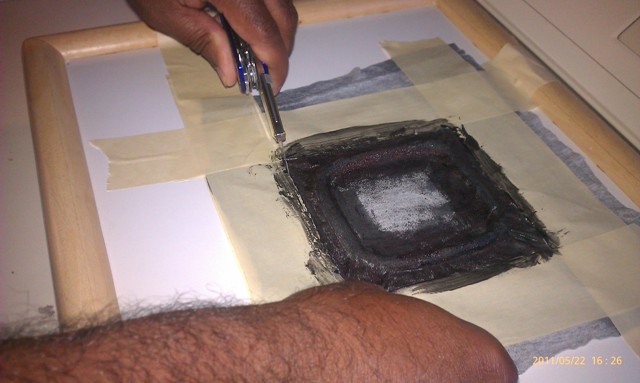
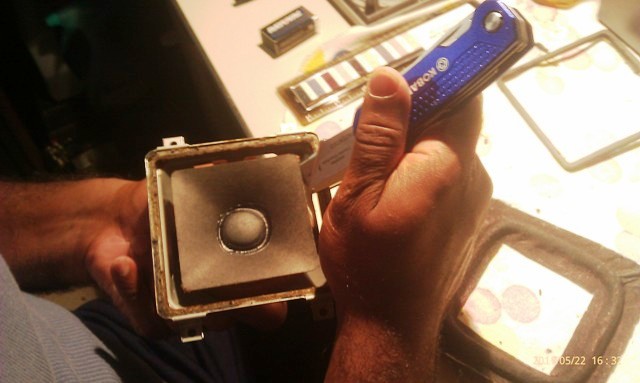
Let's get the old foam off the speaker and frame. IF YOU DO NOT HAVE A STEADY HAND THIS TASK IS NOT FOR YOU. YOU CAN EASILY DAMAGE THE CONE AND MORE IMPORTANTLY INJURE YOURSELF!!!!
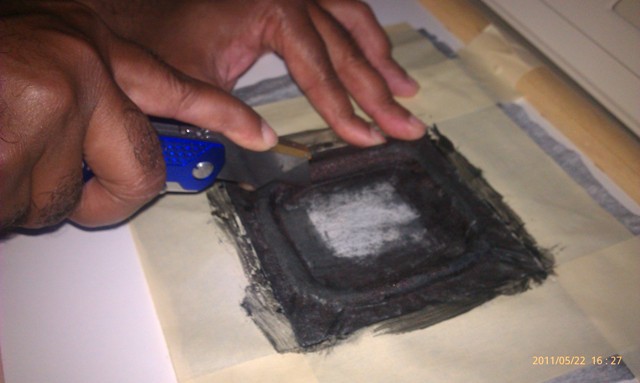
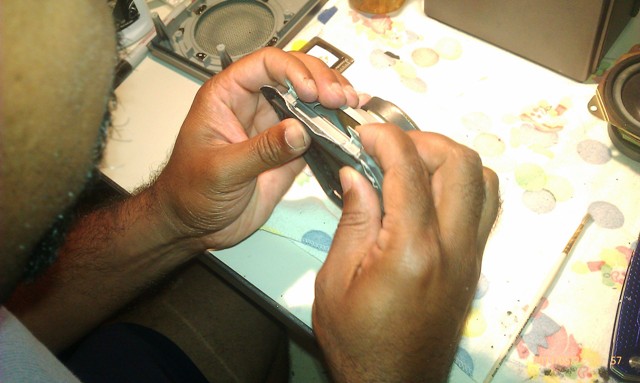
I keep knives pretty handy and use them all the time so for me, easy. Please be careful. Begin by gently scraping the cone egde, then frame edge to remove the old surround. If you have a situation where it has turned to goo, stop and clean the blade when it stops cutting through. Forcing it will not go well.
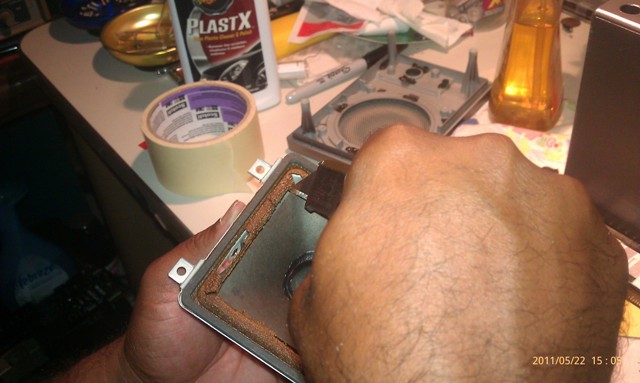
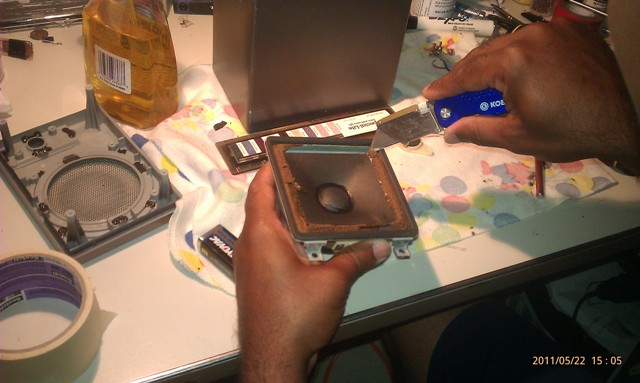
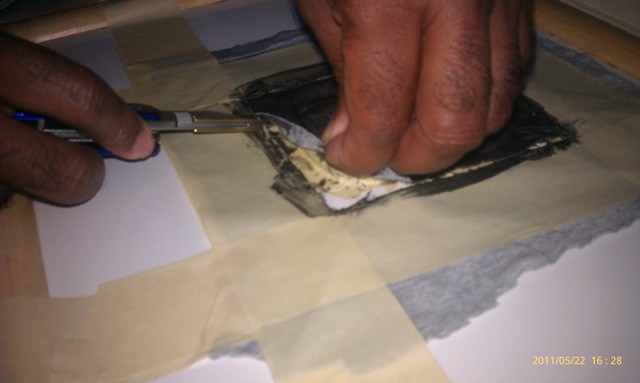
Then remove the shim. Work from the inside being careful not to push on the cone. This gives you the advantage of using the frame edge as a stop. Turn the back of the knife slightly upward so that the blade "digs" beneath the shim.
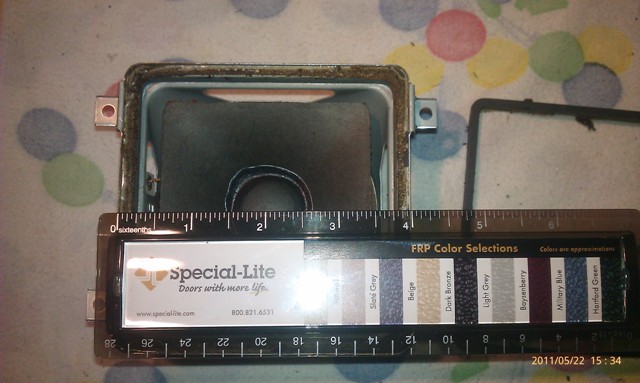
Alright, now that your nerves are shot trying not to destroy the speaker, let's go back to the cloth and form. No more than 30 minutes is needed to let it set a bit. At this point you will get the masking tape to hold down the cloth before using the blow dryer. At this point, measure the frame. As you can see in the photo, it's 4". If you look at the area taped, I allowed for 4-1/2". You can always trim down the outer edge at the frame rest. You don't want to be short on material.
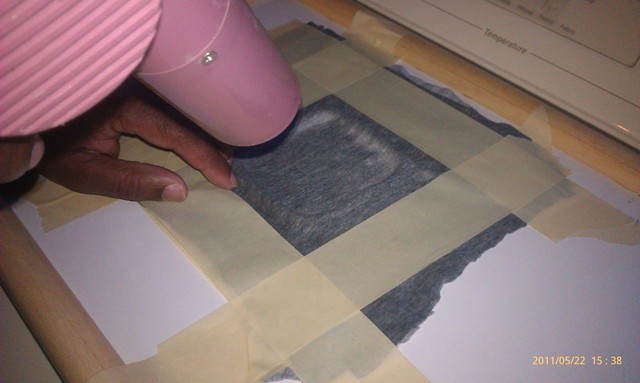
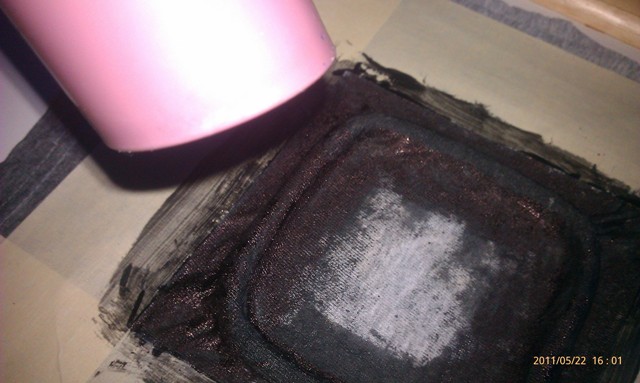
Now that we have the cloth taped down, get the dryer and go evenly around the cloth. Also, noted before, is why I said a gray T shirt is best. You'll clearly see it drying out. Once dry you are now ready to apply the Plast-Dip. I noted before, do not use the spray versions. The reason for this is that you cannot work the compound into the fabric as you could using a brush. Apply generous amounts, not so much as to create a goopy mess, but enough so you can work it into the cloth. Once you are pretty sure you have it well covered, working well into the center and outside to the tape lines, use the dryer and apply even heat to the surface to dry material.
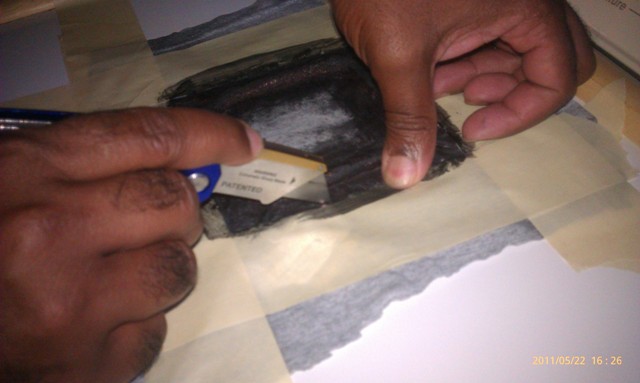
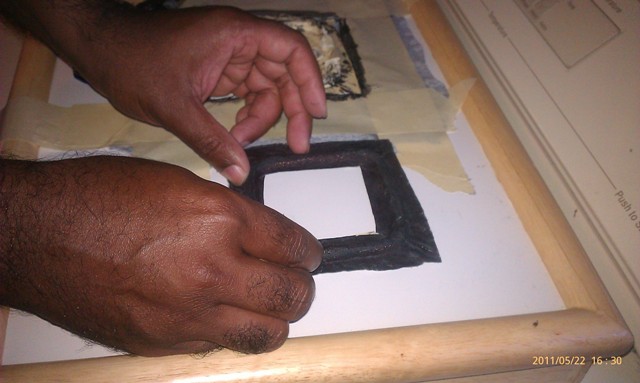
Now comes the part you can get excited about...CUTTING OUT YOUR NEW SURROUND! Very carefully, cut the outer edge where the cloth and tape meet first. Then the inside. Now, you have some options here, if you are attaching under the cone, you may want more mateial to ensure you get a solid attachment given that you will be working through the frame of the basket. If attaching from the top, you absolutely want to get an even cut so it doesn't look like total crap. It's up you. Mine will attach as it originally did from under the cone.
Once you have that done you will now scrape the underside of the cone. I REPEAT BE CAREFUL!!! On most speakers, especially boomboxes, you aren't going to get a lot of thick paper. In some cases you'd find stronger paper in your kids backpack from school. Slow and deliberate is the watchword here.
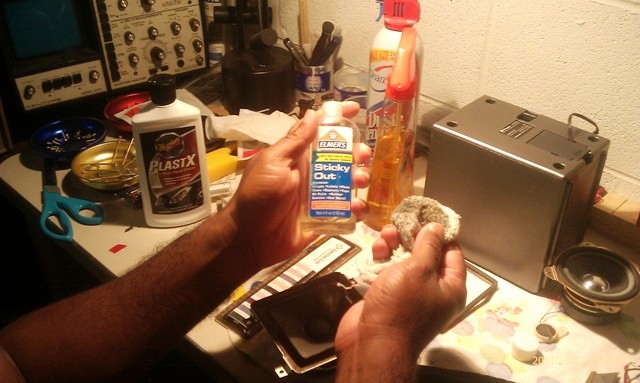
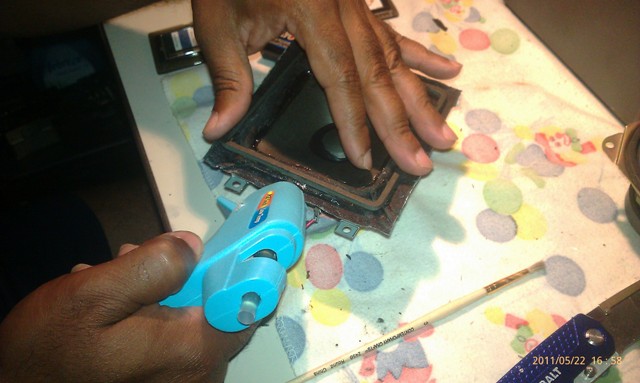
Then using the Sticky-Out or Goo-Gone clean the frame.
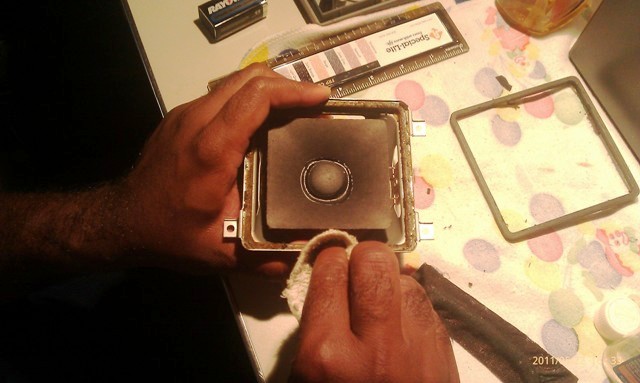
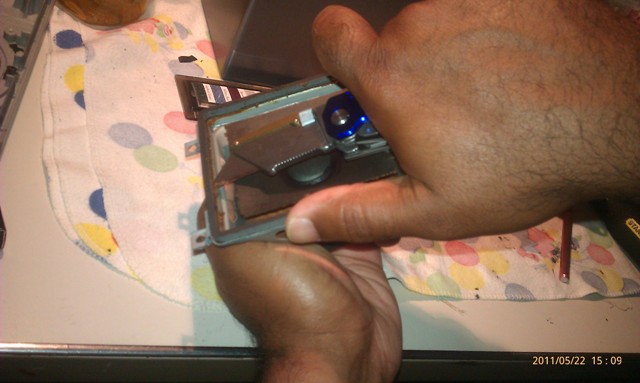
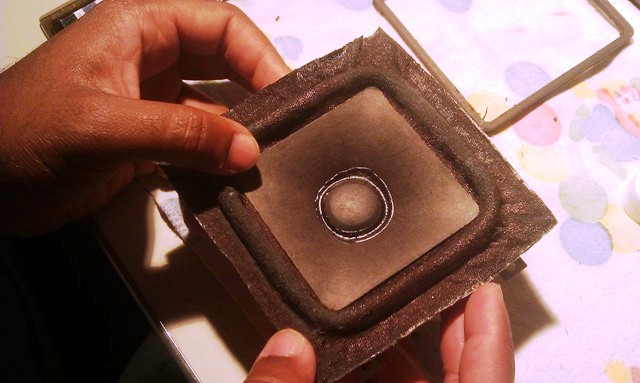
Now we size up the surround, adjust, and adhere...THE CONE FIRST. DO NOT ATTACH TO THE FRAME YET!!! THE CONE WILL NEED TO BE CENTERED AFTERWARD!!! FAILURE TO DO SO WILL RESULT IN AN INOPERABLE OR DAMAGED SPEAKER!!! See the photos below. Be careful, take your time, don't rush. I recommend using a low temp glue gun. A high temp will have glue running everywhere and you don't want that. If you are going under the cone, be careful to stretch the fabric so as to not damage to cone. TAKE YOUR TIME. Make sure you get the rolled edge as even as possible around the speaker. It does't have to be dead nuts on, but not totally out of whack either.
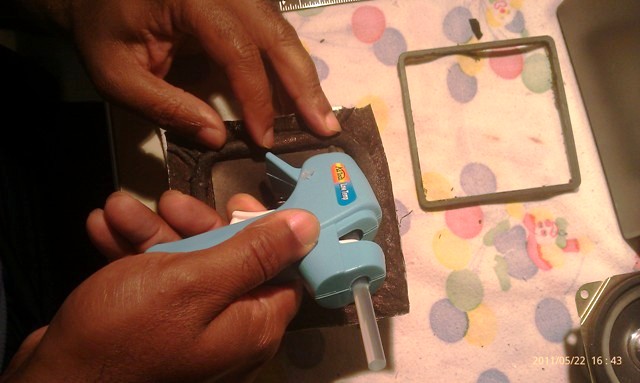
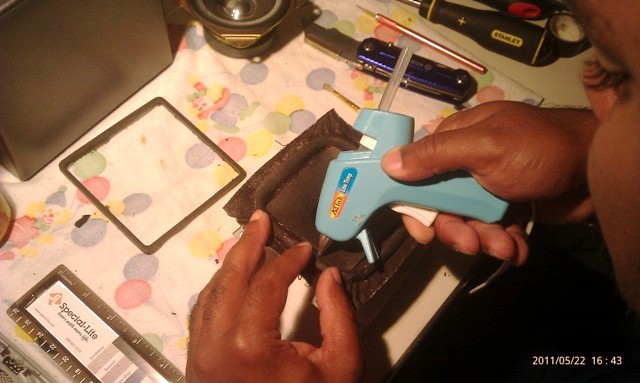
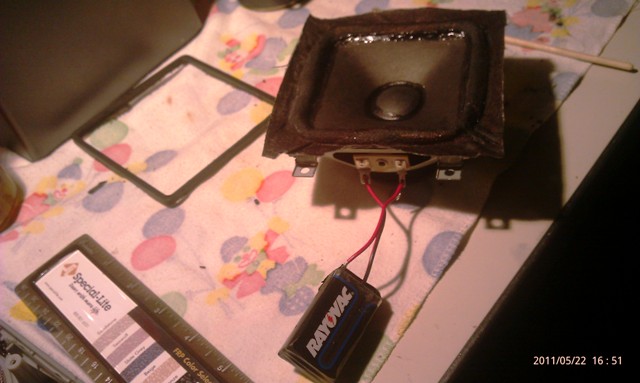
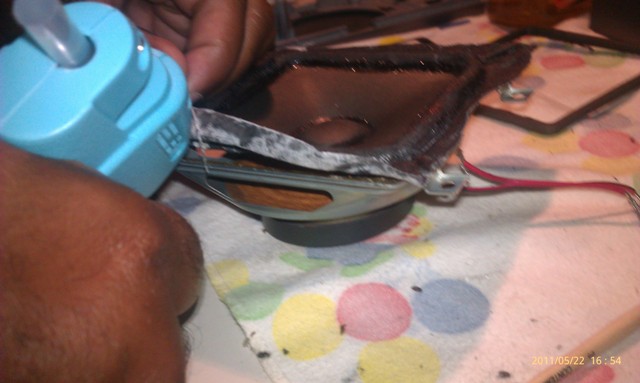
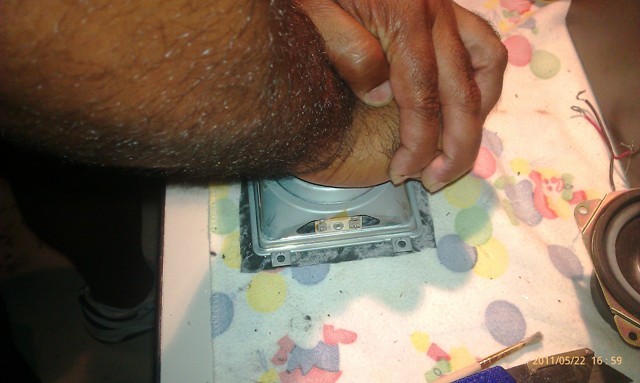
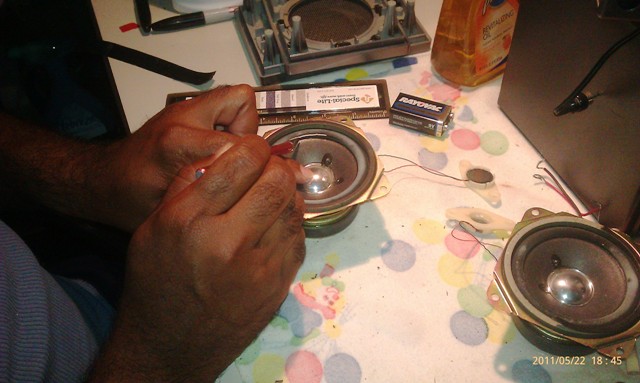
Once the cone and surround are bonded. Take a 9v battery, attach the wires, and place the + lead to the - terminal on the speaker. Reverse for the other terminal. The speaker should go into the down position and stay there. You can simply loop the wires to the speker terminals to hold them in place. While the speaker is in this position, quickly, but deliberately, and using care, bond the outside of your new surround to the frame rest using the glue gun. As you complete each side, or if round, each quarter, release the voltage. Gently press the speaker down and release it. Listen for any scraping sound. If this occurs, using the knife, carefully release the surround from the frame only and start again. When you get around all the way, and the speaker moves in a rebounds freely, HOLLA!!!! The hard part is done!!!
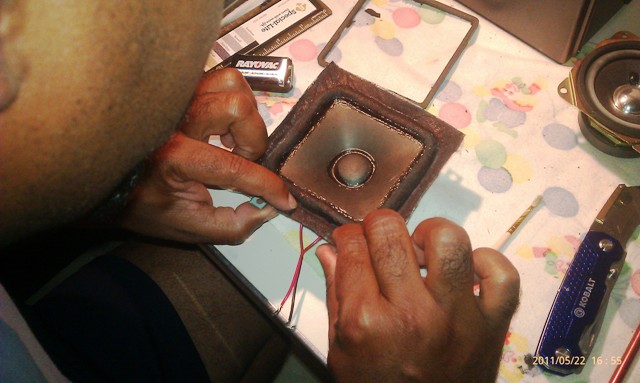
Now re-attach the shim, once done flip the speaker on it's face and apply pressure for about a minute to make sure you have an even solid bond. Trim the extra material from around the frame, dress up the surround and glue if you so choose. (I did even though the cone will never be seen.) A Sharpie can be handy here.
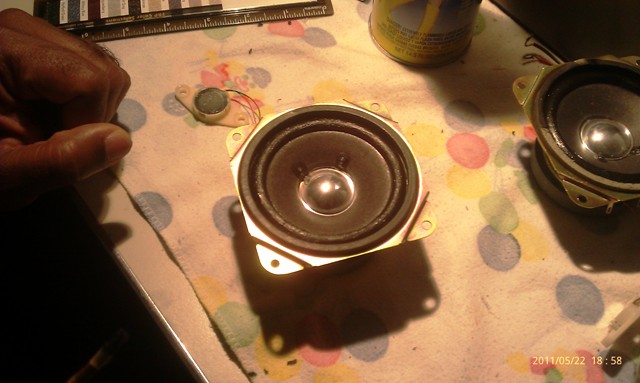
Ta-Daa!!!! And it works like a charm and thumps hard...for a four inch square speaker...
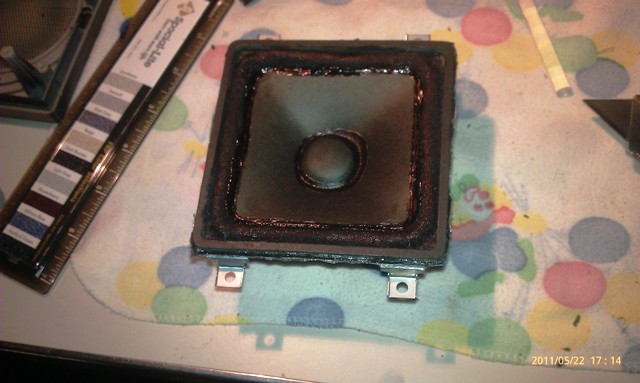
This technique is super easy. Done it before, just finally had time to post a play by play.
BONUS FOOTAGE!!!
So you have a rubber surround that is merely cracked but not completely gone...
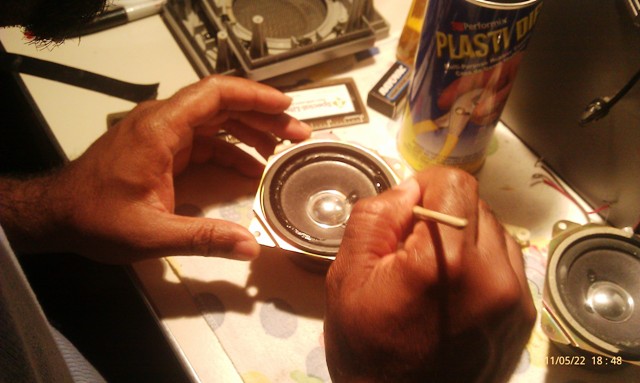
Get the good 'ol Plasti-DIp and paint brush. The pictures tell the story. Do at least two coats with fifteen minutes between. Use even heat with blow dryer. If you have a plastic chrome dustcap and you get to close...bye bye dust cap. Keep the heat moving or you'll harm the existing rubber as well. As always paitience and care...
Questions?
I already had a CK-5F with bad foams which Prime (Brett) handled beautifully for me as I didn't have time to diddle with it a couple of years ago. And though it is doing beautifully as of now, what happens if the foam should go bad again? I also have some Sony's with APM's. What about those? Given foams inherent issues when subject to humidity I decided to make what very few speakers have...fabric reinforced rubber surrounds.
These were done on 4" square cone woofers. The larger the woof, the easier it will be. The same principles apply no matter the shape of the speaker. I hope this will be a great asset for those who can't get specialty sizes anymore. Let's be honest, it's getting pretty damn hard to get speaker surrounds.
Now I know there is a Japanese thread on how to do this with chamois. Here's why I don't like it.
1. Not very suitable to small speakers.
2. Natural chamois can degrade faster than rubber impregnated cloth. Plus getting a chamois thin enough to shape for a very small speaker with enough flexibility is tough. The throw of the speaker is very important and the thickness of material is a very important factor.
3. I believe the combination of rubber and fabric is the best of both worlds. The rubber impregnation inhibits fabric breakdown and gives great moisture resistance while the fabric reinforces the rubber and aids in helping rubber withstand "drying' conditions which it may become brittle.
See a corner of the first one I did below...instructions follow.
First a few things you will need to have on hand...
1. Old T shirt, preferrably gray so you can see it as it dries. You'll see why later.
2. Paint brushes. Plan on trashing these when done. Even with tolulene to thin the liquid rubber material it's a loss. They're cheap enough.
3. Scissors and box cutter, X-acto knife, old plastic card. (Spatula or putty blade will work also.)
4. Sta-Flo liquid starch and bowl.
5. Plasti-Dip rubber coating. (DO NOT USE THE SPRAY...More on this later.)
6. Flat smooth surface obviously.
7. Masking tape. (DO NOT USE PAINTERS TAPE, IT WILL NOT HOLD PROPERLY. Adhesive isn't strong enough.)
8. Plastic tubing. Size depends on speaker.
9. Ruler (I used an Archietct & Engineering scale as well but not required.)
10. 9v Battery, electrical tape and scrap wire for leads.
11. Glue gun. Works great, holds like no ones business, and no long waits.
12. Sticky Out or Goo-Gone.
13. Old rags for the aforementioned.
14. Blow dryer or low power heat gun.
The first thing you will do is size the speaker statrting with the cone. In this case the size edge to edge is 2-15/16". Well address the frame later. This dimension is what you will use to determine the actual amount of tube needed. If you use the frame size, you risk misshaping the template you will be creating. Keep in mind, the rest edges for surrounds vary in size from frame to frame. So use the cone circumfurence, or if square, edge to edge.
While checking the cone edge, look at the gap between the cone and the frame. In my case, it's 1/4" and that's what size tubing I used.
Using a flat surface, in my case an old breakfast tray, I cut the tube to length and bent at the corners, making sure to maintain the 2-15/16th dimension for the inside edge of the surround. (I marked the tubing accordingly, you should do the same.) Upon completion, I set the tube on the tray and began taping it down. What resulted below is after I did the first one, but you get the idea...
Make absolutely sure you check the dimensions after taping. Any shift will get you out of round, or in this case, out of square. Once you are comfortable, cut out a good chunk of the T shirt. Your mileage will vary depending on your situation. Prepare your starch mix using a 2/1 ratio of starch to water. Soak the cloth thouroghly, wring out firmly but not to the point it feels dry. Center the material across your template.
As you can see above, the material has been shaped. And that is exactly what you do after setting the cloth. Be sure to work with firm presses, using the card to crease against the form (tube) work the inside first then out, repeating until it's flat on the outside edge, slightly angled on the inside edge. Let it set for a few minutes. Next is a task you may do earlier, but really should save for now to keep you busy just long enough not to screw with the cloth, and not run off and do something else totally forgetting about it.
Let's get the old foam off the speaker and frame. IF YOU DO NOT HAVE A STEADY HAND THIS TASK IS NOT FOR YOU.
YOU CAN EASILY DAMAGE THE CONE AND MORE IMPORTANTLY INJURE YOURSELF!!!!I keep knives pretty handy and use them all the time so for me, easy. Please be careful. Begin by gently scraping the cone egde, then frame edge to remove the old surround. If you have a situation where it has turned to goo, stop and clean the blade when it stops cutting through. Forcing it will not go well.
Then remove the shim. Work from the inside being careful not to push on the cone. This gives you the advantage of using the frame edge as a stop. Turn the back of the knife slightly upward so that the blade "digs" beneath the shim.
Alright, now that your nerves are shot trying not to destroy the speaker, let's go back to the cloth and form. No more than 30 minutes is needed to let it set a bit. At this point you will get the masking tape to hold down the cloth before using the blow dryer. At this point, measure the frame. As you can see in the photo, it's 4". If you look at the area taped, I allowed for 4-1/2". You can always trim down the outer edge at the frame rest. You don't want to be short on material.
Now that we have the cloth taped down, get the dryer and go evenly around the cloth. Also, noted before, is why I said a gray T shirt is best. You'll clearly see it drying out. Once dry you are now ready to apply the Plast-Dip. I noted before, do not use the spray versions. The reason for this is that you cannot work the compound into the fabric as you could using a brush. Apply generous amounts, not so much as to create a goopy mess, but enough so you can work it into the cloth. Once you are pretty sure you have it well covered, working well into the center and outside to the tape lines, use the dryer and apply even heat to the surface to dry material.
Now comes the part you can get excited about...CUTTING OUT YOUR NEW SURROUND! Very carefully, cut the outer edge where the cloth and tape meet first. Then the inside. Now, you have some options here, if you are attaching under the cone, you may want more mateial to ensure you get a solid attachment given that you will be working through the frame of the basket. If attaching from the top, you absolutely want to get an even cut so it doesn't look like total crap. It's up you. Mine will attach as it originally did from under the cone.
Once you have that done you will now scrape the underside of the cone. I REPEAT BE CAREFUL!!! On most speakers, especially boomboxes, you aren't going to get a lot of thick paper. In some cases you'd find stronger paper in your kids backpack from school. Slow and deliberate is the watchword here.
Then using the Sticky-Out or Goo-Gone clean the frame.
Now we size up the surround, adjust, and adhere...THE CONE FIRST. DO NOT ATTACH TO THE FRAME YET!!! THE CONE WILL NEED TO BE CENTERED AFTERWARD!!! FAILURE TO DO SO WILL RESULT IN AN INOPERABLE OR DAMAGED SPEAKER!!! See the photos below. Be careful, take your time, don't rush. I recommend using a low temp glue gun. A high temp will have glue running everywhere and you don't want that.
If you are going under the cone, be careful to stretch the fabric so as to not damage to cone. TAKE YOUR TIME. Make sure you get the rolled edge as even as possible around the speaker. It does't have to be dead nuts on, but not totally out of whack either.
Once the cone and surround are bonded. Take a 9v battery, attach the wires, and place the + lead to the - terminal on the speaker. Reverse for the other terminal. The speaker should go into the down position and stay there. You can simply loop the wires to the speker terminals to hold them in place. While the speaker is in this position, quickly, but deliberately, and using care, bond the outside of your new surround to the frame rest using the glue gun. As you complete each side, or if round, each quarter, release the voltage. Gently press the speaker down and release it. Listen for any scraping sound. If this occurs, using the knife, carefully release the surround from the frame only and start again. When you get around all the way, and the speaker moves in a rebounds freely, HOLLA!!!! The hard part is done!!!
Now re-attach the shim, once done flip the speaker on it's face and apply pressure for about a minute to make sure you have an even solid bond. Trim the extra material from around the frame, dress up the surround and glue if you so choose. (I did even though the cone will never be seen.) A Sharpie can be handy here.
Ta-Daa!!!! And it works like a charm and thumps hard...for a four inch square speaker...
This technique is super easy. Done it before, just finally had time to post a play by play.
BONUS FOOTAGE!!!
So you have a rubber surround that is merely cracked but not completely gone...
Get the good 'ol Plasti-DIp and paint brush.
The pictures tell the story. Do at least two coats with fifteen minutes between. Use even heat with blow dryer. If you have a plastic chrome dustcap and you get to close...bye bye dust cap. Keep the heat moving or you'll harm the existing rubber as well. As always paitience and care...
Questions?

 That's what grilles are for anyway, right?
  Clever, Freddie...good job.


")


 to try it out?